
Zucchini in Cookies? Oh Yes.
Let me stop you if you’re staring at a giant zucchini pile from your summer garden and wondering what to do with it. Zucchini cookies are the answer: soft, chewy, chocolate-packed cookies with a twist of wholesome oats and hidden veggies.
You might be thinking, “Zucchini? In a dessert?” Yup. It sounds strange until you take a bite. Then it’s pure magic.
This zucchini cookie recipe is foolproof, family-friendly, and addictive. Let’s dive in.

Why You’ll Love These Zucchini Cookies
If you’ve never baked with zucchini before, prepare to be amazed. These zucchini cookies are a delightful surprise; they don’t taste like vegetables.
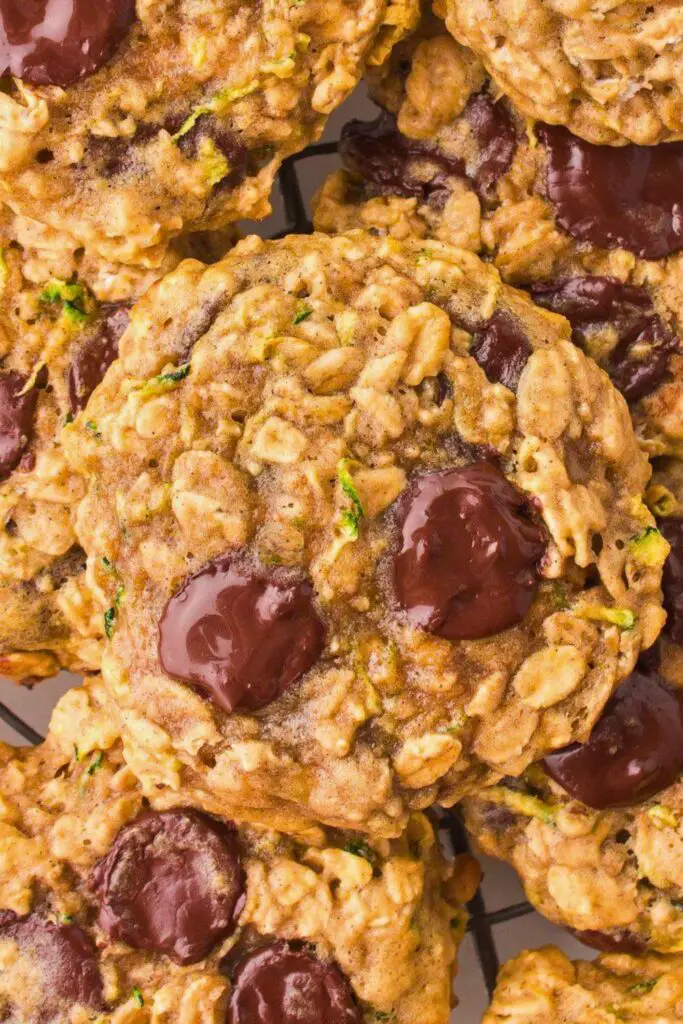
They taste like soft-baked oatmeal chocolate chip cookies with a slightly earthy richness and melt-in-your-mouth texture.
Here’s why you’re going to love them:
1. Moist and Chewy Texture
Thanks to the natural moisture in zucchini and the addition of oats, these cookies come out perfectly chewy, soft in the center, and crisp around the edges. They’re the cookies you want to bite into slowly to savor the texture.
2. Hidden Veggies (Shhh!)
These cookies are a win-win for anyone trying to sneak more veggies into their family’s diet. Zucchini blends right into the dough. You won’t taste it.
You won’t see it. But it works behind the scenes to make your cookies moist, light, and slightly earthy in the best way.
3. Flavor That Goes Beyond Sweet
Most cookies deliver sugar and chocolate. These offer more. The brown sugar and cinnamon give the cookies a cozy, warm depth. The zucchini adds subtle complexity—just enough to make people go, “Wait…what’s in these? They’re amazing!”
4. A Cookie You Can Feel Good About
No, it’s not a salad. But these cookies offer more nutrition thanks to the oats and zucchini. They’re great for school lunch boxes, afternoon snacks, or midnight cravings. Bonus? They freeze well and taste even better the next day.
5. Great for Gifting and Sharing
Since these cookies have that unique twist, they’re always a hit at bake sales, potlucks, or neighborhood swaps. People will ask for the recipe. And you can smile proudly and say, “There’s zucchini in there.”
How to Prepare Zucchini for Cookies

Zucchini might seem like an odd baking ingredient, but it adds moisture and texture without any vegetable flavor when prepared right. But there’s a catch: you can’t just toss chopped zucchini into cookie dough. Here’s how to prep it like a pro:
Step 1: Choose the Right Zucchini
Use medium-sized zucchini, not too small, not a massive baseball bat from the back of your garden. One zucchini, about 6–7 inches long, should give you the 1 cup you need after grating and blotting.
Avoid overripe zucchini with giant seeds. Those are better for soups or stews.
Step 2: No Peeling Needed
Leave the skin on! It’s tender, nutritious, and you won’t notice it once baked. Plus, it adds pretty little green flecks to your cookies (if you look close enough).
Step 3: Grate It Finely
Here’s where it gets crucial. You want to grate your zucchini finely so it melts seamlessly into the dough.
- Food processor method: Attach the grater blade, slice the zucchini to fit, and shred it.
- Then switch to the regular blade and pulse just once. You want smaller pieces, not a wet mush or puree.
- No food processor? Use a hand grater on the fine side. It works just as well with a bit of elbow grease.
Step 4: Remove the Extra Moisture
Zucchini is full of water, and if you add it directly to your dough, it’ll throw off the texture. You’ll get cakey or soggy cookies, and nobody wants that.
Here’s how to fix it:
- Lay the shredded zucchini on a paper towel.
- Place another paper towel over it and press gently.
- Repeat with a fresh towel if needed.
- You’re not trying to dry it; completely remove the excess liquid.
💡 Think of it like squeezing out a sponge; you want it damp, not dripping.
Step 5: Measure It After Blotting
Only measure the zucchini after you blot it. You need exactly 1 cup of shredded, slightly dried zucchini.
And that’s it, your zucchini is cookie-ready!
Ingredients You’ll Need
Below is a complete list of everything you need to make the most delicious batch of zucchini cookies, rich, chewy, chocolatey, and perfectly spiced.
| Ingredient | Amount | Purpose / Notes |
|---|---|---|
| Unsalted butter (softened) | 1 cup | Adds richness and fat for soft texture |
| Dark brown sugar (packed) | 1 cup | Adds sweetness and depth from molasses |
| Granulated sugar | ½ cup | Provides structure and balance to brown sugar sweetness |
| Eggs (large) | 2 | Binds the ingredients and adds moisture |
| Vanilla extract | 1½ teaspoons | Adds warm flavor to the cookie dough |
| All-purpose flour | 2¼ cups | The base structure of the cookie |
| Baking soda | 1 teaspoon | Helps the cookies rise properly |
| Table salt | ¾ teaspoon | Balances sweetness and enhances flavor |
| Ground cinnamon (optional) | 1 teaspoon | Adds cozy spice that complements zucchini |
| Zucchini (shredded & blotted) | 1 cup | Adds moisture and softness—no veggie taste! |
| Rolled oats (old-fashioned) | 3 cups | Creates chewy texture and hearty structure |
| Semi-sweet chocolate chips | 2 cups | Sweet chocolate chunks throughout; reserve ¼ cup for topping |
📝 Note: You can swap semi-sweet for milk or even white chocolate depending on your taste.
Step-by-Step Instructions: Zucchini Cookie Dough
Ready to bake? Follow these easy steps to make your cookie dough from scratch. No fancy skills needed, just a bowl, a mixer, and some good vibes.
1. Cream the Butter and Sugar
Start by combining the fats and sweeteners. This step builds the base flavor and helps your cookies turn out fluffy and decadent.
- In a large mixing bowl, add:
- 1 cup unsalted butter (softened)
- 1 cup dark brown sugar
- ½ cup granulated sugar
- Use a hand or stand mixer to beat everything until the mixture becomes smooth, creamy, and slightly fluffy.
- Scrape down the bowl’s sides to ensure all the sugar is thoroughly mixed in.
💡 Why dark brown sugar? The extra molasses makes the cookies richer, deeper, and slightly caramelized in flavor.
2. Mix in the Eggs and Vanilla
Let’s give the dough structure and a hint of sweet aroma.
- Crack 2 eggs into a small bowl (just in case there are shells).
- Add the eggs one at a time into the butter-sugar mixture.
- Pour in 1½ teaspoons of vanilla extract.
- Mix everything until it looks silky and well-blended.
🥚 Pro Tip: Room temperature eggs mix better—take them out of the fridge 30 minutes early.
3. Prepare the Dry Ingredients
Time to bring in the flour power!
- In a separate bowl, whisk together:
- 2¼ cups all-purpose flour
- 1 teaspoon baking soda
- ¾ teaspoon table salt
- 1 teaspoon ground cinnamon (optional, but recommended)
Mix these dry ingredients well. You want the cinnamon and soda evenly dispersed so you don’t get any flavor pockets.
4. Combine Wet and Dry Ingredients
Slow and steady wins the cookie race.
- Add the dry mixture to the wet mixture in two parts.
- Use a spatula or wooden spoon to stir gently until the flour is combined.
- Don’t overmix! This will keep your cookies soft and tender.
Once it looks like dough, you’re almost there.
5. Fold in the Zucchini
Remember that lovely grated zucchini you prepped earlier?
- Take 1 cup of blotted zucchini and gently fold it into the dough.
- Ensure it’s fully incorporated, but be gentle; you don’t want to deflate the dough.
🥒 You shouldn’t see clumps of green, just some specks here and there.
6. Add the Oats and Chocolate Chips
Here’s where the real cookie magic happens.
- Add 3 cups of old-fashioned rolled oats to the dough.
- Add 1¾ cups of semi-sweet chocolate chips (save the last ¼ cup for later).
- Use a big spoon and mix everything.
The dough will get thick. That’s normal! It’s loaded with oats, so it’ll take some strength to stir.
💪 Warning: This is a workout for your arms. Worth it.
7. Chill the Dough
This is the only “hard” part: waiting!
- Cover the mixing bowl and refrigerate the dough for at least 30 minutes.
- This step helps the cookies:
- Hold their shape when baking (no spreading puddles)
- Develop a deeper flavor
- Improve texture
⏳ Don’t skip this part! Your future self will thank you.
Add the Oats and Chocolate
Now that your dough is soft, rich, and speckled with zucchini, it’s time to load it up with texture and flavor, which means oats and chocolate chips.
Why Oats?
Old-fashioned rolled oats are the unsung hero in these cookies. They add:
- A hearty, chewy texture that complements the softness of the dough.
- A subtle nutty flavor that pairs beautifully with brown sugar and cinnamon.
- Just the right amount of bulk so your cookies don’t feel too light or fall apart.
Make sure you’re using old-fashioned oats, not instant or quick-cooking. Quick oats can make your cookies gummy or too soft.
🥣 Add 3 cups of rolled oats to the dough.
It might seem like a lot, but trust the process. These cookies are meant to be substantial and satisfying.
Let’s Talk Chocolate Chips
Here comes the fun part. Chocolate chips bring everything together. Every bite should have that little melty surprise, especially when fresh out of the oven.
You’ll need 2 cups of chocolate chips total.
- Use semi-sweet for a classic flavor.
- If you love things extra sweet, go for milk chocolate.
- Want to be a little fancy? Try dark chocolate chunks or even white chocolate chips.
Here’s how to do it like a pro:
- Stir 1¾ cups of the chips into the dough right now.
- Set aside ¼ cup for later. We’ll press these into the tops after baking for that bakery-style look.
💡 This step adds visual appeal and makes your cookies look like they came from a gourmet bakery.
Mixing It All
Once the oats and chocolate chips are in, gently stir the dough until everything is evenly distributed.
Yes, it’s thick.
Yes, your arm might get sore.
But it’s worth it. The dough should look chunky, golden, and studded with chocolate.
🎯 If it feels like there’s more “stuff” than dough—that’s exactly right.
Let That Dough Chill (Yes, It’s Necessary)
You’ve made it this far—don’t skip the chill.
I know, waiting is hard. But here’s why chilling the dough is a total game-changer:
1. It Stops Cookie Spread
Warm dough spreads out too quickly in the oven. That results in thin, flat cookies. Chilling firms up the butter and gives your cookies time to hold their shape while baking.
✅ Chill for at least 30 minutes in the fridge.
You can chill it longer, even overnight. Cover the bowl tightly with plastic wrap or transfer the dough to an airtight container.
2. It Deepens the Flavor
Giving the dough a little rest allows all the flavors, vanilla, brown sugar, cinnamon, and zucchini to blend and intensify.
It’s kind of like marinating your cookie dough in deliciousness. You’ll notice a richer taste and a more uniform texture when the cookies are baked.
3. It Improves Texture
A chilled dough bakes up with:
- Softer, thicker centers
- Crispier edges
- Chewier bites
You get the best of all cookie worlds in one perfect bite.
Can You Skip This Step?
Technically, yes. But the cookies will be flatter and less flavorful. If you’re in a rush, chill them in the freezer for at least 15–20 minutes.
But if you want next-level cookies that look and taste amazing, be patient.
📌 While you wait, preheat your oven to 350°F (175°C).
Baking Instructions: How to Bake Zucchini Cookies
The dough is chilled. The oven is hot. You’re so close to the finish line—and your kitchen is about to smell like a cozy, chocolatey dream.
Let’s bake these zucchini cookies to perfection.
Step 1: Preheat the Oven
While your dough is chilling, prepare your oven for no downtime.
- Set your oven to 350°F (175°C).
- Ensure your oven rack is positioned in the center, allowing for even baking.
📏 Pro Tip: Use an oven thermometer if you can. Most ovens run hotter or cooler than they say, and a few degrees can make a big difference in baking.
Step 2: Prepare Your Baking Sheets
You don’t want your cookies sticking or burning on the bottom. So prep your pans right:
- Line your baking sheet with parchment paper or a silicone baking mat.
- Avoid greasing the pan too much; grease can make your cookies spread too much.
👩🍳 Bonus tip: Parchment also makes cleanup a breeze!
Step 3: Scoop the Dough
Time to shape those cookies.
- Use a cookie scoop or a tablespoon to portion out the dough.
- Aim for 1½ tablespoons per cookie, a nice, rounded scoop.
- Drop them directly onto the lined baking sheet.
- Leave about 2 inches of space between cookies to allow for spreading.
Optional: Shape for Perfect Cookies
If you’re a cookie perfectionist (no judgment, we see you), you can gently tuck in any stray bits of dough to make the cookies rounder and smoother.
It won’t change the taste, but will give them that perfect bakery look.
Step 4: Bake the Cookies
Pop your trays into the preheated 350°F oven.
- Bake for 12 minutes—no more, no less.
- You want light golden edges and a soft, slightly underbaked center.
⏰ Do not overbake! They might look soft in the middle, but they’ll finish cooking on the sheet.
Step 5: Add Chocolate Chips (Optional, but Adorable)
Remember that ¼ cup of reserved chocolate chips?
As soon as the cookies come out of the oven (within 1–2 minutes), gently press a few chips into the tops of each cookie.
- It adds a melty, chocolate-studded finish.
- It makes the cookies look fancier and photo-worthy.
- And let’s be honest, it’s just fun.
🍫 This little extra step gives that wow factor like your cookies came from a boutique bakery.
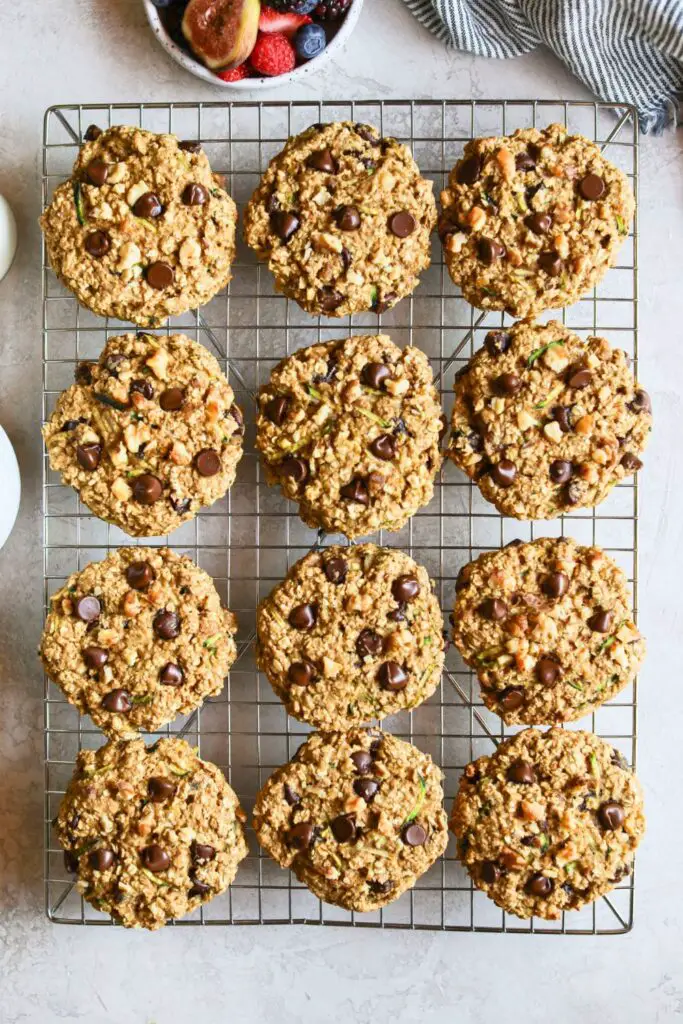
Step 6: Let Them Cool
Now comes the most challenging part: don’t touch them just yet.
- Let the cookies cool on the baking sheet for 5–10 minutes.
- This gives them time to firm up and hold their shape.
- Then transfer them to a wire rack to cool completely (if you can wait that long).
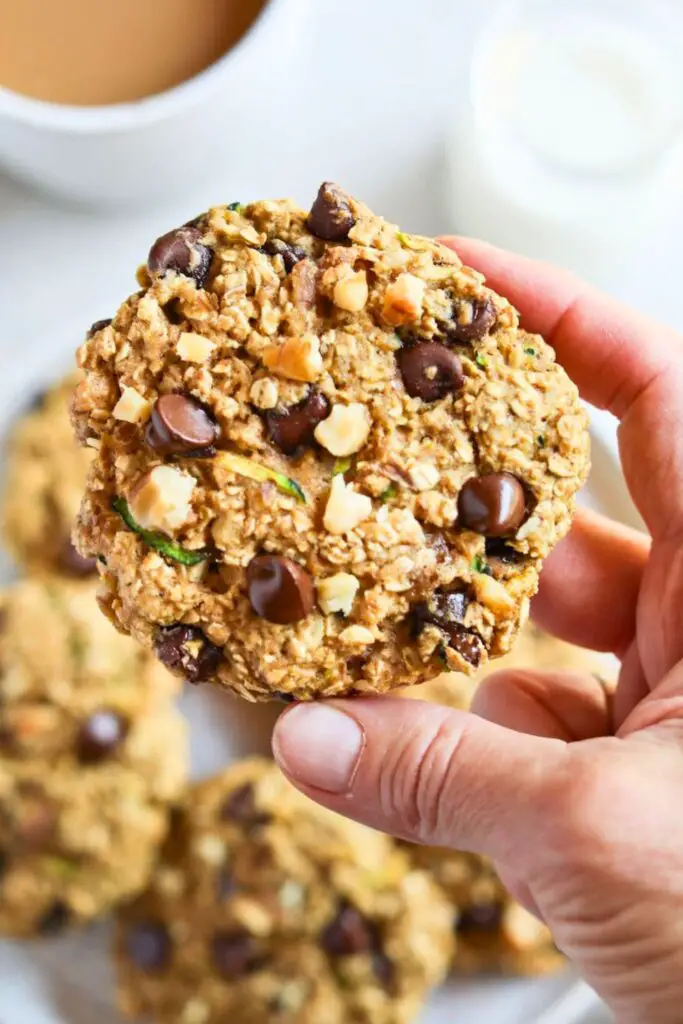
🥵 Fresh out of the oven, they’ll be warm, gooey, and incredibly tempting. Go ahead and sneak one, we won’t tell.
Texture Check: How Do You Know They’re Done?
Here’s what perfectly baked zucchini cookies look and feel like:
- Edges: Golden brown, slightly crisp
- Centers: Soft, chewy, slightly puffy
- Bottoms: Light golden—not too dark
Touch the top gently; it should bounce back but not feel raw.
Zucchini Cookies vs. Regular Cookies
Let’s break it down. What’s the difference between zucchini cookies and your average chocolate chip cookie?
| Feature | Zucchini Cookies | Regular Cookies |
|---|---|---|
| Main Ingredients | Flour, sugar, and chocolate chips | Flour, sugar, chocolate chips |
| Texture | Chewy, hearty, soft | Varies—can be soft, chewy, or crispy |
| Flavor Profile | Warm, rich, slightly spiced | Mostly sweet and buttery |
| Moisture Level | Naturally moist from zucchini | Depends on butter or added fat |
| Nutritional Edge | Includes veggies and fiber-rich oats | Primarily sugar and refined flour |
| Shelf Life | Stays softer longer due to added moisture | May dry out quicker |
| Uniqueness Factor | Unexpected and conversation-worthy | Familiar and widely loved |
So… Which Is Better?
Both have their place, but zucchini cookies are perfect when you want:
- Something a little different
- A dessert that doubles as a snack
- To use up garden zucchini
- To impress without stress
They’re not just good “for a healthy cookie.” They’re just good, period.
Final Thoughts: A Cookie That’ll Surprise You
Who knew that something as humble as a zucchini could turn into a delicious, rich, and chocolate-filled cookie that makes you forget there’s a vegetable in there?
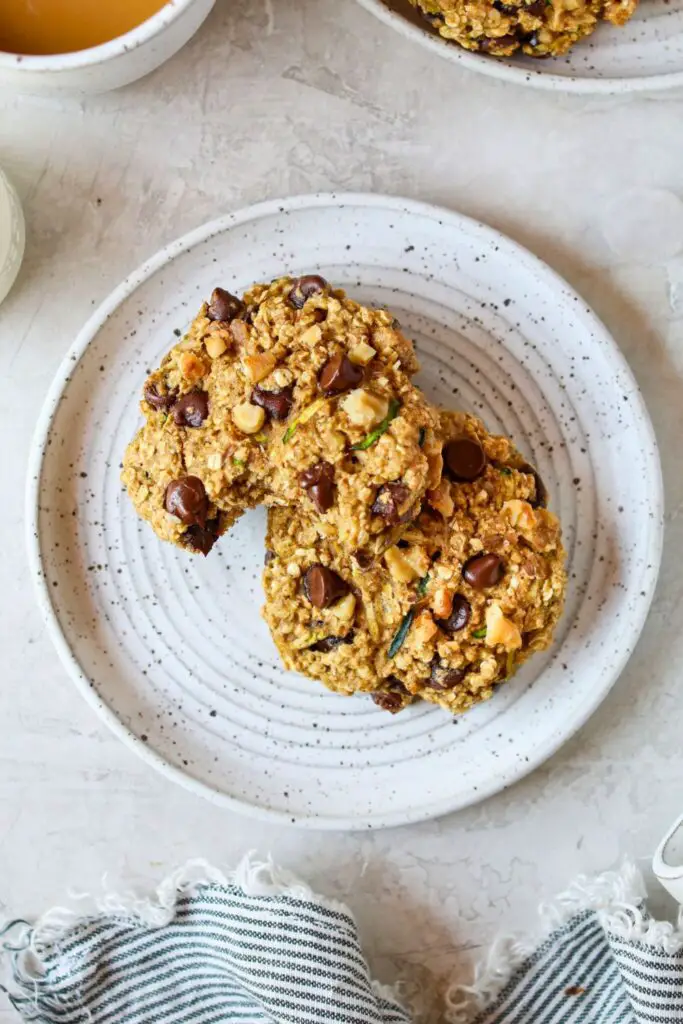
These zucchini cookies aren’t just about sneaking in something healthy. They’re about creating a cookie with depth, texture, and serious feel-good flavor. The oats add chew, the chocolate adds comfort, and the zucchini? That’s the secret weapon you’ll want to keep using.
Whether baking for your family, sharing with neighbors, or just enjoying a late-night snack with a glass of milk, these cookies are the cozy, crave-worthy treat you didn’t know you needed.
So the next time your garden explodes with zucchini (or your grocery haul includes one too many), don’t panic. Bake cookies.
💚 And if you try this recipe, let me know in the comments how they turned out. I’d love to hear from you!
You Might Also Like:
🥰 Quick & Cozy S’mores Cookies Recipe for Summer
Think gooey marshmallows, melted chocolate, and golden graham flavor—all in one bite.
🍑 Cozy 25-Min Peach Cobbler Cookies for Fall Vibes
Warm cinnamon-spiced cookies with a crumble topping and soft peachy centers.
🍪 Best 25-Min Oatmeal Chocolate Chip Cookies Recipe
Classic chewy oatmeal cookies packed with melty chocolate chips made fast.

Ella Foster, co-founder of FoodBears.com, is a skilled writer whose love for cooking fuels her creative work. Her passion for experimenting in the kitchen brings authentic flavor and culinary inspiration to every piece she crafts for the platform.