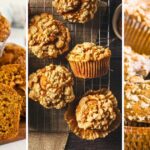
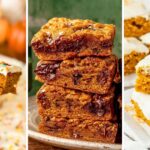
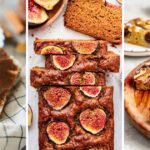
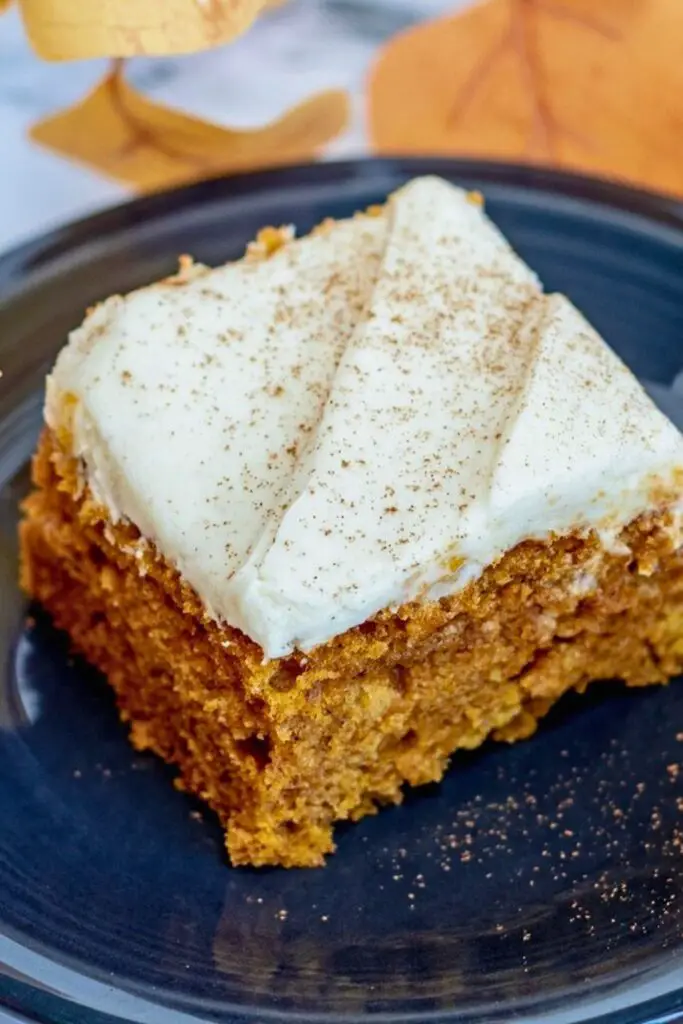
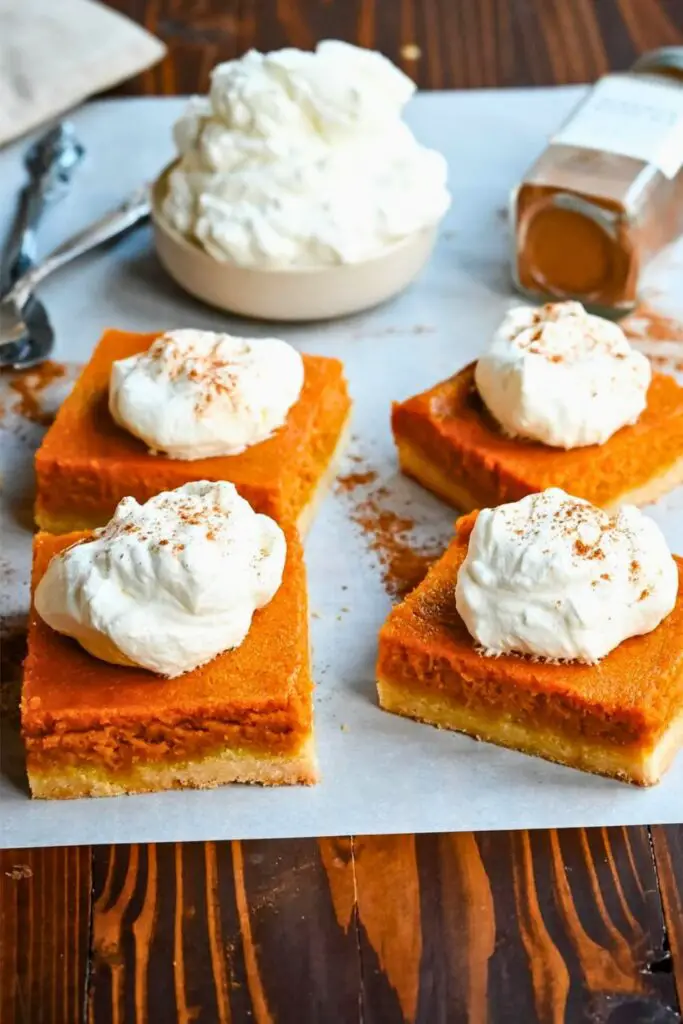
Pumpkin bars are like a warm hug from autumn. They’re soft, moist, full of cozy spices, and topped with a creamy frosting that makes every bite melt in your mouth.
Whether you’re baking for a fall party, a school treat, or to satisfy your pumpkin cravings, this pumpkin bars recipe is about to become your go-to.
If you’ve ever had a slice of spiced pumpkin cake and thought, “This needs to be a handheld treat,” you’re in the right place.
Let’s walk through the entire process, step by step, in a fun and stress-free way. Think of this as your guide to nailing the best pumpkin bars of your life.
What Are Pumpkin Bars?
Pumpkin bars are a cozy fall classic that live somewhere between a cake and a brownie but with the warm hug of autumn spices and a soft, melt-in-your-mouth texture.
If you’ve never had one, imagine the flavor of a spiced pumpkin cake, but thinner, denser, and easier to slice and share.
They’re baked in a shallow jelly roll pan, which gives them that “bar” shape instead of the high rise of a cake.
The batter is rich and moist thanks to pumpkin puree and oil, and it’s gently spiced with cinnamon, nutmeg, allspice, and ginger to give that classic fall flavor.
What takes them over the top? That thick, swoopy cream cheese frosting. It’s tangy, sweet, and creamy, the perfect match for spiced pumpkin bars.
And the best part? These bars are incredibly forgiving. Even if you make a minor mistake along the way (forgetting to whisk something or tossing ingredients in the wrong order), they still turn out delicious.
It’s the kind of recipe that feels homemade in the best way: a little chaotic, a lot of fun, and 100% satisfying.
Pumpkin Bars Ingredients: Let’s Break It Down

Here’s your complete ingredient list, organized for clarity. Every ingredient plays a vital role in creating that irresistible texture and flavor.
| Ingredient | Amount | Purpose |
|---|---|---|
| All-purpose flour | 2 cups (240g) | Forms the structure of the bars |
| Granulated sugar | ¼ cup (50g) | Adds sweetness and balances the spices |
| Brown sugar (packed) | 1 cup (220g) | Adds moisture and a deep molasses flavor |
| Baking powder | 1 tsp | Helps the bars rise |
| Baking soda | 1 tsp | Works with the acid in the pumpkin to lift the batter |
| Salt | ¾ tsp | Enhances flavor |
| Ground cinnamon | 1 ½ tsp | The star of the show adds flavor, color, and a soft texture |
| Allspice | ½ tsp | Adds a rich, aromatic undertone |
| Ground ginger | ¼ tsp | Brings a gentle heat and earthiness |
| Nutmeg (fresh or ground) | ¼ tsp | Adds depth and classic pumpkin pie flavor |
| Eggs | 3 large | Binds the batter and gives structure |
| Vegetable oil | ⅔ cup | Adds richness and keeps the bars moist |
| Milk | ¼ cup | Helps thin out the batter for smooth mixing |
| Vanilla extract | 2 tsp | Boosts the flavor of everything else |
| Pumpkin puree (canned) | 1 can (15 oz or 425g) | The star of the show—adds flavor, color, and a soft texture |
Tip: Use Libby’s or a good-quality canned pumpkin for best results. The texture matters!
Gather Your Tools Before You Begin
Before you dive into baking, it’s a good idea to have everything ready. While the recipe is beginner-friendly, having the right tools on hand makes the process easier and less messy.
Essentials You’ll Need:
- Mixing bowls: one large for dry ingredients and one medium for wet ingredients.
- Measuring cups and spoons: Or, even better, a kitchen scale for accuracy, especially when measuring flour and brown sugar.
- Whisk and spatula: Use a whisk for dry ingredients and a silicone spatula for folding the batter without overmixing.
- Jelly roll pan: A 10×15-inch pan is ideal. Don’t have one? No worries! You can create a DIY version by shaping foil into a similar size inside a half-sheet pan.
- Parchment paper: Helps prevent sticking and makes it easy to lift the bars out of the pan.
- Hand or stand mixer: For the cream cheese frosting. You’ll want a paddle attachment if using a stand mixer.
- Offset spatula or large spoon: For spreading that frosting into dreamy swoops.
- Cooling rack: To cool the bars quickly and evenly once they’re out of the oven.
Pro tip: If you don’t have a jelly roll pan, don’t skip the recipe—just rig one up like in the video! Fold some foil into a 10×15-inch size, set it inside a larger pan, and it’ll bake just fine.
With your tools ready and ingredients prepped, you’re already halfway to bakery-level pumpkin bar greatness. Let’s move on to the mixing and baking process!
How to Make Pumpkin Bars: Step-by-Step Instructions

Ready to bake the coziest fall treat in your kitchen? These pumpkin bars come together easily with a few bowls, a whisk, and some nostalgic autumn spices.
Each step below walks you through the process in detail. So even if you’re not a seasoned baker, you’ll end up with soft, flavorful bars topped with the dreamiest frosting.
Let’s jump in!
Step 1: Preheat and Prep
First things first, set your oven to 350°F (175°C) and let it preheat while you prepare the remaining ingredients. You’ll need a jelly roll pan for this recipe, which is typically 10 x 15 inches in size. If you don’t own one (many people don’t), don’t panic!
You can rig up a makeshift jelly roll pan using a regular half-sheet pan and some foil. Fold the foil into a 10×15 rectangle, press it into the pan, and line it with parchment paper. That’s it—you’re good to go!
Why it matters: The jelly roll pan gives these bars their signature thin, cake-like texture. Using a taller pan would change the bake time and consistency.
Step 2: Whisk the Dry Ingredients
In a large mixing bowl, whisk together the dry ingredients. This includes:
- 2 cups all-purpose flour (240g)
- 1 tsp baking powder
- 1 tsp baking soda
- ¾ tsp salt
- 1 ½ tsp cinnamon
- ½ tsp allspice
- ¼ tsp ground ginger
- ¼ tsp nutmeg (freshly grated if possible!)
Don’t rush this step. Whisking evenly ensures your spices, leavening agents, and flour are well-distributed, meaning your bars will rise properly and taste just right in every bite.
Baker’s insight: Freshly grated nutmeg gives a slightly sharper, warmer aroma than the pre-ground stuff. If you’ve never tried it, this recipe is a great excuse.
Step 3: Get Hands-On With Brown Sugar
Let’s talk brown sugar. It tends to form clumps, especially if it’s been sitting in the pantry for a while. For this recipe, you’ll need:
- 1 cup of packed brown sugar (220g)
Instead of tossing it straight into your mix, break it apart with your hands. Grab a handful, crumble it up between your fingers, and sprinkle it into the bowl. This extra step helps ensure there are no hard sugar pebbles in your batter later.
Kitchen moment of zen: Breaking up brown sugar is oddly satisfying. Embrace the mess—it’s part of the homemade charm.
Step 4: Mix the Wet Ingredients
Now, grab a separate medium bowl and whisk together all the wet ingredients:
- ¼ cup granulated sugar (50g)
- 1 cup packed brown sugar (again!)
- 3 large eggs
- ⅔ cup vegetable oil
- ¼ cup milk
- 2 tsp vanilla extract
- 1 can (15 oz or 425g) pumpkin puree
Give everything a good whisk until thoroughly combined. The mixture should appear thick, smooth, and have a warm, orange hue, reminiscent of autumn in a bowl.
Pumpkin pick: Use a quality pumpkin puree like Libby’s for consistent results. Avoid pumpkin pie filling (which contains sugar and spices already).
Step 5: Combine Wet and Dry (But Gently)
Time to bring it all together. Pour your wet ingredients into the bowl with the dry mix.
Now, here’s the trick: Don’t overmix. Seriously. It’s tempting to keep going until everything looks ultra-smooth, but that’s actually how you get gummy, dense bars.
Use a silicone spatula to gently fold the mixture together. You’re aiming for a well-combined batter with no visible flour streaks, but you don’t want to activate the gluten too much.
Why it matters: Overmixing causes the flour’s gluten to strengthen too much, which leads to a chewy or rubbery texture not what we want in a soft pumpkin bar!
Step 6: Pour and Spread Evenly
Once your batter is ready, pour it into your prepared jelly roll pan. Use a spatula to smooth it out into an even layer to the edges.
This step is crucial. Because the bars are thin, they won’t self-level in the oven. If you leave a mound in the middle, it’ll stay that way, and uneven bars aren’t nearly as fun to frost or eat.
Helpful tip: Take your time smoothing the surface. Think of it like icing a giant cracker it doesn’t have to be perfect, but it should be evenly flat.
Step 7: Bake to Perfection
Slide the pan into your preheated oven and bake for about 25 minutes.
You’ll know the bars are done when:
- The top looks dry and set
- The center springs back lightly when touched
- A toothpick inserted in the center comes out clean
Transfer the pan to a cooling rack and let it cool completely before frosting. Rushing this step can cause the frosting to melt and make everything sloppy, so patience pays off!
Don’t skip cooling: A warm cake base + cold frosting = a slippy, drippy mess.
Step 8: Make the Dreamiest Cream Cheese Frosting
While your bars are cooling, let’s whip up the frosting. You’ll need:
- 8 oz cream cheese (softened)
- ½ cup (1 stick) unsalted butter (softened)
- 3 cups powdered sugar (340–360g)
- 1 tsp vanilla extract
Start by beating the cream cheese and butter together until they’re smooth and creamy. This takes approximately 1–2 minutes with a hand mixer or stand mixer (using the paddle attachment is recommended).
Once blended, slowly add the powdered sugar a little at a time, to avoid sugar clouds. Mix on low speed until fully incorporated, then add the vanilla. Let it whip for another minute or so until you have a thick, luscious frosting that holds its shape.
Pro tip: Scrape the bowl once or twice during mixing so no butter or cream cheese clumps hide out in the corners.
Step 9: Frost & Swoop Like a Pro
Once your pumpkin bars are completely cooled, remove them from the pan and place them on a cutting board or flat surface.
Spoon the frosting onto the top and spread it across with an offset spatula or the back of a spoon. Try to create swoops and swirls by lifting your spatula and turning it gently in different directions.
Want to take it one step further? Dust a little cinnamon on top for that “wow” factor.
Swoop tip: For big, fluffy frosting peaks, hold your spatula straight up and pull it gently away from the surface. Instant bakery vibes!
Step 10: Slice and Serve
Now comes the fun part, cutting and sharing! You can slice your pumpkin bars into:
- Classic rectangles (about 2×3 inches)
- Bite-sized squares for party platters
- Or even long skinny bars if you’re feeling fancy
Store leftovers in an airtight container in the fridge for up to 5 days. Want to freeze them? Store the unfrosted bars in the freezer for up to 2 months. Just thaw, frost, and serve!
Serving idea: These bars are amazing with coffee, chai, or warm apple cider. Basically, they were born to be paired with cozy drinks.
Make It Your Own: Easy Pumpkin Bars Variations
Pumpkin bars are delicious as-is, but if you’re the kind of baker who likes to mix things up (or cater to specific diets), you’re in luck. This recipe is super versatile. You can add texture, make it allergy-friendly, or go bold with flavor twists.
Here’s a handy table with some of the easiest and most delicious variations to try:
| Variation | How to Do It |
|---|---|
| Gluten-Free | Use a 1:1 gluten-free flour blend instead of all-purpose flour. Bob’s Red Mill and King Arthur are both great options. |
| Dairy-Free | Swap the milk for almond, oat, or soy milk. Use vegan butter and dairy-free cream cheese for the frosting. |
| Vegan Option | Stir in ½ cup chopped walnuts or pecans into the batter before baking. Toast them first for extra flavor. |
| Nutty Texture | Stir in ½ cup chopped walnuts or pecans to the batter before baking. Toast them first for extra flavor. |
| Chocolate Twist | Add ½ cup mini chocolate chips to the batter for pumpkin-chocolate magic. |
| Extra Spice | Amp up the flavor with a pinch of cloves or cardamom in addition to the original spices. |
| Maple Frosting | Add 1–2 tbsp pure maple syrup to the cream cheese frosting for a sweet, earthy layer of fall flavor. |
| Coconut Touch | Sprinkle shredded coconut on top of the frosting for texture and a hint of tropical flair. |
| Pumpkin Pie Bars | Add a graham cracker crust layer to the bottom for a pumpkin pie-inspired twist. |
Pro Tip: If you’re making substitutions for the first time, try a small test batch before serving to a crowd. Some tweaks can slightly alter texture or bake time.
Serving Ideas for Pumpkin Bars

These pumpkin bars are incredibly flexible when it comes to serving. You can dress them up or keep it simple, depending on the occasion.
Here are some creative and practical ways to serve them:
1. Classic Rectangle Bars
Cut them into 2-inch by 3-inch rectangles for a traditional pumpkin bar shape. Easy to grab and perfect for potlucks or bake sales.
2. Mini Bites for Parties
Hosting a fall gathering? Slice them into bite-sized squares (1 inch by 1 inch) and insert toothpicks into each. You’ll have a tray of festive finger food ready to go.
3. With a Warm Drink
Pumpkin bars pair wonderfully with:
- Spiced chai tea
- Hot apple cider
- Vanilla lattes
- Even mulled wine if you’re feeling fancy
They’re sweet, soft, and slightly spiced, basically the ideal partner for cozy sips.
4. Holiday Dessert Boards
Arrange them alongside other seasonal treats, such as gingersnaps, apple slices, caramel popcorn, and cinnamon cookies. Add a drizzle of caramel or sprinkle of cinnamon on top for an extra touch of flair.
5. Breakfast (Yes, Really!)
They’re low-key sweet enough to pass as a brunch pastry. Serve with Greek yogurt and fruit for a morning treat that feels indulgent but still fits the season.
6. With a Scoop of Ice Cream
Warm the bar slightly and top with a scoop of vanilla or cinnamon ice cream. Finish with a drizzle of maple syrup or caramel sauce for a fall dessert sundae.
Pumpkin Bars vs. Pumpkin Cake vs. Pumpkin Roll
Pumpkin is the star in so many delicious fall treats, but how do you know which dessert to make when you’re in the mood for something sweet and spiced? Let’s break it down so you can pick your pumpkin-perfect match.
| Feature | Pumpkin Bars | Pumpkin Cake | Pumpkin Roll |
|---|---|---|---|
| Texture | Rolled log with a spiral of filling | Fluffy, airy, thick cake layers | Light and flexible sponge-style texture |
| Form | Cut into squares or rectangles | Cut into slices or layers | Rolled log with spiral of filling |
| Ease of Prep | Super easy, one bowl, beginner-friendly | Slightly more involved, usually layered | More technical requires rolling and careful handling |
| Frosting Style | Spread on top (cream cheese is typical) | Usually frosted between layers or on top | Cream cheese filling is rolled inside |
| Presentation | Casual, great for parties or snacking | Elegant enough for birthdays or gatherings | Beautiful swirl, showstopper dessert |
| Bake Time | ~25 minutes | ~35–45 minutes | ~12–15 minutes (but needs rolling + cooling + filling) |
| Best For | Potlucks, lunchboxes, quick desserts | Celebrations, layered dessert lovers | Impressing guests, holiday centerpieces |
| Skill Level Needed | Easy (great for beginners!) | Intermediate | Advanced (requires confidence and patience) |
If you’re short on time but still want that warm pumpkin flavor with minimal stress, pumpkin bars are your best bet. Want to impress a crowd? Go for a pumpkin roll. Hosting a fall birthday or dinner? Pumpkin cake fits the bill
Final Thoughts: Why Pumpkin Bars Belong in Your Fall Baking List
Pumpkin bars aren’t just another seasonal treat—they’re the essence of fall comfort.
With their perfectly spiced flavor, pillowy-soft texture, and that rich cream cheese frosting on top, they strike the ideal balance between homey and indulgent.
Whether you’re baking them for a cozy night in, sharing at a potluck, or prepping dessert for a fall party, they’re guaranteed to be a hit.
What makes this recipe stand out is its forgiving and versatile nature. You don’t need a mixer for the batter. You don’t need fancy pans.
And even if you forget to whisk something or switch steps around, guess what? They still turn out amazing. That’s what makes them a go-to year after year.
So grab a can of pumpkin, turn on your oven, and make your kitchen smell like the best parts of autumn.
Looking for more fall dinner ideas before dessert? Try these reader favorites:
- 🍂 30 Cozy Chicken Recipes Perfect for Fall Nights – From creamy bakes to savory one-pots, this roundup will keep your fall dinners warm and satisfying.
- 🍷 40-Min Easy Chicken Marsala Recipe for Dinner – Rich, hearty, and full of Italian-inspired flavor. Perfect for a cozy night in.
- 🌿 Easy 30-Min Pesto Chicken Recipe for Busy Girls – Quick, healthy, and bursting with flavor. A must-make for weeknights when you still want something special.
Easy Pumpkin Bars Recipe With Cream Cheese Frosting


Ella Foster, co-founder of FoodBears.com, is a skilled writer whose love for cooking fuels her creative work. Her passion for experimenting in the kitchen brings authentic flavor and culinary inspiration to every piece she crafts for the platform.