
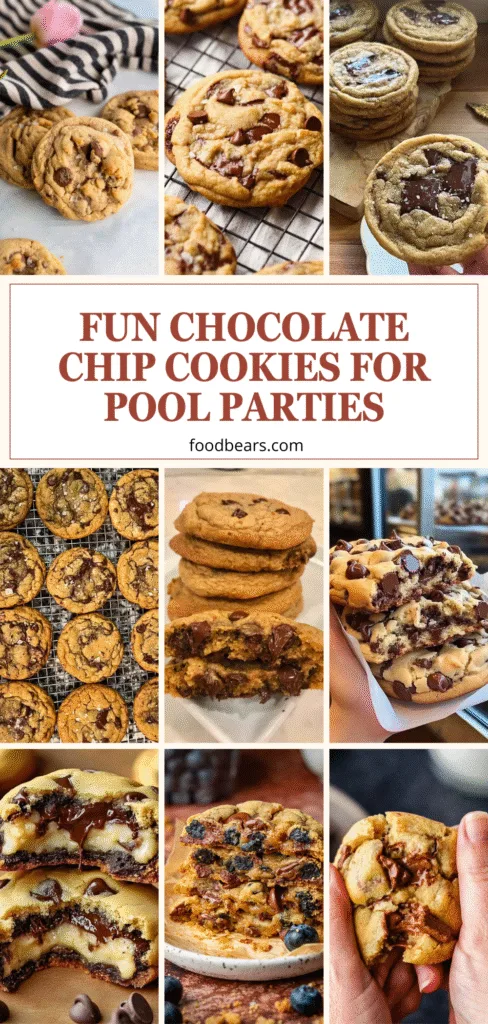
Nothing like freshly baked chocolate chip cookies wafting through the kitchen. It’s cozy, nostalgic, and downright irresistible.
Whether you’re baking a batch for a family gathering, a lunchbox treat, or just a late-night craving, these cookies tick all the boxes: soft, chewy, buttery, and packed with melty chocolate chips.
Today, we’re diving deep into the best chocolate chip cookies you’ll ever bake (and eat).
🍫 Why You’ll Love This Chocolate Chip Cookie Recipe
This isn’t just another cookie recipe; it’s the one you’ll keep returning to. Here’s why:
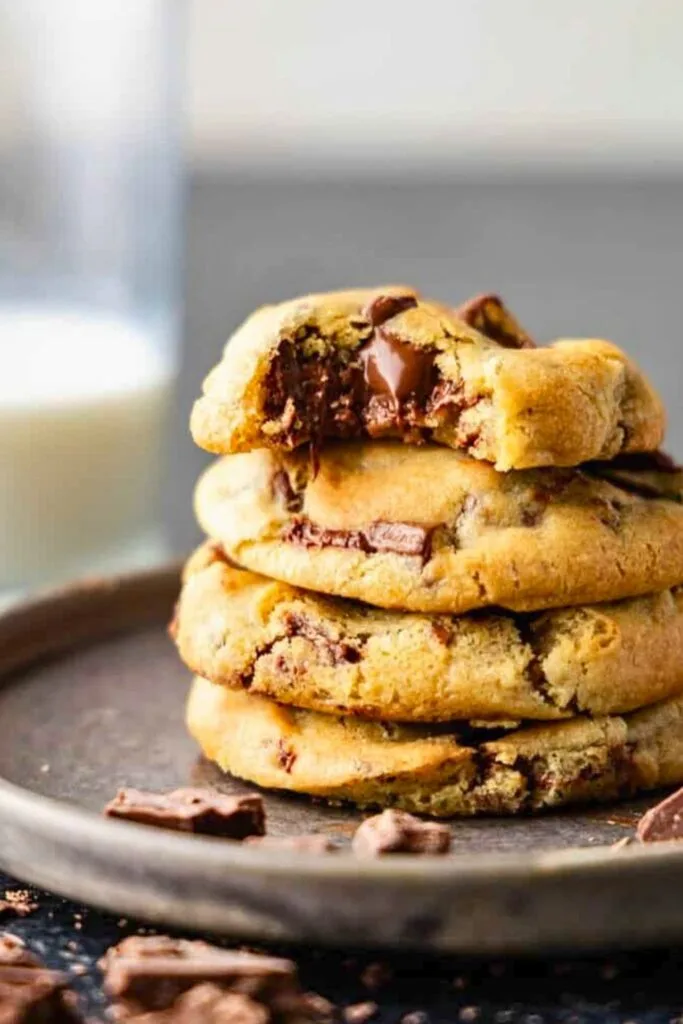
1. Soft and Gooey Center
The inside of these cookies is dreamy soft like cookie dough, but fully baked. Thanks to the perfect butter-to-flour ratio and a touch of brown sugar, you get a chewy bite every time.
2. Crisp Edges, Fluffy Tops
These cookies rise beautifully and keep their shape without spreading too flat. The edges are slightly crisp while the centers remain soft and tall. That texture combo? Perfection.
3. Rich, Buttery Flavor
Using real butter and brown sugar gives these cookies a deep, rich, almost caramel-like taste. Add vanilla to the mix, and you get that bakery-style flavor that hits different.
4. Packed with Chocolate Chips
We’re not shy here; two full cups of semi-sweet chocolate chips are folded into the dough, so every bite delivers melty chocolate goodness.
5. No Chill Time Required
Most cookie recipes demand refrigeration. Not this one. You can go from bowl to oven in minutes, which is ideal for last-minute cravings or surprise guests.
6. Foolproof for Beginners
Even if you’ve never baked cookies before, this recipe is easy to follow and hard to mess up. It’s perfect for first-time bakers, parents with kids, or anyone who wants a quick, homemade treat.
7. Freezer-Friendly
Want fresh-baked cookies on demand? Make the dough, freeze the scoops, and bake whenever the mood strikes. It’s like having a bakery in your freezer.
📋 Ingredients You’ll Need
Below is a simple ingredient list in table format to make your prep easier:
| Ingredient | Amount | Purpose |
|---|---|---|
| Unsalted butter (softened) | 1 cup (2 sticks) | Adds richness and helps create a soft, tender texture |
| Light brown sugar | 1 cup | Adds sweetness and moisture with a hint of molasses flavor |
| Granulated sugar | ½ cup | Helps the cookies spread and adds sweetness |
| Large eggs | 2 (room temperature) | Binds the dough and provides structure |
| Vanilla extract | 2 teaspoons | Enhances flavor and adds warmth |
| All-purpose flour | 3 cups | Gives the cookies body and structure |
| Baking powder | 2 teaspoons | Helps the cookies rise and stay fluffy |
| Salt | ½ teaspoon | Balances the sweetness and enhances overall flavor |
| Semi-sweet chocolate chips | 2 cups (plus extras) | The star of the show—melty pockets of chocolate |
👩🍳 Step-by-Step: How to Make Chocolate Chip Cookies
This chocolate chip cookie recipe is a keeper, making it easier than you think. Let’s break it down one step at a time, with helpful insights.
Step 1: Cream the Butter and sugar
Start by placing 1 cup of softened unsalted butter, 1 cup of light brown sugar, and ½ cup of granulated sugar into a large mixing bowl.
Using a hand mixer or stand mixer fitted with a paddle attachment, beat the mixture on medium-high speed for 2–3 minutes until it looks:
- Light in color
- Creamy and smooth
- Slightly fluffy
💡 Why this matters: Creaming introduces air into the dough, giving you a softer, taller cookie. The brown sugar also helps retain moisture, keeping the cookie chewy for days.
Step 2: Add the Eggs and Vanilla
Next, add 2 large eggs, one at a time. Beat well after each egg so it thoroughly blends into the dough.
Then, pour 2 teaspoons of vanilla extract and beat again until smooth.
💡 Tip: Use room temperature eggs. Cold eggs can cause the butter to seize up, leading to uneven texture.
Step 3: Mix the Dry Ingredients Separately
In a smaller bowl, whisk together:
- 3 cups all-purpose flour
- 2 teaspoons baking powder
- ½ teaspoon salt
Mixing the dry ingredients separately ensures they’re evenly distributed and prevents clumps of salt or leavening in your cookie dough.
💡 Pro Tip: Don’t scoop your flour directly from the bag; it packs too much. Instead, spoon it into your measuring cup and level it off with a knife for accuracy.
Step 4: Combine Wet and Dry Ingredients
Slowly add the dry mixture into the wet mixture in thirds, mixing well after each addition.
This prevents flour clouds from flying out of the bowl and makes blending much easier and smoother.
As the dough forms, it’ll become thick but still soft, perfect for scooping.
Step 5: Fold in the Chocolate Chips
Add 2 cups of semi-sweet chocolate chips to the dough.
Use a rubber spatula or wooden spoon to fold the chips until they’re evenly distributed gently. Don’t overmix, just enough so every scoop gets plenty of chocolate.
Optional: Save a small handful of chips to press on top of each dough ball later for a “bakery-style” look.
💡 Variation Tip: Want extra texture? Mix in some chopped walnuts or mix dark and milk chocolate chips!
Step 6: Scoop the Dough
Use a trigger-release ice cream scoop or a large spoon to portion the dough into even balls.
This helps ensure:
- Every cookie is the same size
- Even baking
- A uniform, professional look
Place each dough ball on a parchment-lined baking sheet, leaving 2–3 inches between them to allow for spreading.
💡 Optional but recommended: Press 2–3 extra chocolate chips into the tops of the dough balls for presentation. They’ll look extra tempting once baked.
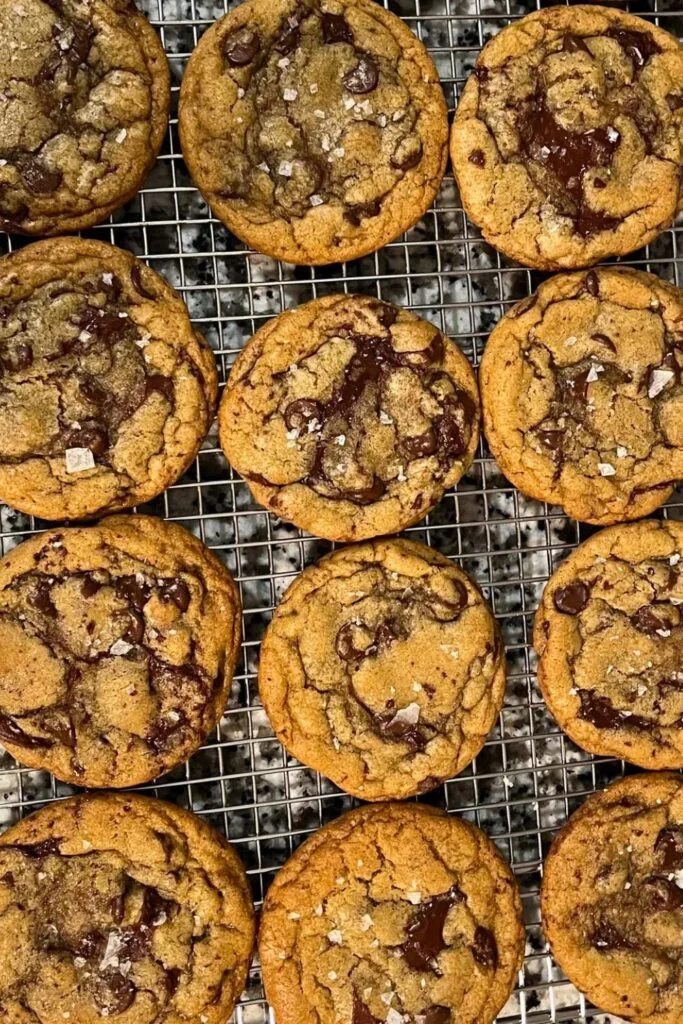
Step 7: Bake the Cookies
Preheat your oven to 350°F (175°C) if you haven’t already.
Place one sheet of cookies in the center rack of your oven and bake for 13 to 15 minutes, or until:
- The edges are golden
- The centers look slightly underbaked
This is key. Please don’t wait for the tops to turn golden; they’ll be finished baking on the tray after you pull them out.
💡 Pro Tip: Always bake one sheet at a time for even heat circulation.
Step 8: Let Them Rest
Once out of the oven, leave the cookies on the baking sheet for 5 minutes.
They’re still very soft at this stage and can fall apart if moved too early. Letting them rest allows them to:
- Finish baking from residual heat
- Firm up just enough for easy transfer
Then gently move them to a cooling rack.
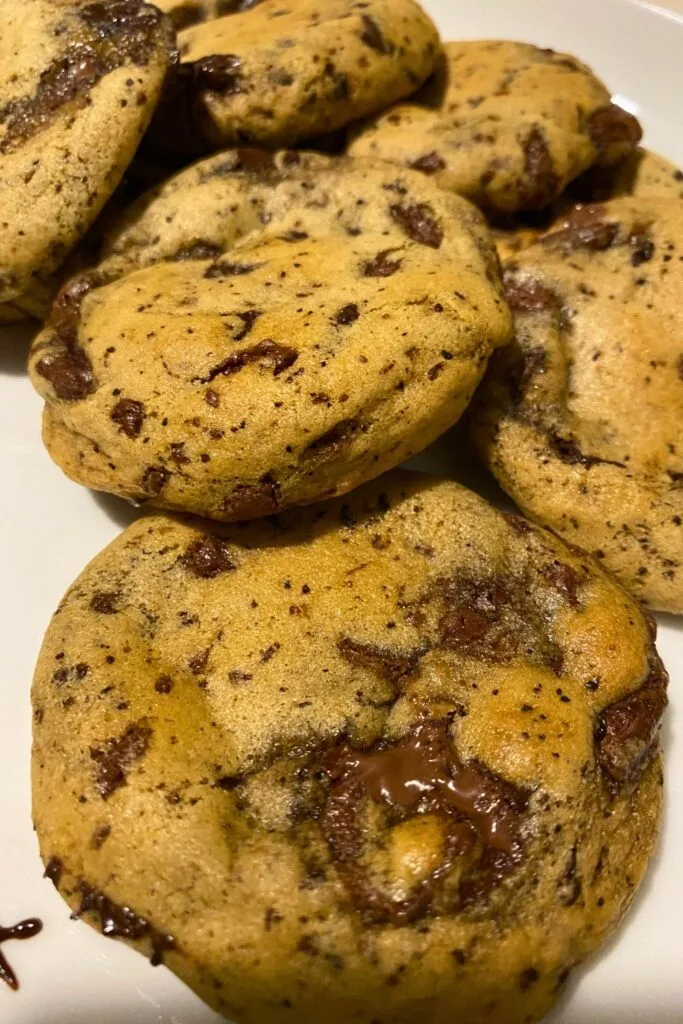
Step 9: Enjoy Warm or Cool
Now the best part—eating them! Whether you enjoy them warm and gooey or let them cool completely, these cookies are next-level delicious.
Pair them with a cold glass of milk, a scoop of ice cream, or a big smile.
🧊 Can You Freeze the Dough? Yes
One of the best things about this chocolate chip cookie dough is how freezer-friendly it is. Whether you’re prepping for a party or want to treat your future self, freezing cookie dough is smart.
Here’s How to Freeze the Dough Like a Pro:
- Scoop the dough into individual cookie-sized balls.
- Line them up on a baking sheet (no touching!) and freeze until solid, about 1 hour.
- Transfer the frozen dough balls into a ziplock freezer bag or an airtight container.
- Label it with the date and baking instructions (because your future self will thank you).
How Long Can You Freeze It?
- Cookie dough lasts up to 3 months in the freezer.
- You can also refrigerate the dough for up to 3 days if you’re baking soon.
Baking from Frozen:
You don’t even have to thaw it! Just:
- Place the frozen dough on a baking sheet
- Add 1–2 extra minutes to the baking time
That’s it. Hot, fresh cookies on demand anytime. It’s like having a secret dessert weapon in your freezer.
💡 Bonus Tip: Frozen cookie dough makes a great last-minute gift. Package a few dough balls in a cute bag with baking instructions—voilà, instant edible gift!
⏳ Cool Before Devouring (If You Can Wait!)
We get it. The smell of warm, chocolate-loaded cookies is enough to make anyone lose their patience. But a key step to achieving cookie bliss is a slightly cooling your cookies.
Why Cooling Matters:
- Prevents breakage: Straight out of the oven, the cookies are super soft and fragile.
- Keeps shape: Letting them rest for 5 minutes on the baking tray helps them firm up.
- Finishes baking: The heat from the tray continues to gently cook the center, giving you that perfect gooey-but-baked consistency.
After 5 Minutes:
Gently transfer them to a cooling rack. This allows air to circulate and stops baking, so they don’t get dry or overcooked.
But hey, if you can’t wait, we understand. Just be careful not to burn your tongue on molten chocolate chips. 😅
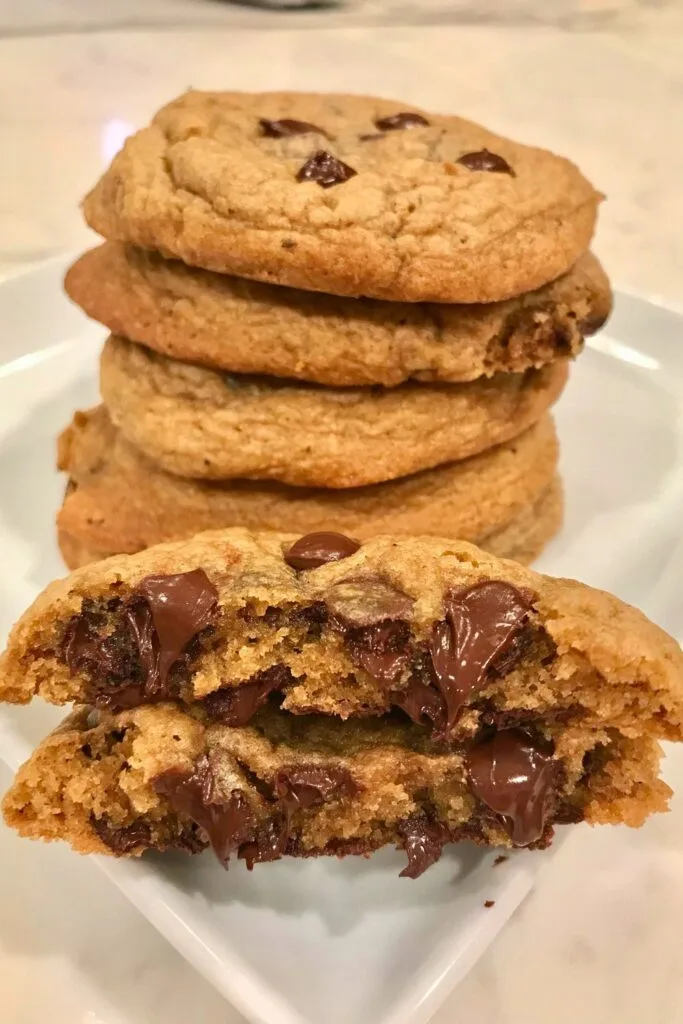
🍪 Taste Test: What to Expect
Let’s get to the fun part: what do these cookies taste like?
Imagine biting into a still-warm, golden brown cookie. Here’s what happens:
The Texture:
- The outside edge is lightly crisp, just enough to hold everything together.
- The center is soft, thick, and chewy, almost like cookie dough (but fully baked).
- Each bite has a melt-in-your-mouth quality that’s borderline addictive.
The Flavor:
- Buttery richness that coats your tongue
- Hints of caramel from the brown sugar
- The perfect touch of salt to balance the sweetness
- And let’s not forget the gooey, melty chocolate chips that practically ooze out of every bite
It’s everything you want in a cookie:
✅ Sweet but not too sweet
✅ Rich but not greasy
✅ Balanced and satisfying
Add a cold glass of milk, and you’ve just entered cookie heaven.
💬 Real Talk: “These just made my day.” That’s what you’ll be saying after your first bite.
And if you’re like the baker in the video, you might even hide the batch from your kids until you’ve had a few to yourself. 😉
🧒 Kid-Approved & Crowd-Pleasing

Let’s be honest, everyone loves chocolate chip cookies. But this recipe? It’s on a whole different level of obsession.
Kids Go Wild for These
The moment the sweet smell hits the kitchen, it’s game over. Whether you’re baking with your kids, for your kids, or simply hiding a few for yourself (guilty as charged), these cookies are guaranteed to bring smiles.
- Soft centers = safe for toddlers (no tooth-busting crunch!)
- Not overly sweet, so they’re just right for tiny taste buds
- Fun to make together, from scooping dough to adding extra chips on top
They’re a family favorite for a reason.
💬 “I haven’t told my kids these are out of the oven yet… because they’ll vanish.” – Straight from the original baker’s mouth!
Crowd Favorite at Any Event
Taking these to a party? Don’t blink—they’ll disappear from the tray faster than you can say “save me one.”
Whether it’s:
- A school bake sale
- Holiday cookie swap
- Birthday party favor
- Or just a regular ol’ movie night with friends
These cookies never fail. You might even earn the “cookie person” title in your circle; consider yourself warned.
💡 Make-ahead tip: Bake a whole batch, freeze half, and save them for unexpected guests or late-night cravings. Instant crowd-pleaser.
🍽️ Serving Suggestions: Creative Ways to Enjoy Chocolate Chip Cookies
You can eat them straight from the tray (and we highly encourage it), but why stop there? Here are some fun and delicious ways to level up your cookie experience:
1. Classic and Simple
- Serve warm with a cold glass of milk
- Stack them up on a plate and sprinkle with powdered sugar
- Wrap in wax paper and tie with twine for DIY gifts
2. With Ice Cream
- Make ice cream cookie sandwiches: Add a scoop of vanilla, chocolate, or caramel ice cream between two cookies.
- Crumble cookies over ice cream sundaes for added crunch and flavor.
- Serve warm cookies with a scoop of ice cream on top for a dessert you’ll never forget.
3. Cookie Bar Fun
Hosting a gathering? Try a cookie bar:
- Offer different chip options: white, dark, and peanut butter
- Include toppings like sprinkles, sea salt flakes, or mini marshmallows
- Provide dips: Nutella, caramel sauce, or whipped cream
Let guests customize their cookies and you’ll be the host(ess) with the most-est.
4. Make Mini Versions
- Use a small scoop to make bite-sized cookies—perfect for lunchboxes or party platters.
- Sandwich two mini cookies with frosting or peanut butter for mini delights.
5. Holiday Twist
- Add festive M&Ms for a Christmas or Easter version
- Use heart-shaped molds for Valentine’s Day
- Decorate with themed sprinkles for birthday parties
✔️ Why This Recipe Works Every Time
This isn’t just luck. There’s real science and brilliant technique behind why these chocolate chip cookies consistently turn out amazing.
Let’s break it down:
1. Balanced Ingredients
- Butter gives richness and flavor
- Brown sugar adds moisture and a hint of caramel
- Granulated sugar helps the cookies spread slightly and crisp at the edges
This combo creates the ideal texture: crispy, soft, and chewy outside.
2. No Chill Time = Instant Gratification
Many cookie recipes require chilling the dough for hours (or overnight). Not this one.
Thanks to the perfect fat-to-flour ratio and baking powder instead of baking soda, you get:
- Less spreading
- Better shape retention
- And instant baking satisfaction
3. Even Mixing Techniques
Mixing the dry ingredients separately and then adding them in thirds helps:
- Distribute the leavening evenly
- Prevent over-mixing
- Make a smooth, even dough
This small detail keeps your cookies uniform and professional-looking every time.
4. Semi-Sweet Chocolate Chips
These aren’t just for taste; they balance out the sugar so your cookie is rich, not cloyingly sweet. They also melt beautifully, creating those irresistible gooey pockets in every bite.
5. Smart Baking Method
Baking one sheet at a time in the center rack of the oven ensures:
- Even cooking
- Controlled spreading
- Golden edges with slightly underbaked centers (a.k.a.. cookie heaven)
Pulling them out when the tops look underbaked lets them finish cooking on the tray, giving you that perfect soft, chewy finish.
🎯 Final Thoughts: The Last Chocolate Chip Cookie Recipe You’ll Ever Need
If you’re looking for a chocolate chip cookie recipe that delivers every single time, you’ve just found your forever favorite. This recipe isn’t easy, it’s reliable, nostalgic, and downright addictive.
It’s the kind of cookie that:
- Makes your kitchen smell like a warm hug
- Impresses a crowd with minimal effort
- Turns simple ingredients into something magical
Whether you bake a whole batch for a party or sneak in a late-night cookie-and-milk moment (we won’t tell), these cookies bring joy to every bite.
📌 Recommended Recipes You’ll Love Next
🥗 Farro Salad Recipe Millennials Are Loving in 2025
Looking for something light and hearty after all those cookies? This colorful, flavor-packed farro salad is the go-to summer lunch you didn’t know you needed.
🍅 Fun & Fresh Gazpacho Recipe for Foodies in 2025
Cool down with this chilled Spanish soup with fresh veggies and bold flavors. Perfect for hot days or elegant starters!
🍔 Quick & Easy BBQ Chicken Sliders for Crowds in 2025
Planning a gathering? These juicy, saucy sliders are the ultimate party food—easy to make and impossible to resist.

Ella Foster, co-founder of FoodBears.com, is a skilled writer whose love for cooking fuels her creative work. Her passion for experimenting in the kitchen brings authentic flavor and culinary inspiration to every piece she crafts for the platform.