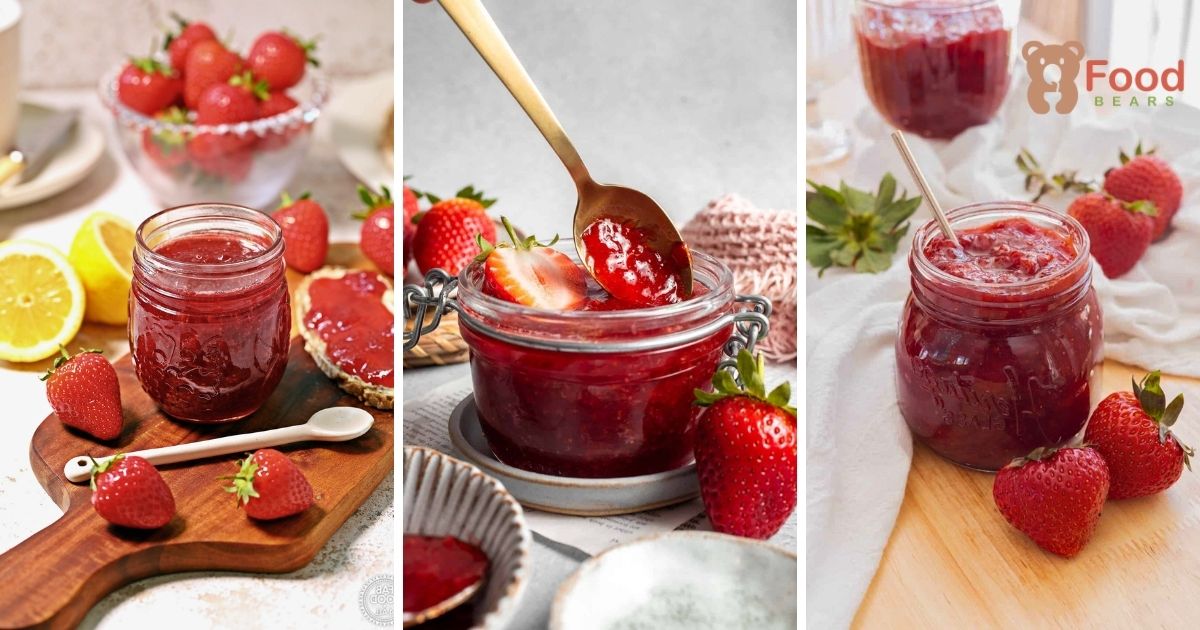
Ever wished you could make your own strawberry jam without any fancy tools or ingredients?
Maybe you’ve been scrolling through recipes that need candy thermometers, canning kits, or pounds and pounds of fruit, and you thought, “Nope, not for me.”
Well, let’s change that today.
This super simple strawberry jam recipe is made with just three ingredients, no pectin, and no complicated steps.
It’s perfect for beginners, small households, and anyone who craves that sweet, homemade goodness without the fuss.
Let’s break it all down and walk through this small-batch magic together.
Why You’ll Love This Easy Strawberry Jam

Before we dive in, here’s why this recipe deserves a permanent spot in your kitchen:
- Only 3 ingredients: strawberries, sugar, and lemon juice.
- No pectin, no gelatin, no thermometers needed.
- Makes just over a pint, perfect for smaller households.
- It can be made with any berries.
- Keeps for months in the fridge (no canning required!).
Sounds too good to be true? It’s not. Let’s get into it.
Ingredients You’ll Need

Here’s a clear breakdown of the simple 3-ingredient list used in this recipe:
| Ingredient | Amount | Notes |
|---|---|---|
| Fresh Strawberries | 2 pounds (about 4 cups chopped) | Washed, hulled, and roughly chopped |
| Granulated Sugar | 2 cups | White, plain sugar helps draw moisture and sets the jam |
| Lemon Juice | 1 tablespoon | Use half a large fresh lemon or bottled lemon juice |
Tip: You can scale this recipe up or down, but don’t overdo it in one pot; a batch that’s too large may prevent it from thickening evenly.
Tools You Need
One of the best things about this jam recipe is how low-tech it is. You likely already have everything you need in your kitchen.
Here’s a handy list:
| Tool | Purpose |
|---|---|
| Large Mixing Bowl | To mix chopped berries, lemon juice, and sugar |
| Melon Baller or Paring Knife | For removing strawberry tops (hulls) |
| Spatula or Wooden Spoon | To mix and stir the ingredients thoroughly |
| 4-Quart Saucepan or Pot | Large enough to hold bubbling jam without boiling over |
| Stove | For cooking the jam over medium to medium-high heat |
| Canning Funnel | Helps transfer hot jam neatly into jars |
| Ladle or Spoon | Used to scoop hot jam into jars |
| Glass Jars with Lids | For storing the jam (half-pint or 8 oz jars recommended) |
| Freezer-Safe Plate | Used to test jam consistency (frozen plate test) |
| Tongs (optional) | Helpful for handling hot jars |
| Marker or Labels | To mark the jars with the date you made the jam |
No pectin, no thermometer, no water bath canning setup needed.
Just a few basics and you’re good to go!
How to Make Strawberry Jam (Step-by-Step Tutorial)

Making strawberry jam at home doesn’t have to be a complicated or intimidating process. In fact, this method keeps it beautifully simple, no pectin, no gelatin, no thermometers, and absolutely no canning equipment required.
If you’ve got a bowl, a pot, and a little bit of time, you’re good to go.
Here’s the full breakdown of how to make this small-batch strawberry jam, from prepping your berries to storing your jars. Let’s jam (pun totally intended)!
Step 1: Prep the Strawberries Like a Pro
First things first, start with fresh, ripe strawberries. You’ll need 2 pounds, which is the perfect amount for a manageable batch that won’t take over your fridge.
Give your berries a good rinse to remove any dirt or debris. Pat them dry with a clean kitchen towel or paper towels. Now it’s time to remove the tops.
You can use a melon baller, paring knife, or even a spoon to hull the strawberries. The goal is to scoop out the leafy tops and the white core underneath. Once they’re hulled, roughly chop the berries into pieces.
Don’t stress about making the pieces uniform. Large chunks are wonderful. This jam is rustic and homemade, and that’s what makes it so good.
Why we love this step: No food processor. No precise cuts. Just simple, hands-on prep.
Step 2: Add Lemon Juice
Lemon juice isn’t just here for flavor; it plays a critical role in helping the jam set, especially since we’re not using pectin.
Grab a large lemon, slice it in half, and squeeze just half of it over your strawberries. This equals about 1 tablespoon of lemon juice. You can use bottled juice if you’d like, no judgment here!
If you accidentally drop in a seed or two while juicing (been there), fish them out with a spoon or your fingers. Easy fix.
Why lemon matters: It provides natural pectin, balances sweetness, and keeps the color vibrant.
Step 3: Sweeten Things Up
Next up: sugar.
Pour in 2 cups of granulated white sugar over the chopped strawberries and lemon juice. Grab a spatula and stir the mixture until all the berries are coated.
This is where the magic begins: maceration. That’s a fancy word for letting fruit sit in sugar so it starts to break down and release its natural juices.
Leave the bowl on the counter for about 1 hour. You’ll start to see the sugar dissolve and the strawberries turn into a juicy, ruby-red mixture.
In a rush? An hour is plenty. But if you’re prepping ahead, you can cover the bowl and refrigerate it overnight. The longer it rests, the more flavorful and syrupy it becomes.
Step 4: Let the Juices Flow
After macerating, your berries will be swimming in their own gorgeous, sweet juice. That’s precisely what we want.
Transfer the entire mixture, including the juice, into a large saucepan. You’ll need a pot that’s at least 4 quarts in size. Trust me on this: jam bubbles up while cooking, and you’ll want the extra space to avoid sticky overflows.
Set the pot on the stove, and now we move into the cooking phase.
Step 5: Time to Cook Your Jam
Turn the heat to medium-high and bring the strawberry mixture to a gentle boil. You’ll want to stir constantly during this stage.
Seriously, don’t walk away.
This isn’t like simmering soup or pasta sauce. This mixture needs your full attention because it can burn easily if left alone, especially since we’re working without added pectin or thickeners.
As the jam heats up, you’ll notice a foamy layer rising to the top. That’s normal. It’s just air bubbles forming as the fruit cooks down.
If the foam gets close to the edge of the pot, lift the pan off the heat briefly while continuing to stir. This helps it settle.
Important tip: If the jam starts to stick to the bottom or smell like it’s burning, lower the heat immediately. There’s no saving scorched jam.
Step 6: Reduce and Thicken
Keep stirring as the jam boils and reduces. This step takes about 30 to 40 minutes, depending on your stove and pan.
You’re watching for three signs that your jam is getting close to done:
1. The foam starts disappearing
At first, the jam will be very bubbly and foamy on top. As it cooks down, the foam will lessen. When you can stir the jam and the foam mixes in and disappears, that’s a strong sign it’s thick enough.
2. The bubbles change
You’ll hear it. Instead of sounding like water boiling, the bubbles become slower and heavier like pudding or gravy. This is a sign that the water has mostly cooked off, and the sugars are thickening.
3. Frozen plate test (the gold standard)
Before you start cooking, place a small plate in your freezer.
Once you think the jam is ready, spoon a little onto the cold plate. Wait 10 seconds, then drag your finger through the middle. If the jam stays in place and doesn’t run back together, you’re done!
Note: The plate chills the jam instantly, so you can test its final texture without waiting for it to cool in the pot.
Step 7: Jar It While It’s Hot
With your jam perfectly cooked and still hot, it’s time to jar it up.
Since we’re not doing traditional canning here, you’ll want to prep your jars with boiling water to avoid cracking from the temperature difference.
Here’s what to do:
- Pour boiling water into your clean jars
- Let them sit for 10 minutes to heat up
- Pour out the water, and immediately ladle in the hot jam
Use a canning funnel to make things less messy. A ladle works best for scooping the jam and filling the jars about ¼ inch from the top.
This recipe yields just over 1 pint of jam, so that you can fill:
- Two 8-oz jars, or
- Three 6-oz jars
Once filled, wipe the rims clean and screw on your lids.
No water bath. No sealing. Just store in the fridge.
Step 8: Store in the Fridge
Because we didn’t process the jars using a water bath or pressure canner, the jam isn’t shelf-stable. But don’t worry—it will last in the fridge for up to 6 months.
Label your jars with the date you made them. Use a piece of tape and a permanent marker, or write directly on the lid.
Keep your jam refrigerated, and always use a clean spoon when scooping to avoid introducing bacteria.
Tips for Strawberry Jam Success

Making homemade strawberry jam is easier than ever with this recipe, but a few helpful tips can make the process smoother and yield even better results.
1. Use Ripe, In-Season Strawberries
Flavor starts with the fruit. Choose strawberries that are red all the way through—no white centers, no bruises. Local or farmer’s market berries often have the best flavor.
2. Stir Constantly While Cooking
This isn’t a “walk away” recipe. Once your pot hits the stove, it needs your full attention. Stir frequently (constantly, if possible) to prevent scorching or uneven cooking.
3. Use the Right Pot Size
You need at least a 4-quart saucepan or pot. This jam bubbles and foams, and a smaller pot will overflow quickly, leaving a sticky mess on your stove.
4. Don’t Skip the Maceration Time
Letting the strawberries sit with sugar for at least 1 hour helps release their natural juices. This reduces cooking time and gives you a better final texture and flavor.
5. Try the Frozen Plate Test
If you’re unsure whether your jam is done, the frozen plate test is your best friend. It mimics how the jam will set once cooled, preventing over- or undercooking.
With these five tips, even a first-timer can make jam like a pro!
How to Know When Strawberry Jam is Done

No pectin? No thermometer? No problem.
There are a few easy ways to know your strawberry jam has reached the proper consistency:
1. The Foam Disappears
At the start of cooking, your jam will foam a lot. When it’s nearly done, you’ll notice that foam can be stirred back into the mix, and eventually, it won’t reappear. That’s a strong visual cue.
2. The Bubbles Thicken
Listen closely. Early in the cooking, your jam will bubble like boiling water. As it thickens, the sound changes. It becomes glossy and slow, like bubbling pudding or thick custard.
3. The Jam Pulls Together as You Stir
You’ll notice the mixture sticking more to your spoon or spatula. It won’t be runny, and it may start to mound slightly as you stir.
4. The Frozen Plate Test
This is the most reliable method:
- Chill a plate in your freezer while the jam cooks.
- When you think it’s ready, spoon a bit of jam onto the plate.
- After 10–15 seconds, run your finger through it.
- If the line stays put and the jam doesn’t run back together, it’s done.
Simple. Accurate. And you won’t need a candy thermometer at all.
How to Use Your Homemade Strawberry Jam

Once you’ve got your beautiful jars of homemade strawberry jam, the question is, what do you do with it?
Here are some tasty ideas to put it to good use:
🥐 Breakfast Favorites
- Spread it over buttered toast
- Add to freshly baked biscuits or English muffins
- Swirl it into Greek yogurt or oatmeal
- Spoon on top of waffles, pancakes, or crepes
🥪 Sandwiches & Snacks
- Upgrade your PB&J with homemade jam
- Use it in a grilled cheese with brie
- Make fancy tea sandwiches
🍰 Baking and Desserts
- Fill thumbprint cookies or sandwich cookies
- Add to jam bars or crumble bars
- Layer into parfaits, cheesecakes, or cakes
- Serve with ice cream or whipped cream
🍹 Bonus Ideas
- Stir into lemonade or cocktails for a fruity twist
- Use as a glaze for pork or chicken
This jam is endlessly versatile; if you can dream it, you can spoon it.
Easy Variations of Strawberry Jam

Want to switch it up next time? Try one of these simple variations to give your jam a flavorful twist:
| Variation | What to Add | When to Add |
|---|---|---|
| Strawberry-Vanilla Jam | ½ tsp vanilla extract or ½ vanilla bean | Add during the final 5 minutes of cooking |
| Strawberry-Basil Jam | 1–2 tbsp finely chopped fresh basil | Replace 1 cup of strawberries with blueberries |
| Strawberry-Lemon Zest Jam | Zest from 1 lemon | With lemon juice, before macerating |
| Strawberry-Blueberry Jam | With awareness, it may be thinner | During initial prep |
| Spiced Strawberry Jam | ¼ tsp cinnamon + pinch of nutmeg or cardamom | During cooking |
| Strawberry-Mint Jam | 1 tbsp finely chopped mint | After cooking, before jarring |
| Low-Sugar Version | Use 1–1½ cups sugar instead of 2 cups | With awareness it may be thinner |
| Maple-Sweetened Jam | Replace sugar with ¾ cup maple syrup | Use caution will be softer set |
Each version still follows the same base method, but lets you experiment with flavors you love!
Final Thoughts
This easy strawberry jam recipe proves you don’t need fancy tools or complicated steps to make something truly special.
With just a few ingredients and a little stovetop magic, you can create a sweet, glossy jam that captures the taste of summer in every bite.
Whether you spread it on biscuits, swirl it into yogurt, or spoon it over cheesecake, your homemade strawberry jam will add comfort and flavor to any meal or snack.
And the best part? You made it with your own hands, no pectin, no preservatives, just pure joy in a jar.
So go ahead, grab some fresh berries, and turn your kitchen into a jam-making haven. One batch, and you’ll be hooked.
You Might Crave These Next…
Looking for more comforting, cozy, or seasonal cooking inspiration? These reader-favorite roundups are the perfect next stop:
🎄 50 Cozy Christmas Recipes for Every Cook
A festive feast of heartwarming dishes from slow-cooked mains to cozy sides and nostalgic favorites. Perfect for cold-weather cravings and holiday gatherings.
🍪 30 Best Christmas Baking Ideas to Save
Holiday baking made fun and easy! Whether you’re baking with kids or prepping treats for a party, this list has cookies, bars, cakes, and crowd-pleasers galore.
🍗 25 Chicken Crockpot Recipes for Easy, Cozy Dinners
Set it and forget it! These crockpot chicken recipes are made for busy nights, lazy weekends, and everything in between. Comfort food at its best.


Ella Foster, co-founder of FoodBears.com, is a skilled writer whose love for cooking fuels her creative work. Her passion for experimenting in the kitchen brings authentic flavor and culinary inspiration to every piece she crafts for the platform.