
There’s something timeless about the warm, spiced aroma of pumpkin pie wafting through the kitchen.
Whether it’s Halloween, Thanksgiving, a cozy Sunday afternoon, or just an excuse to enjoy fall flavors, pumpkin pie is a must-bake classic.
And if you’ve ever struggled with soggy crusts, bland filling, or cracked tops, you’re in the right place.
In this post, I’m sharing a step-by-step, foolproof pumpkin pie recipe based on real kitchen-tested tips from an expert baker.
From choosing between homemade and pre-made crusts to warming the filling for perfect texture, we’re covering everything you need to make the best pumpkin pie you’ve ever had. Plus a few clever tricks you won’t find on the back of a can.
Let’s dive into your new favorite fall dessert.
🧡 Why You’ll Love This Pumpkin Pie Recipe
This pumpkin pie isn’t just good, it’s next-level delicious, thanks to a few simple yet powerful baking techniques.
1. Rich, Buttery Crust
The crust is more than just a container for the filling. It’s a flavor powerhouse. Made from scratch with butter, it bakes up golden, crisp, and perfectly flaky. While you can use a pre-made crust for convenience, a homemade butter crust adds texture and depth that’s hard to beat.
“If you blind bake a butter crust, it turns out amazing and perfect and golden and delicious.”
2. Silky-Smooth Filling
This pie’s filling is a creamy custard base made with pumpkin puree, eggs, brown sugar, and evaporated milk. When whisked and warmed, the result is ultra-smooth with no lumps or cracks. It’s not just sweet—it’s full of warm spices and a velvety texture that practically melts in your mouth.
3. Flavor That Screams Fall
From cinnamon and ginger to cloves and nutmeg, each bite bursts with cozy, autumnal flavor. Want to customize? You can add allspice or cardamom to give it your unique twist.
4. Bakes Beautifully
No more soggy bottoms or cracked tops. This method walks you through blind baking, warming the filling, and even using a hair dryer to remove bubbles. You’ll end up with a gorgeous pie that looks as good as it tastes.
5. Beginner-Friendly + Flexible
Even if you’re new to baking, this recipe breaks everything down step by step. Use what you’ve, whether homemade or pre-made crust, canned or fresh pumpkin, and adapt it based on your time and taste.
📋 What You’ll Need: Ingredients & Equipment
Here’s a clear, organized table of everything you’ll need to make this pumpkin pie from start to finish.
🧂 Ingredients Table
| Ingredient | Amount | Notes |
|---|---|---|
| Brown Sugar (packed) | 3/4 cup (160g) | Use a scale to avoid lumps; packed brown sugar adds depth and moisture. |
| Salt | 1/2 teaspoon | Enhances sweetness and balances flavors. |
| Ground Cinnamon | 1/2 teaspoon | Classic fall spice. |
| Ground Ginger | 1/2 teaspoon | Adds warmth and zing. |
| Ground Cloves | 1/8 teaspoon (pinch) | Strong flavor—just a touch. |
| Ground Nutmeg | 1/4 teaspoon | Freshly grated recommended for aroma. |
| Optional Spices | 1/4 teaspoon each | Allspice or cardamom for custom spice blends. |
| Pumpkin Puree | 1 can (15 oz) | Libby’s brand preferred; smooth and richly colored. |
| Eggs (room temperature) | 3 large | Helps bind the custard. |
| Evaporated Milk | 1 can (12 oz) | Freshly grated is recommended for aroma. |
🧰 Equipment Table
| Tool | Purpose |
|---|---|
| Pie Dish (9-inch) | To hold your beautiful crust and filling. |
| Rolling Pin | For flattening homemade pie dough. |
| Pastry Mat | Helps transfer rolled dough neatly to your pie dish. |
| Parchment Paper | It can be shaped and reused as an easy pie weight. |
| Pie Weights or Dried Beans | Prevents crust from puffing up during blind bake. |
| Foil (Reusable or Regular) | For applying the optional egg wash to the crust. |
| Mixing Bowl | Ensures precise oven temperature. |
| Whisk | For smooth, lump-free mixing. |
| Kitchen Scale | Makes measuring sugar more accurate (and easier). |
| Oven Thermometer (optional) | To warm the filling for a better texture and quicker bake. |
| Small Saucepan (optional) | For applying the optional egg wash to the crust. |
| Brush | For applying optional egg wash to the crust. |
| Hair Dryer (optional) | Removes bubbles from the surface before baking. |
7 Steps to Make Homemade Pumpkin Pie
🥧 Step 1: Prepare the Perfect Pie Crust
Let’s kick things off with the foundation of any great pumpkin pie: the crust.
If you’re going the homemade route, this is where you set the stage for buttery, flaky magic. Roll your chilled pie dough out on a floured pastry mat to about 1/4 inch thick. A pastry mat helps you transfer the dough easily into your pie dish without tearing or sticking.
Once rolled, carefully transfer the dough into your 9-inch pie dish. Roll it over your pin or mat and gently unroll it into place.
Let it relax into the corners of the pan—don’t stretch it, or it might shrink while baking.
Now, let’s make those edges pretty:
- Trim the overhang so that there is about 1 inch beyond the rim.
- Fold the excess dough under to create a thick border.
- Crimp the edges however you like—classic finger pinch, fork press, or spoon scallop.
“Fold our pie dough underneath to have a nice thick edge that’s clean and beautiful.”
Now here’s a power move: freeze your shaped crust for at least 20 minutes. This stops shrinking, puffing, or warping during baking. You can even make several crusts in advance and freeze them, great for the holidays!
🔥 Step 2: Blind Bake the Crust
If you’re using a homemade butter crust, blind baking is essential for achieving a crisp, golden bottom. Preheat your oven to 425°F (or 400°F if you’re using a store-bought crust and skipping this step).
To blind bake:
- Take a square of parchment paper and fold it up like you’re making an old-school snowflake. Cut off the edges so it fits your pie dish, then snip the sides to create little frills.
- Place the paper inside your frozen crust.
- Fill with pie weights, dried beans, or even a triple-layered foil ring that you’ve shaped to fit snugly in the pie. The goal is to hold the crust in place and prevent bubbling or sagging.
“This is a nice barrier to protect it… it holds everything up and keeps your pie perfectly shaped.”
- Bake for 15 minutes, then remove the weights and parchment paper, and continue baking for an additional 5 minutes to dry out the base.
Blind baking gives your crust a head start, which is essential for custard pies like pumpkin. It ensures the bottom doesn’t end up soggy or raw once the wet filling is added.
🥄 Step 3: Make the Custard Filling
Time to make the star of the show the pumpkin custard.
In a large mixing bowl, add the following ingredients:
- 3/4 cup packed brown sugar (160g) – Use a scale for accuracy and to avoid lumps. Packed sugar often hides hard clumps, and we want a smooth custard.
- 1/2 tsp salt – For balance and contrast.
- 1/2 tsp cinnamon
- 1/2 tsp ground ginger
- 1/8 tsp ground cloves (just a pinch)
- 1/4 tsp ground nutmeg – Freshly grated if possible for maximum aroma.
Whisk all the dry ingredients until they’re well combined. This is your base spice mix. Want to get creative? Add 1/4 tsp allspice or 1/4 tsp cardamom for a twist on the traditional flavor.
Next, add:
- 1 can (15 oz) pumpkin puree – Libby’s is the gold standard for a reason: great consistency, rich color, and ideal moisture levels.
- 3 large eggs, room temperature – These bind the custard and give it structure.
- 1 can (12 oz) evaporated milk – Alternatively, substitute heavy cream for an ultra-rich version.
Whisk everything together until smooth and silky. Watch for lumps, especially those from the sugar, and ensure it’s all well combined.
“Pumpkin pie is an amazing custard pie… eggs are gonna bind everything together and give us that wonderful silky consistency.”
🌡️ Step 4: Warm the Filling (Optional but Awesome)
Here’s the step that separates good pies from great ones.
You don’t want to add a cold filling into a hot oven. It can cause uneven baking, where the edges cook too fast and the center stays underdone. It may also create cracks as the custard expands too quickly.
So instead, warm it gently:
- Pour the prepared filling into a medium saucepan.
- Heat it over medium-low to low heat.
- Stir continuously until the mixture is warm to the touch. You should see a bit of steam, but don’t let it boil.
This step also helps remove any air bubbles you introduced while whisking. Those bubbles can lead to pockmarks or cracks on the surface of the pie.
“This is nice and warm… when I stir, I’m removing a lot of the air bubbles… and air bubbles are not your friend for custard.”
Warm filling = faster bake time, smoother texture, and fewer surface flaws.
🍳 Step 5: Apply an Egg Wash (Optional)
Want a glossy, golden pie crust edge that looks like it came from a bakery?
Whisk together:
- 1 egg
- 1 tbsp milk, cream, or water
Then lightly brush it around the edge of the crust right before pouring in the filling. It gives the crust a beautiful color and shine. If you don’t want to waste the leftover egg wash, save it in the fridge for scrambled eggs the next morning!
“You could brush with a little bit of cream… it’ll give you a similar situation.”
🧁 Step 6: Fill and Bake the Pie
Now comes the moment of truth: filling and baking your masterpiece.
For homemade or blind-baked crust:
- Preheat your oven to 400°F.
- Pour the warm filling into the crust until it reaches just below the rim.
- Place the pie on a baking sheet (to catch any spills).
- Bake at 400°F for 15 minutes, then reduce oven temperature to 350°F.
- Continue baking for 35 to 45 minutes, until the edges are set and the center jiggles slightly when the pan is moved.
“We’re gonna bake this until the center just jiggles softly.”
If you’re using a shallow pre-made frozen crust, you’ll likely have enough filling for two pies. Bonus: extra pie = extra happy people.
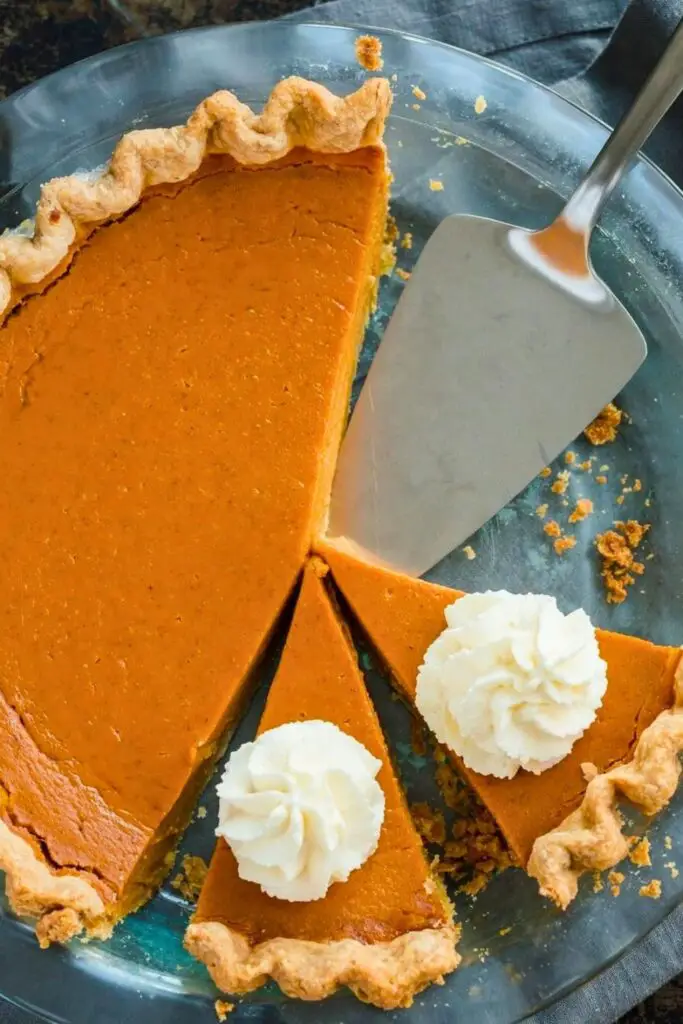
💡 Step 7: Cool, Slice, and Serve
Once your pie is baked, don’t dig in right away. Custard pies need time to set.
Here’s how to finish it off right:
- Remove the dish from the oven and place it on a wire rack.
- Let it cool for at least 2 hours at room temperature.
- Then transfer to the refrigerator for chilling (optional, but ideal for cleaner slices).
“Cool for at least 2 hours… the filling continues to set as it cools.”
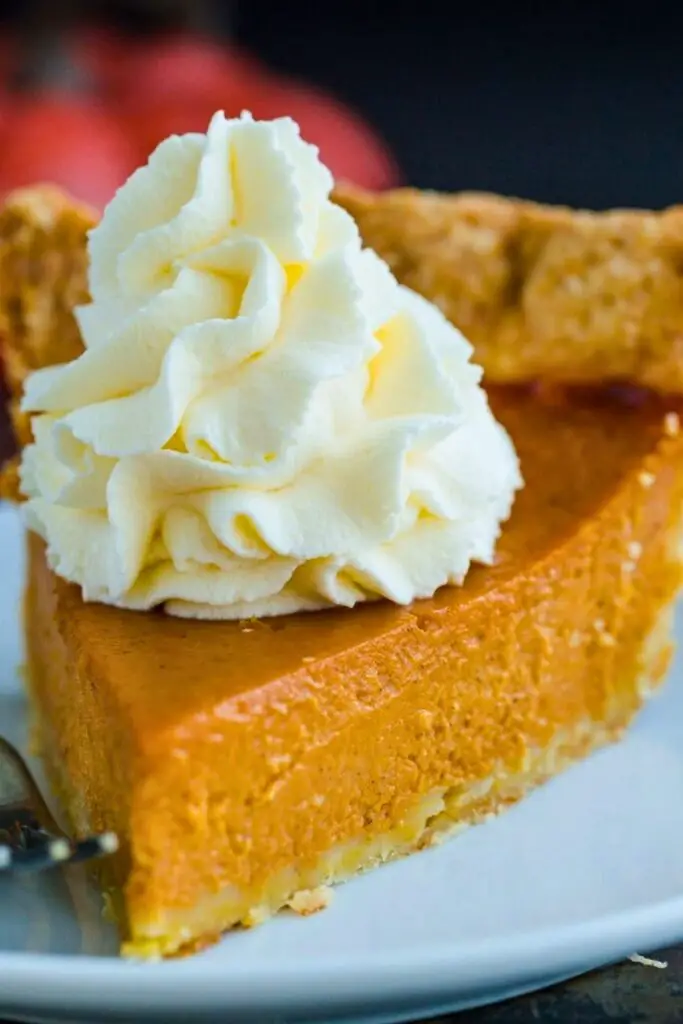
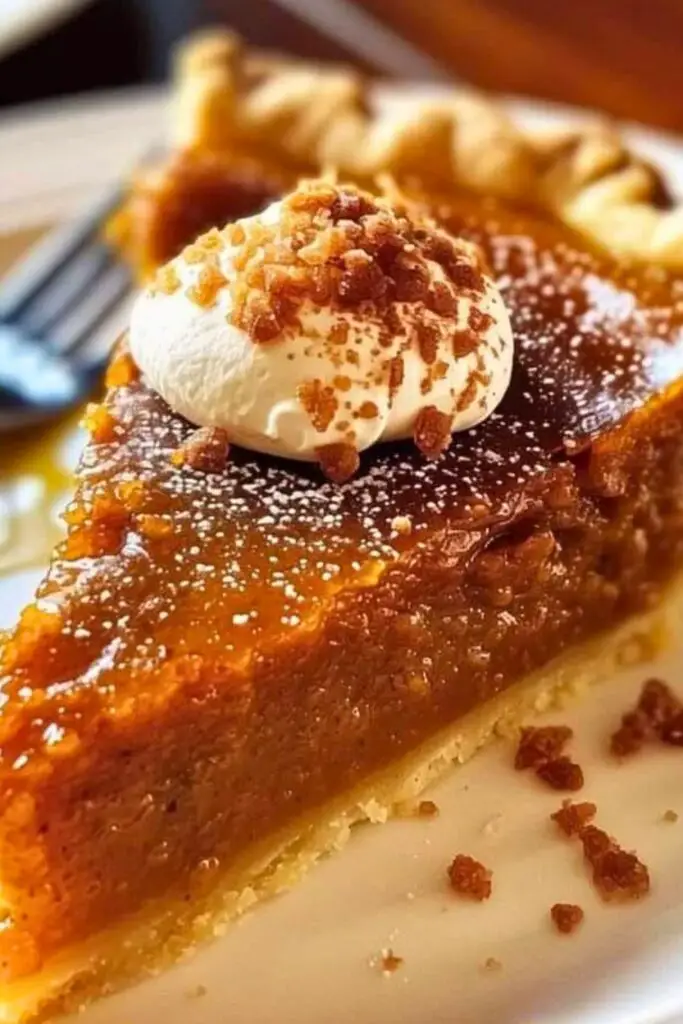
✨ Toppings That Take It Over the Top:
- A big dollop of whipped cream
- Dusting of cinnamon or nutmeg
- A drizzle of caramel sauce
- Or even a side of vanilla ice cream
And if the top has bubbles or texture issues? A quick blast of a hair dryer right before baking smooths it all out.
🏁 Bonus: Cold vs. Warm Filling Bake-Off
Curious whether warming the filling makes a difference?
The video did a side-by-side test:
- Pie A (warmed filling) baked faster and had a smoother top.
- Pie B (cold filling) took longer and had a slightly bumpier surface.
Both were delicious, but the warm-filled pie had better consistency and appearance. In a time crunch, cold works—but if you can, warm it.
“The difference really so far was that this took 10 minutes longer to bake… the texture is a little bit more bumpy on top.”
🎯 Tips for the Best Pumpkin Pie at Home
Mastering pumpkin pie isn’t just about following the recipe. It’s about nailing the little details that elevate a good pie into an unforgettable one. Here are tried-and-true tips drawn straight from the baking process:
🔥 1. Blind Bake the Crust
If you’re using a homemade butter crust, don’t skip the blind baking step. This pre-baking step yields a flaky, golden, and non-soggy bottom. Be sure to use pie weights or a foil mold to prevent the crust from puffing.
🧊 2. Freeze Your Pie Shell Before Baking
Pop your prepared crust into the freezer for at least 20 minutes. A frozen shell retains its shape better in the oven, helping to avoid shrinking or sagging.
🥄 3. Warm the Filling Gently
Warming your custard filling before baking ensures even cooking and a silkier texture. It also removes air bubbles that can cause cracks or uneven tops.
“You never want to put ice-cold anything in the oven unless it’s pastry crust.”
💨 4. Use a Hair Dryer for a Smooth Finish
Yes, seriously! If bubbles bother you or you want that perfectly smooth top, give your filled pie a quick blast with a hair dryer before baking.
🥚 5. Egg Wash for a Beautiful Crust
An egg wash makes the crust shiny, golden, and more appetizing. It’s a simple trick that gives your pie a professional touch.
“Brush with a little bit of cream or egg—it gives you a beautiful, glossy finish.”
🍽️ Pumpkin Pie Serving Suggestions
Pumpkin pie is iconic on its own, but there are a few simple ways to dress it up and impress your guests:
🧁 1. Classic Whipped Cream
You can never go wrong with a generous dollop of freshly whipped cream. Add a pinch of cinnamon or nutmeg on top for an extra touch of flair.
🍦 2. With Ice Cream
Pair your warm pie with a scoop of vanilla bean or cinnamon ice cream. The contrast of cold and warm is heavenly.
🍁 3. Maple Whipped Cream
Whisk a tablespoon of pure maple syrup into your whipped cream for a fall-inspired twist. This adds a sweet, earthy layer that complements the spices.
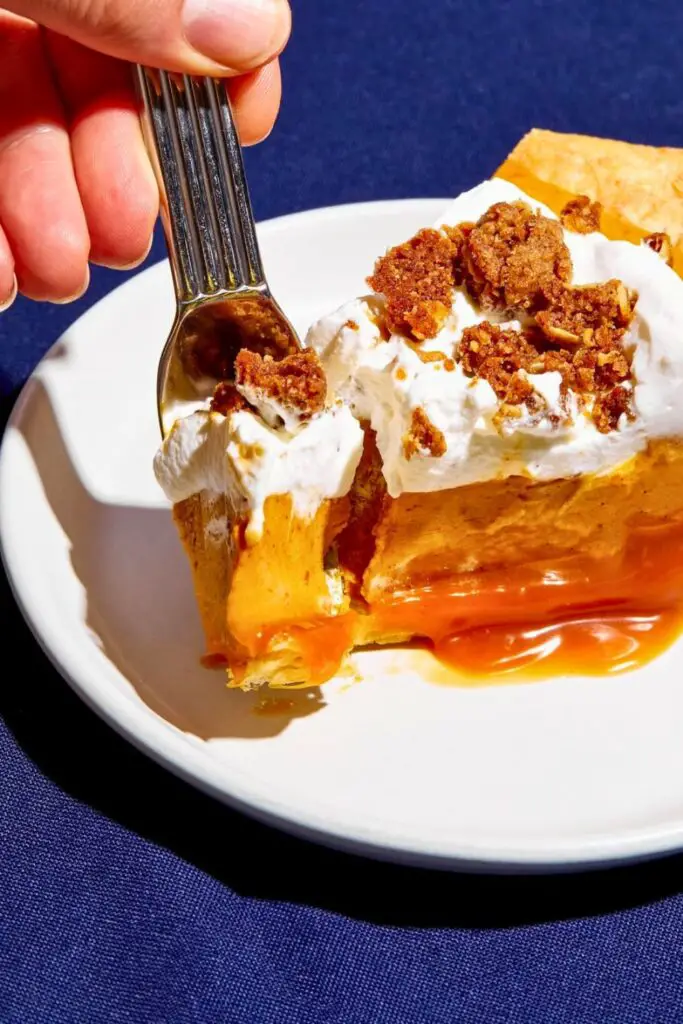
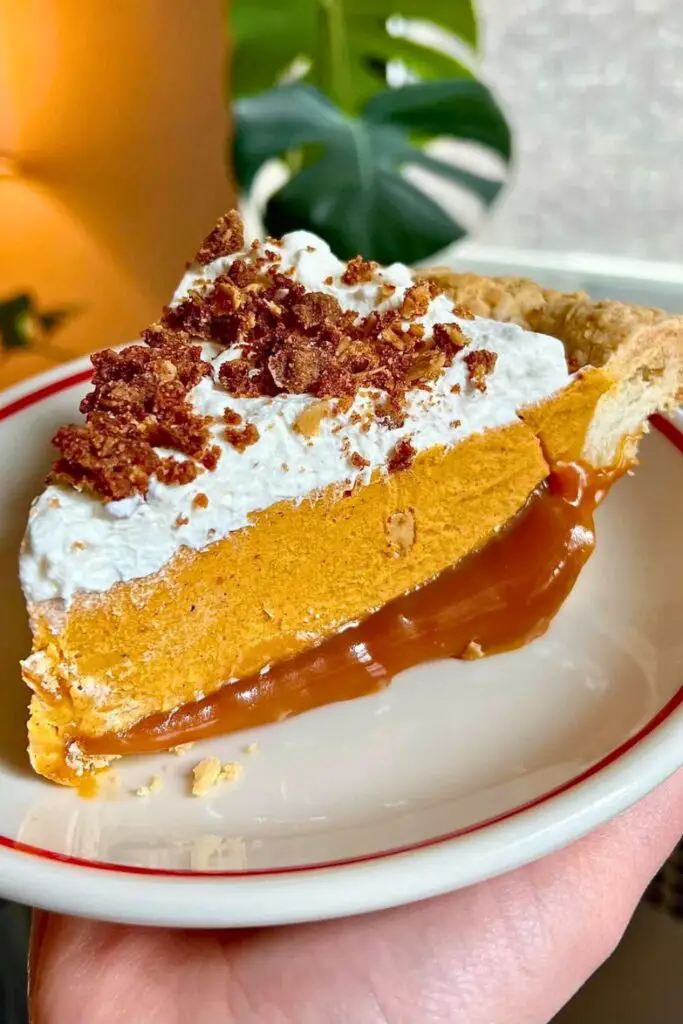
🍬 4. Caramel Drizzle
Drizzle warm caramel sauce across each slice just before serving. It adds richness and visual appeal.
🥜 5. Pecan or Walnut Garnish
Sprinkle a few candied pecans or toasted walnuts over the whipped topping for crunch and flavor contrast.
🌀 Pumpkin Pie Variants You Can Try
Don’t get stuck in a pie rut! Here’s a handy table of creative pumpkin pie twists you can try based on your preferences, dietary needs, or flavor cravings:
| Variant Name | Key Ingredients | Flavor Profile | Why You’ll Love It |
|---|---|---|---|
| Maple Pumpkin Pie | Replace part of brown sugar with maple syrup | Warm, rich, slightly earthy | Perfect for maple lovers; deep fall flavors |
| Pumpkin Cheesecake Pie | Add a layer of cheesecake filling beneath the pumpkin | Tangy and creamy | Combines two classic desserts in one bite |
| Spiced Chai Pumpkin Pie | Add chai spice mix (cardamom, black pepper, etc.) | Bold, spiced, aromatic | For tea lovers and spice adventurers |
| Chocolate Pumpkin Pie | Stir in melted dark chocolate or top with ganache | Rich, bittersweet + earthy pumpkin | Great for chocolate lovers looking for something new |
| Coconut Pumpkin Pie | Use coconut milk instead of evaporated milk | Creamy with a tropical note | Dairy-free, with a slight coconut background |
| Bourbon Pumpkin Pie | Add a splash of bourbon or rum to the filling | Subtly boozy, deep caramel notes | Adult-friendly, cozy twist |
| Gluten-Free Pumpkin Pie | Replace part of the brown sugar with maple syrup | Light, crust-free option | Ideal for gluten-sensitive guests |
| Vegan Pumpkin Pie | Sub flax eggs + coconut milk and vegan crust | Plant-based, creamy | Totally dairy- and egg-free, without sacrificing flavor |
| Pumpkin Pecan Pie Mash-Up | Half pumpkin custard, half pecan topping | Sweet, crunchy, spiced | Texture bomb with smooth custard and nutty crunch |
| Pumpkin Pie Bars | Use gluten-free pie crust or a crustless version | Easy to serve, portable | Perfect for potlucks or slicing into squares |
🍂 Final Thoughts: Bake, Slice, Savor
Pumpkin pie is more than just a dessert. It’s a celebration of comfort, tradition, and flavor. Whether you’re making it for Thanksgiving, a chilly fall evening, or just because you’re craving something sweet and spiced, this recipe is designed to help you nail it every time.
From the flaky homemade crust to the silky, warmly spiced filling, each slice of this pie brings together the best parts of fall baking.
And with tips like warming the filling, blind-baking the crust, and adding a shiny egg wash, your pie will look as incredible as it tastes.
So go ahead, gather your ingredients, roll out that dough, and turn your kitchen into a slice of autumn magic. And don’t forget the whipped cream. 😉
🔗 You May Also Love:
Looking for more fall desserts that wow? Check out these seasonal favorites:
🥮 Best Southern Peach Cake Recipe You’ll Love
A warm, buttery cake layered with juicy peaches and Southern charm. Perfect for cozy weekends.
🎃 Best Pumpkin Bars Recipe for Fall
Soft, spiced, and topped with cream cheese frosting, your new favorite pumpkin treat is in a 9×13 pan.
🧁 Delicious Pumpkin Muffins for Cozy Fall Days
Moist, fluffy, and bursting with pumpkin flavor, this is ideal for breakfast, snacks, or a fall brunch.

Ella Foster, co-founder of FoodBears.com, is a skilled writer whose love for cooking fuels her creative work. Her passion for experimenting in the kitchen brings authentic flavor and culinary inspiration to every piece she crafts for the platform.