Creating a homemade brick pizza oven has always been a dream of mine. There’s something incredibly satisfying about crafting an oven with my hands and then using it to bake delicious, perfectly crispy pizzas.
What draws me to this project is how a DIY brick pizza oven can transform any backyard into the ultimate gathering spot.
Whether an experienced builder or a complete novice, exploring various designs can spark some great ideas.
Each oven offers unique features and benefits, making the process of choosing one both fun and informative.
Plus, seeing different styles can help you find one that best suits your space and needs.
1. Rustic Stone-Hearth Pizza Oven
I fell in love with the idea of a Rustic stone-earth pizza Oven the moment I saw one. It gives my backyard a charming, old-world feel.
It’s not just about the look, though. The stone provides excellent insulation, making pizza nights unforgettable.
To build this oven:
- Start with a sturdy base. Using split-face cinder blocks ensures a long-lasting structure.
- Add layers of firebrick to create the hearth. This helps in retaining heat.
I remember gathering my materials, following instructions carefully, and watching as my oven took shape. It was a combination of hard work and creativity.
When you start your project, remember to browse different designs. The Homemade Pizza School offers tremendous step-by-step guides.
Tip:
Using natural stone veneer not only adds elegance but also improves insulation. According to BrickWood Ovens, it’s a great choice.
Here’s what you need:
- Firebrick for the base
- Natural stone veneer for the exterior
- Concrete for the foundation
Nothing beats the satisfaction of pulling a perfectly cooked pizza from an oven I built myself. Cooking in a rustic stone hearth oven is more than just making food; it’s creating memories.
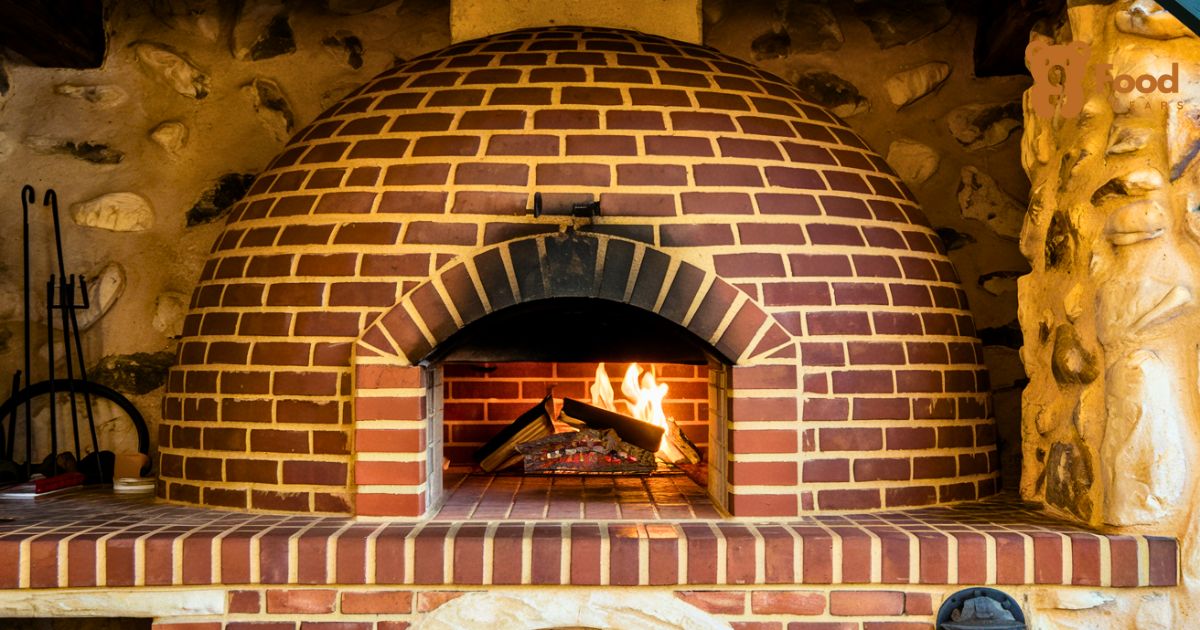
2. Mediterranean Brick Dome Oven
I love the Mediterranean Brick Dome Oven for its stunning design and efficient cooking. It’s perfect for making those delicious, crispy pizzas.
Start by laying bricks in a circular pattern using high-heat mortar. This ensures the oven can withstand high temperatures.
Steps to Build
- Use a wood shim to guide the angle and curvature.
- Lay each brick, remove the shim, and fill the space with mortar.
- Continue building the dome by placing bricks next to or over the opening.
Tips
- Leave enough clearance around the oven. At least 10 inches on the sides and back, 18 inches on top, and 30 inches below.
- Use steel rebar in the foundation for added support.
Building this oven makes cooking pizza an experience you and your family will cherish.
For more detailed guidance, check out these helpful resources on building a pizza oven dome and DIY brick pizza ovens.
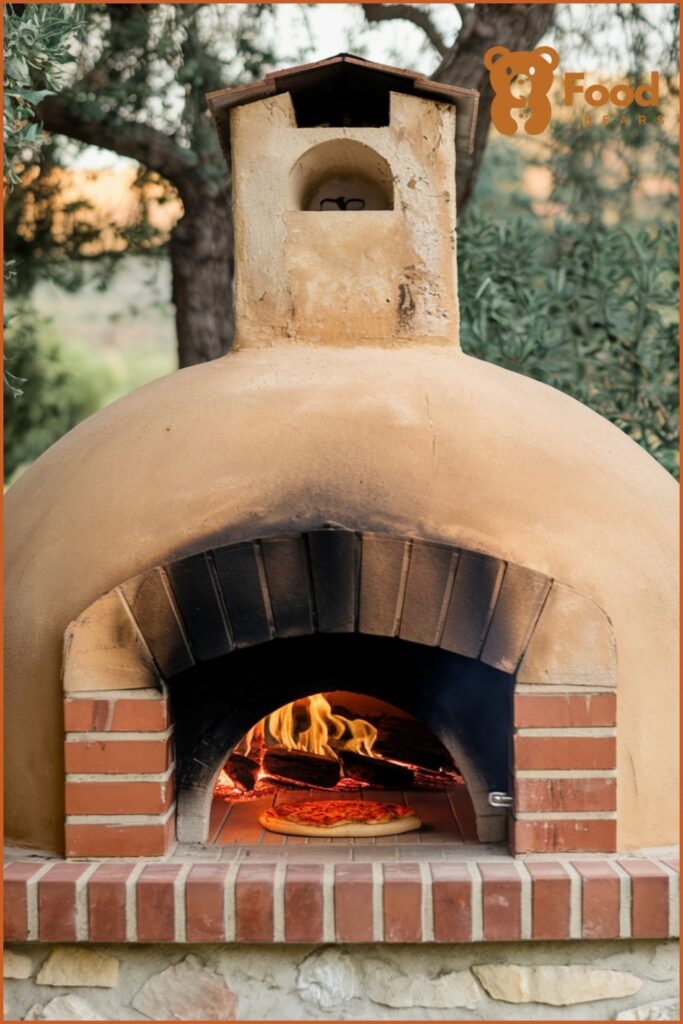
3. Tuscan Terrace Pizza Oven
I love the idea of a Tuscan terrace pizza oven. It’s perfect for creating a cozy, rustic atmosphere in the backyard. This type of oven often features multi-color brick veneer and a stucco finish.
I used reinforced concrete for extra strength when building the base. It’s important to create a solid foundation to support the brick structure.
Here are some steps to get started:
- Dig and prep the pad site.
- Build a form with 2×10’s for the concrete pad.
- Add class V gravel, leaving eight inches to the top.
The oven dome is a standout feature. It retains heat well, making it ideal for baking and roasting. I usually aim for a dome height of about 15 inches and an opening of about 11 inches. This ensures efficient heat circulation.
I also follow safety guidelines. For example, the oven should have at least 10 inches of clearance from combustible materials around the sides and back.
Materials Needed:
- Bricks
- Mortar
- Stucco
- Reinforced concrete
- 2×10 lumber
- Class V gravel
Building a Tuscan terrace pizza oven adds charm to my backyard and allows me to enjoy delicious homemade pizzas. I highly recommend trying it out!
4. Urban Backyard Brick Oven
I decided to build an urban backyard brick oven to enjoy delicious homemade pizza right at home. It’s a cozy addition to my outdoor space and a fun weekend project.
Here’s what I used for this DIY:
- 47 solid clay bricks, each costing $0.90
- Two 12 x 12-inch pavers, priced at $1.98 each
The whole project cost me less than $50, which is budget-friendly compared to professional brick ovens.
Quick Tips:
- Ensure at least 10 inches of clearance around the oven’s sides and back from combustible materials.
- Maintain at least 18 inches of clearance on the top and 30 inches at the bottom.
These clearances are crucial for safety.
For the oven base, I laid the bricks in a rectangular shape and used the pavers for the oven base.
An arched brick oven can be built in just one day. This design is simple yet effective for urban settings. A sturdy platform is essential, but cinder blocks can also work if you don’t have one.
I love how this project turned out. It’s a great way to add a personal touch to my backyard. Now, I can bake delicious, restaurant-quality pizzas anytime I want.
5. Vintage Brick Barrel Vault Oven
I’ve always been fascinated by vintage designs. A Brick Barrel Vault Oven has an old-world charm that reminds me of classic Italian pizzerias. This design not only looks great but also cooks pizzas perfectly.
When building this oven, start with a sturdy foundation. Use firebricks to create the base. Remember to mix the mortar well to ensure the bricks stay in place.
I used a barrel-shaped arch for the oven’s ceiling. This shape helps distribute the heat evenly and gives the oven its unique look. You’ll need a wooden frame to support the arch while the mortar dries.
A great tip I found is to use a mix of sand, clay, and straw for the insulation layer. This combination keeps the heat inside, making the cooking process more efficient. You can then cover this layer with more bricks for durability.
Materials Needed:
- Firebricks
- Mortar mix
- Wooden frame
- Sand, clay, straw
This vintage design is not just functional but a centerpiece in any backyard. The aroma of a pizza cooking in a barrel vault oven is incredible. Trust me, the effort is totally worth it.
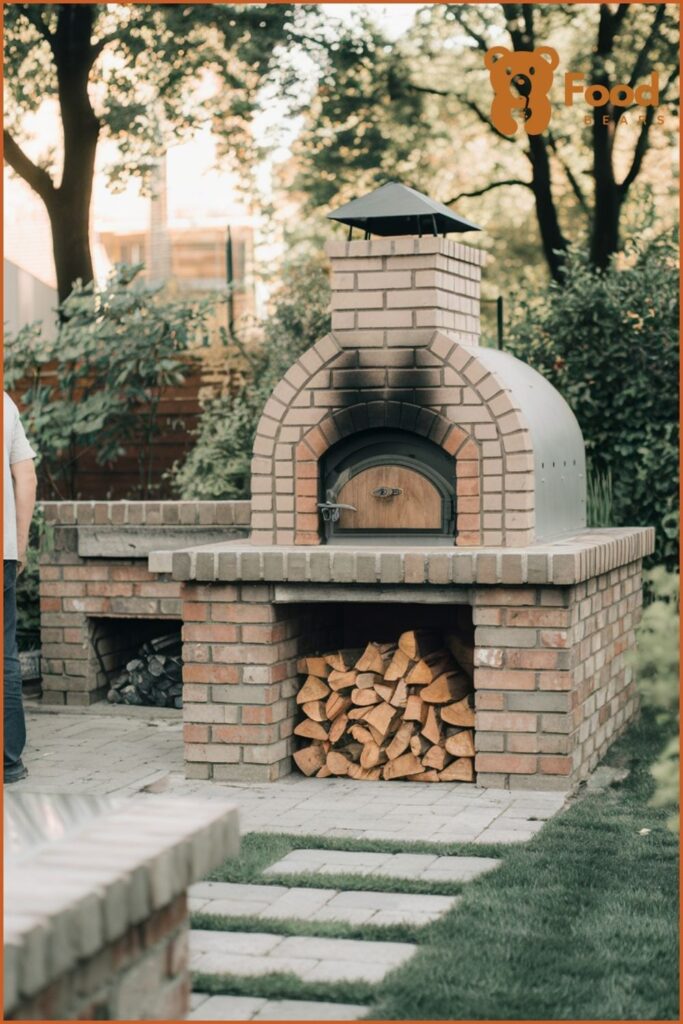
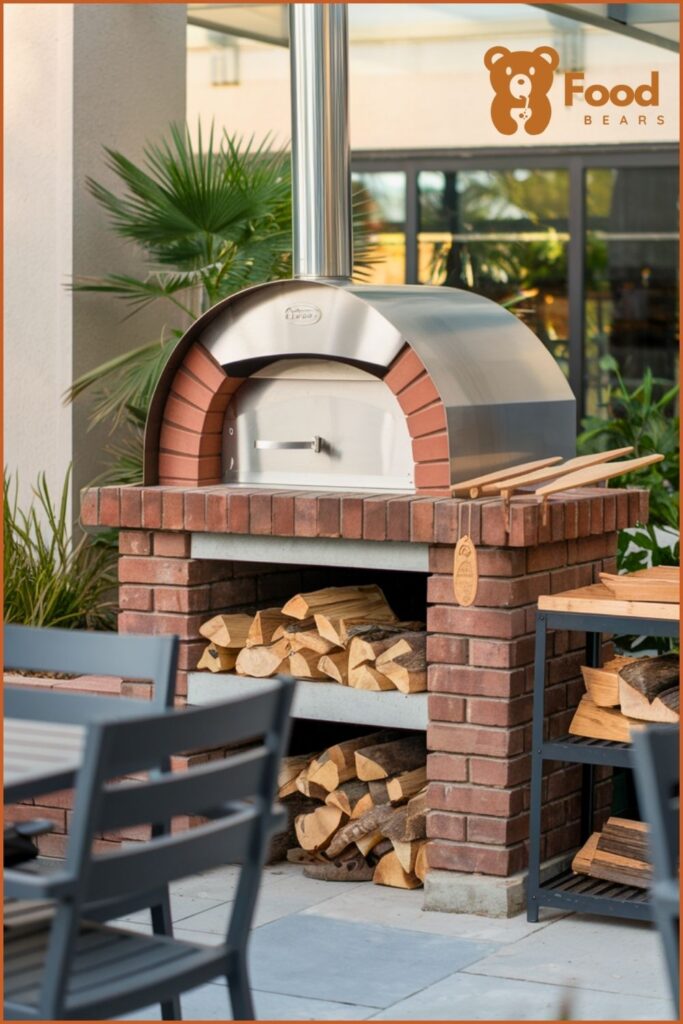
6. DIY Pizza Oven with a Firewood Storage
I decided to add a firewood storage section to my DIY pizza oven project. This design gives it a practical and rustic look.
First, I built the base using strong materials like concrete blocks. The base also stores firewood, keeping it dry and close at hand.
Steps to Build the Firewood Storage
- Foundation: I used paver stones for the base. Next, I created a structure of concrete blocks, leaving an open section for firewood storage.
- Supporting Walls: I filled the open cores of the blocks with concrete to give extra strength.
- Firewood Storage: I left an empty space in the bottom section and added a shelf to organize the wood neatly.
Adding the firewood storage was a rewarding addition. It’s practical and helps maintain the area clear and clutter-free. For more details, check out this step-by-step guide.
My friends love the cozy vibe it adds to the backyard. Now, I have a neat space to store wood and can quickly grab what I need while cooking.
Building firewood storage adds functionality and a unique touch to the pizza oven.
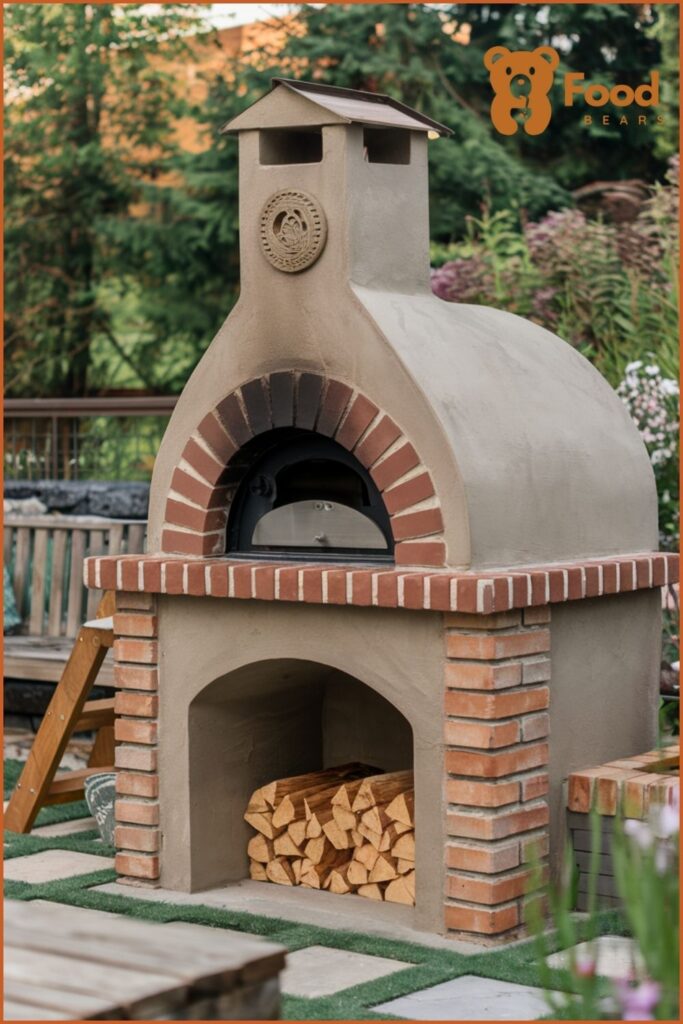
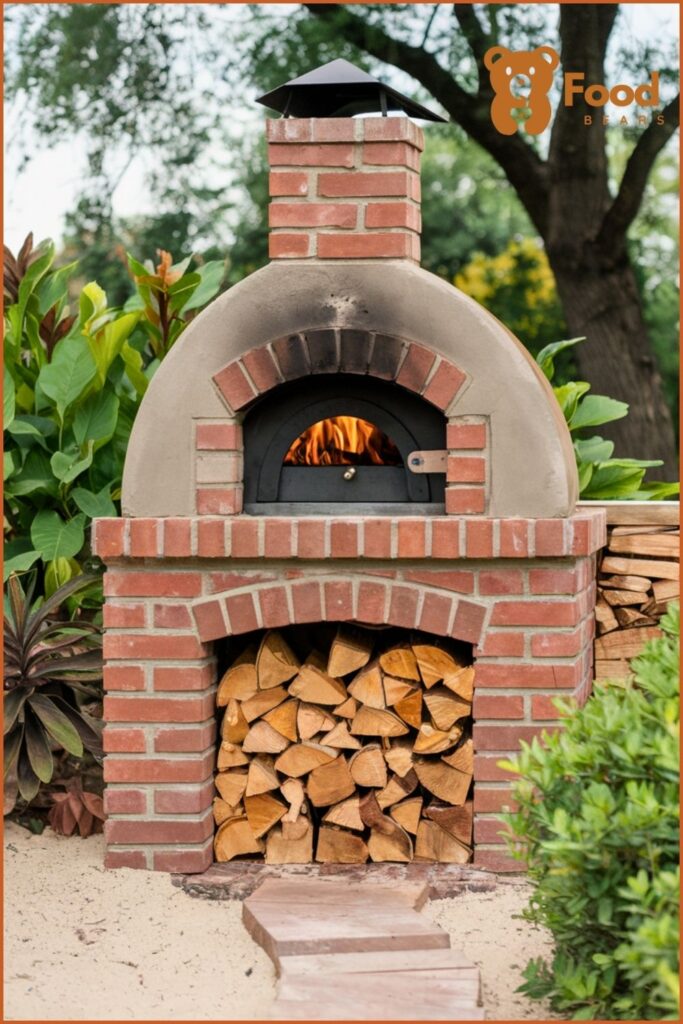
7. Compact Brick Pizza Oven for Small Yards
Sometimes, you don’t need a massive oven to enjoy delicious homemade pizza. I built a compact brick pizza oven in my small backyard, which fits perfectly!
To start, make sure you have a solid base. I used concrete pavers to ensure stability. It’s essential to get this right.
Here are a few tips for keeping your design small and efficient:
- Minimal footprint: Only take up as much space as you need.
- Efficient heat retention: Use high-quality bricks that hold heat well.
- Tall chimney: Helps with better airflow and temperature control.
Materials list:
- Fire bricks
- Mortar
- Concrete pavers for the base
- Insulation (like vermiculite or perlite)
Building it felt like quite an achievement! This guide has great advice for keeping it simple.
One of the coolest things about my oven is that it heats up quickly and evenly. This was achieved by following easy steps for compact designs, which you can find here, and adapting where necessary.
A mini brick pizza oven can still make a big impact. It’s perfect for anyone with limited space who loves outdoor cooking.
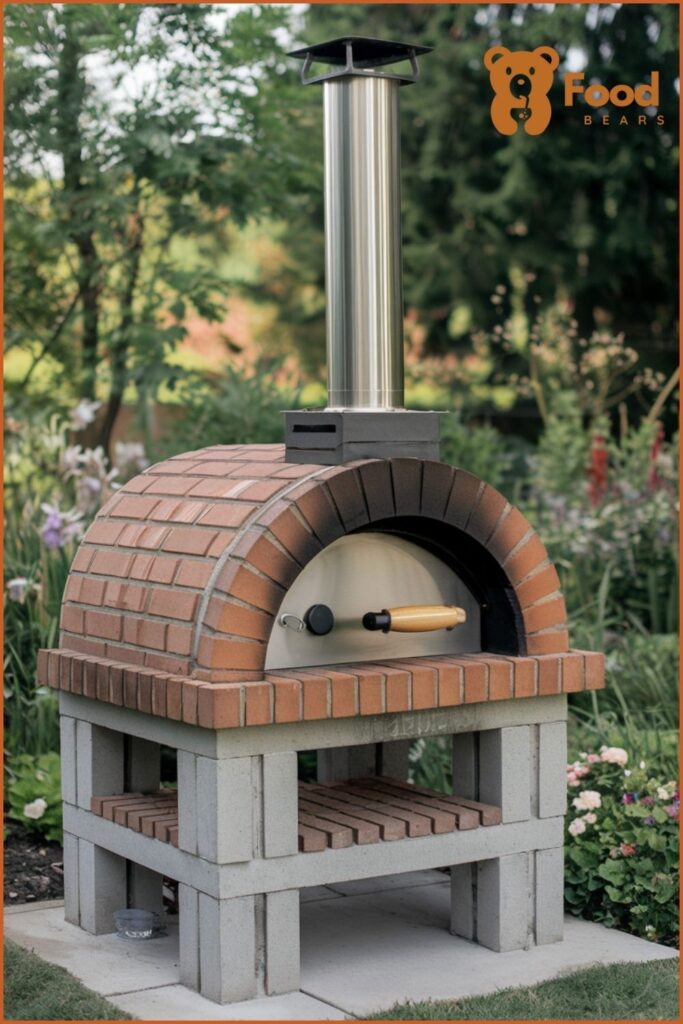
8. Modern Brick and Steel Pizza Oven Combo
I love how the modern brick and steel pizza oven combo blends traditional and contemporary styles. This design uses a brick base for excellent heat retention and a sleek steel dome for a chic look.
The combination makes it durable and efficient. Here are some key features:
- Brick base: Provides excellent heat retention.
- Steel dome: Ensures quick heating and stylish appearance.
- Compact size: Fits well in smaller spaces.
I’ve found that this style is perfect for my backyard. I can achieve a crispy crust with consistent heat, while the steel dome makes cleanup easy. Plus, the modern design always catches my guests’ eyes.
This DIY project is an excellent choice for anyone who combines efficiency with aesthetics. It transforms any outdoor space into a functional and beautiful cooking area. You can find more details on how to build one here.
| Component | Material | Purpose |
|---|---|---|
| Base | Brick | Heat retention |
| Dome | Steel | Quick heating and durability |
| Insulation | Ceramic | Better heat distribution |
Building a modern brick and steel pizza oven is both rewarding and practical. It combines the best of both worlds: the robust heat of brick and the stylish efficiency of steel. This design certainly adds a touch of modern elegance to any backyard.
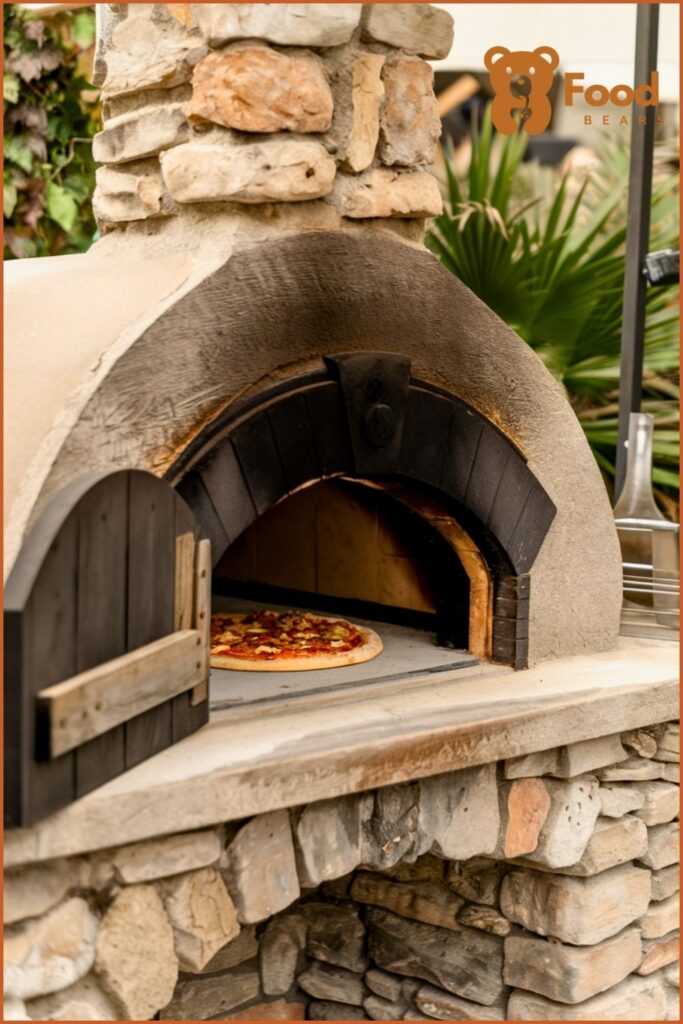
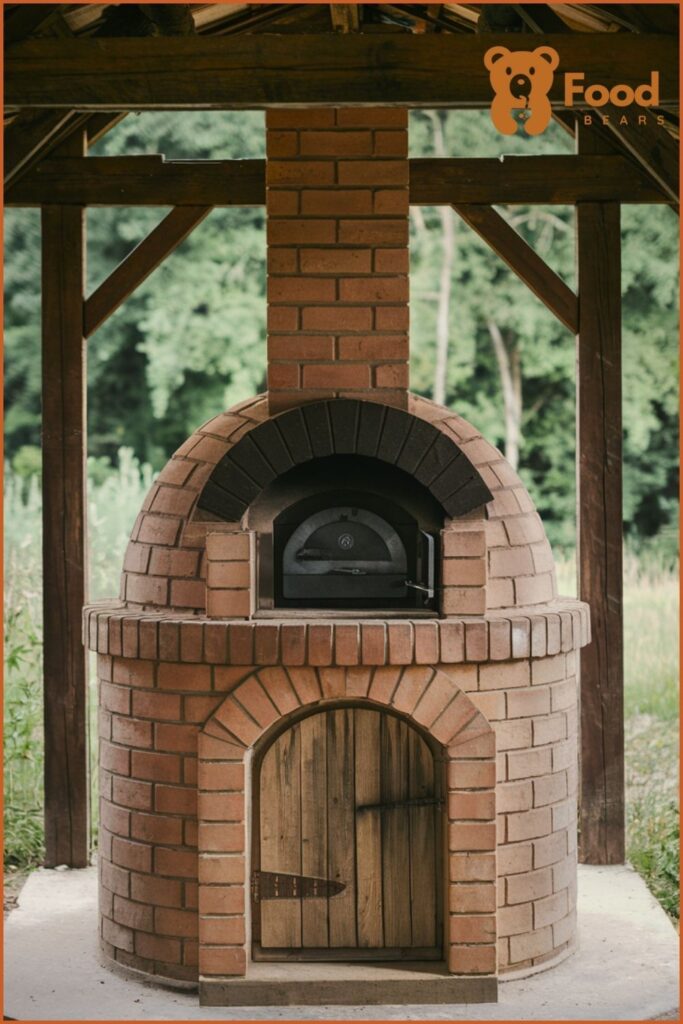
9. Rustic Cottage Brick Pizza Oven
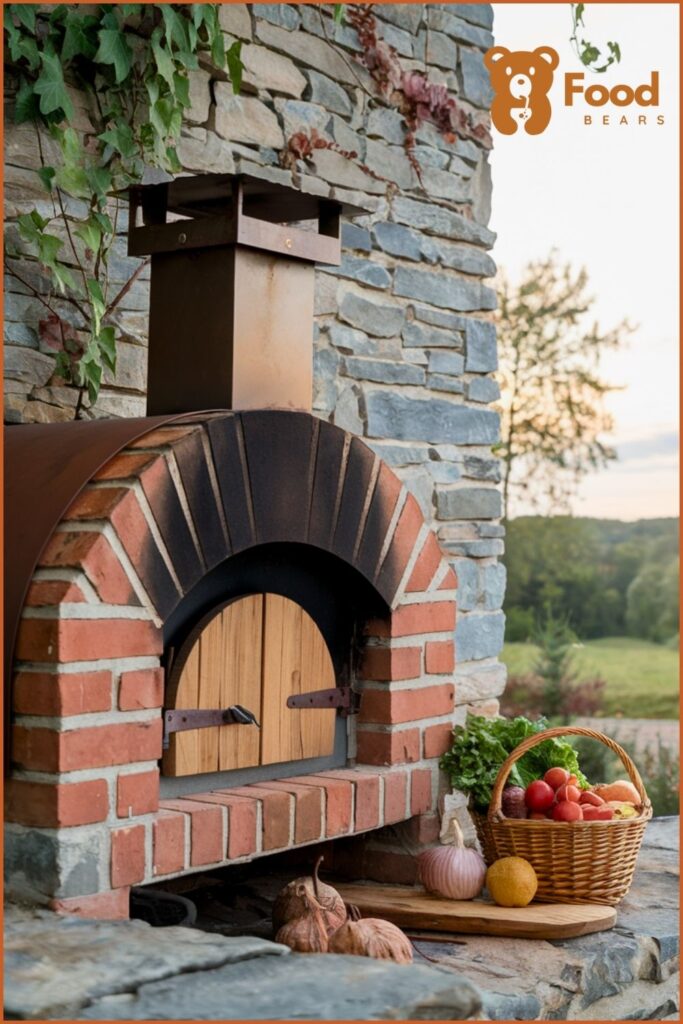
I built my Rustic Cottage Brick Pizza Oven last summer, and it quickly became my favorite backyard feature.
The oven is made from traditional red bricks, giving it a charming, old-world look. I added a stone arch and a wooden door to enhance the rustic feel. These small touches help blend the oven seamlessly with my cottage-style garden.
Here are a few tips for you:
- Use reclaimed bricks for an authentic look.
- Add a stone hearth for baking bread and other goodies.
- Decorate with vines and plants for a cozy feel.
Here’s a simple step-by-step table to get you started:
| Step | Task | Materials Needed |
|---|---|---|
| Build the base | Lay the foundation | Cinder blocks, concrete |
| Stack the bricks | Form the oven chamber | Reclaimed bricks, mortar |
| Add insulation | Improve heat retention | Ceramic fiber, insulation |
| Construct the arch | Create the opening | Stone, bricks |
| Finishing touches | Detail and decorate | Paint, wooden door |
I was inspired by the authentic pizza oven article I read, where others shared their own beautiful designs. The process took time, but the results were worth it for me and my loved ones!
Have fun building your own rustic oven, and enjoy the delicious homemade pizzas and breads you’ll create!
10. Patio Brick Oven with Built-In Seating
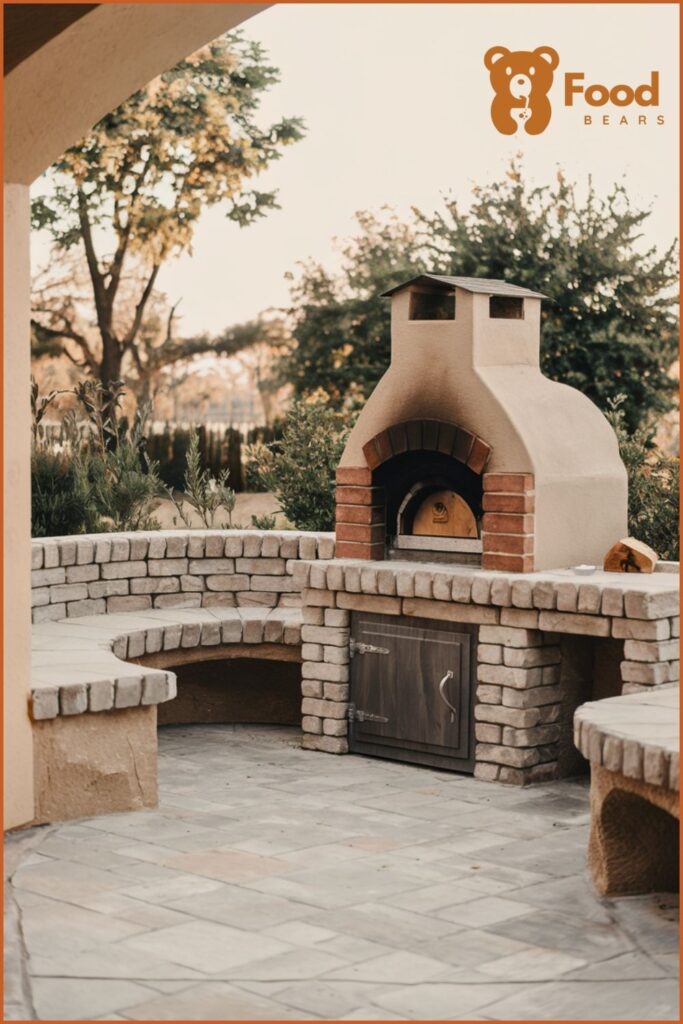
I love combining a brick pizza oven with built-in seating on my patio. It would create a cozy, functional space for friends and family to gather.
Key Features:
- Comfort: Built-in seating offers a comfortable place to sit and enjoy freshly baked pizza.
- Design: The oven’s brick design blends seamlessly with the patio seating.
A family in Maryland created a gorgeous red brick pizza oven that inspired this idea. They built it with durability in mind, ensuring it would last for generations.
Tips for Building:
- Use durable materials for both the oven and the seating.
- Plan the layout to ensure enough space for the oven and comfortable seating.
One TikToker shared a budget-friendly design that cost less than $50. They used solid clay bricks and simple pavers to create a practical and stylish pizza oven.
For safety, remember to maintain proper clearances around the oven. According to Homemade Pizza School, the oven must be at least 10 inches away from any combustible materials.
Transform your patio into a welcoming and warm space with a brick pizza oven and comfy built-in seating for everyone to enjoy.
11. Garden Brick Pizza Oven with Herb Planters
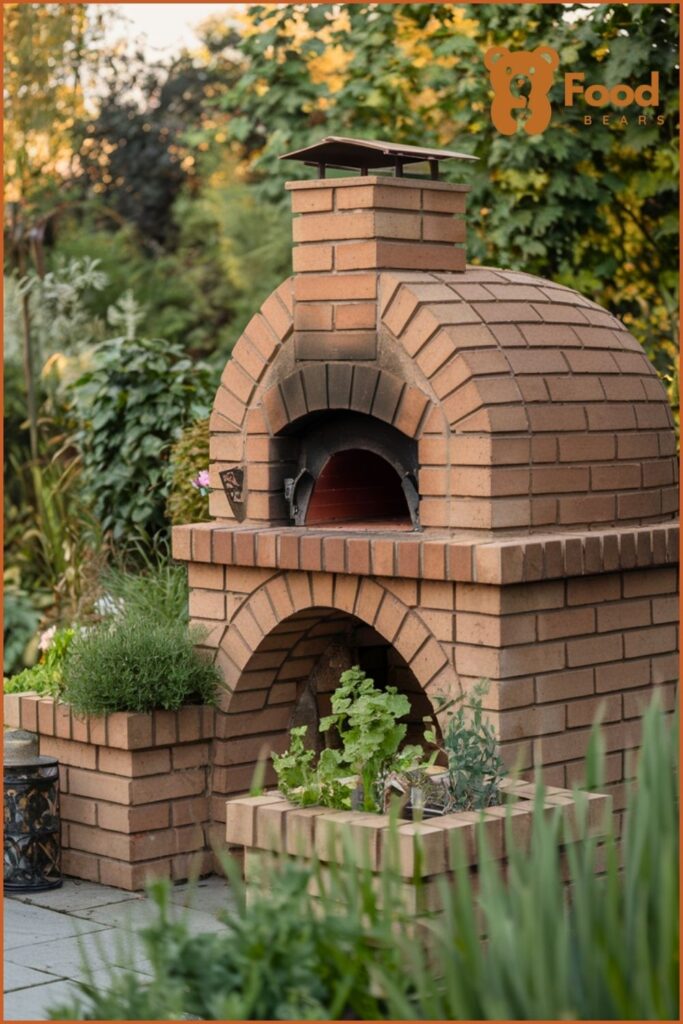
I love the idea of combining a brick pizza oven with herb planters. It’s both functional and beautiful. Imagine picking fresh basil or rosemary and using it right on your pizza!
Building this type of oven takes a bit of planning.
Materials you’ll need:
- Bricks
- Cement
- Sand
- Steel rods
- Herb planters
You’ll start by finding a good spot in your garden. Make sure it’s spacious enough for both the oven and the planters. Then, design a sturdy base for your oven to keep it stable.
Once the base is ready, arrange the bricks in a dome shape to hold in the heat.
Planter Details:
Integrate small planters around the base or sides. Use these to grow herbs like basil, oregano, and thyme.
Benefits:
- Fresh herbs are always at hand
- Beautiful garden feature
- Enhanced flavor for your pizzas
Using fresh herbs right from the garden really elevates the cooking experience.
This pizza oven brings nature into your cooking space. And it looks charming, too!
12. Contemporary Brick Pizza Oven with Glass Doors
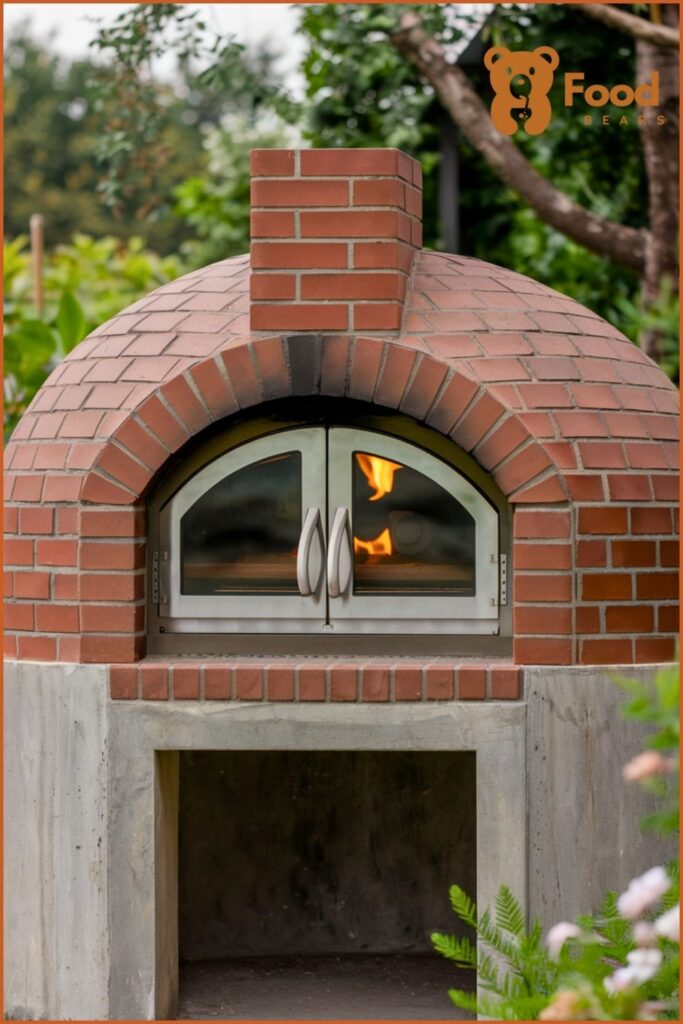
The contemporary brick pizza oven with glass doors is a modern twist on a classic design. When I built mine, I wanted something stylish and functional. The glass doors let me see the delicious pizza cooking inside, which always adds a bit of excitement.
Using glass doors adds a sleek look. I chose tempered glass to handle high temperatures. It’s an eye-catching feature that impresses guests every time.
To build this oven, follow these key steps:
- Create the Base: Make sure the base is level and strong.
- Build the Dome: Use high-quality bricks for durability.
- Install the Glass Doors: Carefully set the tempered glass doors in place.
An essential tip is to use high-temperature-resistant sealant around the doors. This ensures no heat escapes and keeps the oven efficient.
Steps to Build Your Brick Pizza Oven
Building a brick pizza oven involves planning, constructing a solid base, creating the oven dome, and adding necessary insulation. Each step is crucial for your project’s stability, efficiency, and longevity.
1. Planning and Design
Planning and design are the first steps in ensuring your oven fits well in your backyard. I start by sketching a design on paper, noting dimensions and materials. A typical brick oven includes a base, dome, and chimney.
Choosing high-quality materials like fire bricks for the dome and a sturdy base is essential since these directly affect the oven’s performance and lifespan. Check for any local building codes or permits required in your area.
2. Foundation and Base Construction
Creating the foundation and base is crucial for a stable oven. I usually start by digging and leveling the ground where the oven will sit. Then, I built a wooden form to hold the concrete and poured in about 4-6 inches of gravel for drainage.
After tamping the gravel, I pour concrete into the form, smooth it out, and let it cure for a few days. Using concrete blocks or bricks, I build a base that will hold the oven floor, ensuring it’s level and sturdy.
3. Building the Oven Dome
The oven dome is the heart of the pizza oven. Fire bricks are the best choice due to their heat resistance. I start by laying a circular layer of bricks for the dome base and use a sand mold to shape the dome.
Carefully, I lay the bricks in a circular pattern, overlapping slightly to create a strong structure. The bricks should be cut at angles to fit snugly. This part takes patience, as a well-built dome ensures efficient heat distribution.
4. Adding Insulation and Chimney
Insulation is vital for retaining heat. I wrap the dome with ceramic fiber blankets or another insulating material. This step ensures the oven maintains its high internal temperature even when cooking.
Next, I added the chimney, which helps with airflow and smoke ventilation. Using a stovepipe or metal flue, I fit it securely at the top of the dome and seal any gaps. Proper ventilation ensures better cooking and a safer experience.
5. Final Touches and Decoration
After completing the main structure, it’s time for final touches and decorations. I smooth out rough edges and add a plaster layer for a cleaner look. I also like to add tile or stone for aesthetic appeal.
I finish by adding a protective roof or cover to shield the oven from weather elements, ensuring it lasts longer. This final step is about making the oven not just functional but beautiful.
By following these steps carefully, I can efficiently assemble my brick pizza oven, providing a great outdoor cooking experience.

Ella Foster, co-founder of FoodBears.com, is a skilled writer whose love for cooking fuels her creative work. Her passion for experimenting in the kitchen brings authentic flavor and culinary inspiration to every piece she crafts for the platform.