Watermelon and cupcakes are two words that scream summer and sweet fun! But have you ever combined them into one delicious treat? If not, you’re seriously missing out.
Watermelon cupcakes are the perfect dessert for summer parties, birthdays, BBQs, or even a sunny weekend at home. They’re light, fruity, and fun to look at, like a mini watermelon in your hand, but better… because they’re cake!
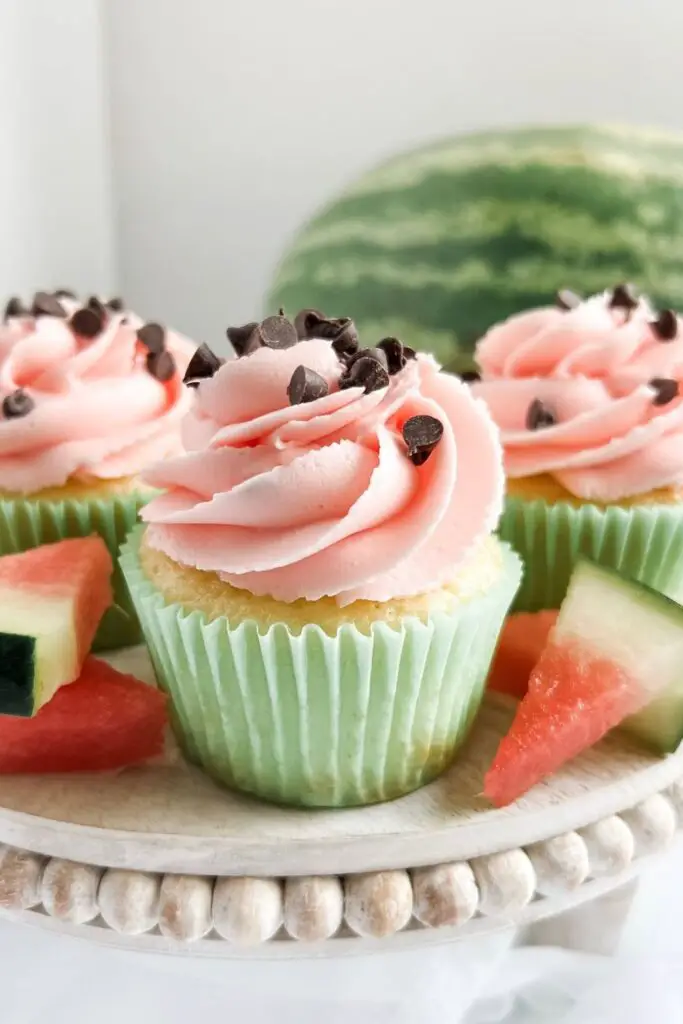
These cupcakes don’t actually have chunks of watermelon inside (unless you want them to), but they’re made to taste like watermelon with a soft, sweet flavor that’s not overpowering. Plus, you get the look of green liners, pink cake, and chocolate chip “seeds.” Cute, right?
Ready to make a batch of these adorable summer cupcakes? Let’s dive into the recipe!
Read more:
Ingredients: Everything You Need to Bake Watermelon Cupcakes
Here’s a quick and easy table to help you prep before baking.
| Ingredient | Amount | Use |
|---|---|---|
| All-purpose flour | 1 ½ cups | Base of the cupcake |
| Baking powder | 1 ½ tsp | Helps the cupcakes rise |
| Salt | ¼ tsp | Balances the sweetness |
| Granulated sugar | ¾ cup | Sweetens the batter |
| Unsalted butter (softened) | ½ cup (1 stick) | Adds moisture and richness |
| Eggs | 2 large | Binds everything together |
| Watermelon extract | 1 tsp | Key flavor ingredient |
| Red or pink food coloring | 2-3 drops | Gives the batter a watermelon hue |
| Mini chocolate chips | ½ cup | “Seeds” in the cupcakes |
| Whole milk | ½ cup | Makes the batter creamy |
| Green cupcake liners | 12 | For that watermelon look |
Step-by-Step: How to Make Watermelon Cupcakes
Let’s walk through the whole process from start to finish. This isn’t just a recipe; it’s your roadmap to baking success. Don’t worry, I’ve got your back!
Step 1: Preheat the Oven and Prepare Your Pan
Preheat your oven to 350°F (175°C). This is the first thing you should do. Preheating ensures your cupcakes bake evenly and rise correctly.
Next, line your muffin pan with green cupcake liners. When they’re done, these will give your cupcakes that fun “watermelon rind” look.
If you don’t have green liners, don’t panic. You can still bake them, but the presentation might be less “watermelon-ish.”
Tip: Set your butter, eggs, and milk on the counter while the oven preheats. They bake better at room temperature.
Step 2: Mix Your Dry Ingredients
Grab a mixing bowl and whisk together:
- 1 ½ cups all-purpose flour
- 1 ½ teaspoons baking powder
- ¼ teaspoon salt
These three are your dry bases. Flour gives structure, baking powder helps the cupcakes rise into fluffy domes, and salt may seem small, but it balances the sweetness and brings out the flavor.
Pro Tip: For an ultra-light batter, use a wire whisk or sift your dry mix. It helps break up clumps.
Step 3: Cream the Butter and Sugar (Make it Fluffy!)
In a separate large mixing bowl, add:
- ½ cup (1 stick) unsalted butter, softened
- ¾ cup granulated sugar
Using an electric hand mixer or stand mixer, beat them together for 2–3 minutes at medium to high speed until the mixture is pale and fluffy.
Think of this step like whipping air into your batter. More air = fluffier cupcakes!
If your butter isn’t soft enough, the mixture will look chunky instead of creamy. You want it smooth and whipped.
Step 4: Add the Eggs and Watermelon Flavoring
Now, crack in your 2 large eggs, one at a time.
- After adding the first egg, mix until fully combined.
- Add the second egg and repeat.
Then stir in:
- 1 teaspoon watermelon extract
- 2–3 drops of red or pink food coloring
This is the fun part—you’ll start to see that gorgeous watermelon pink color come to life. If the color looks too light, add another drop or two until it looks just right.
Don’t overdo the extract. A little goes a long way. Too much, and your cupcakes might taste artificial.
Step 5: Mix the Dry and Wet Ingredients Together
Now, it’s time to bring everything together.
Alternately, add the dry mixture and ½ cup milk to the butter-egg mixture, starting and ending with the dry ingredients.
Here’s the flow:
- Add ⅓ of the dry mix → stir.
- Add ½ of the milk → stir.
- Add another ⅓ of the dry mix → stir.
- Add remaining milk → stir.
- Add final ⅓ of dry mix → stir just until blended.
Important: Don’t overmix. Stir just until you don’t see dry flour anymore. Overmixing = dense, chewy cupcakes.
Step 6: Fold in the Mini Chocolate Chips (“Watermelon Seeds”)
Add ½ cup of mini chocolate chips to your batter. Use a spatula to fold them in gently.
These are your fake “watermelon seeds.” They make the cupcakes look realistic and give you little bursts of chocolate in every bite.
Tip: Dust the chocolate chips with a little flour before folding them in. This helps keep them from sinking to the bottom while baking.
Step 7: Fill the Cupcake Liners and Bake
Use a spoon or cookie scoop to fill each green cupcake liner about 2/3 full. You want to leave enough room for the cupcakes to rise without overflowing.
Place the tray in the center rack of your oven and bake for 18 to 20 minutes.
Don’t open the oven door too early! This can cause the cupcakes to collapse.
How to tell if they’re done?
- A toothpick inserted in the center should come out clean.
- The tops should look slightly golden and bounce back when lightly touched.
Step 8: Let the Cupcakes Cool
Once baked, remove the tray and let the cupcakes sit in the pan for 5 minutes. Then, carefully transfer them to a wire rack to cool completely.
Why cool completely before frosting? Warm cupcakes can melt your frosting, making it slide off or become oily.
While the cupcakes cool, you can move on to making the frosting (see the frosting recipe in the main post).
Extra Touch: Want a Surprise Inside?
If you’re feeling creative, here’s a bonus step:
- Once the cupcakes are cool, cut a small hole in the center (use a cupcake corer or a knife).
- Fill it with watermelon jam or watermelon-flavored candy.
- Cover the top and frost as usual.
It’s a fun surprise your guests won’t see coming!
Watermelon Cupcake Frosting Recipe (Step-by-Step Guide)

The frosting is the crown of your cupcake. And with watermelon cupcakes, we’re not just going for taste; we’re going for style. Think of this as painting your tiny watermelon masterpiece.
Step 1: Gather Your Frosting Ingredients
Here’s what you’ll need:
- ½ cup unsalted butter (1 stick), softened
- 2 ½ cups powdered sugar
- ½ tsp watermelon extract
- 1–2 tbsp heavy cream or milk
- Gel food coloring: red/pink and green
- Optional: Mini chocolate chips or sprinkles
Softened butter = silky smooth frosting. If your butter is too cold, your frosting may look lumpy or split.
Step 2: Cream the Butter
Place your softened butter in a large bowl and beat it with a mixer on high speed for about 2–3 minutes until it’s pale, creamy, and fluffy.
This step is crucial. You want your base to be as smooth as possible.
Step 3: Add Powdered Sugar Gradually
Add powdered sugar in batches (about ½ cup at a time). After each addition, beat until it blends in.
Don’t dump it all at once—you’ll end up in a powdered sugar snowstorm.
Step 4: Add Flavor and Liquid
Now, stir your ½ tsp watermelon extract for that sweet, fruity twist.
Next, add 1 tablespoon of milk or cream and beat until the frosting becomes fluffy and easy to spread or pipe. If it’s too thick, add a little more cream, a teaspoon at a time.
The consistency should hold peaks but still be soft enough to pipe or spread easily.
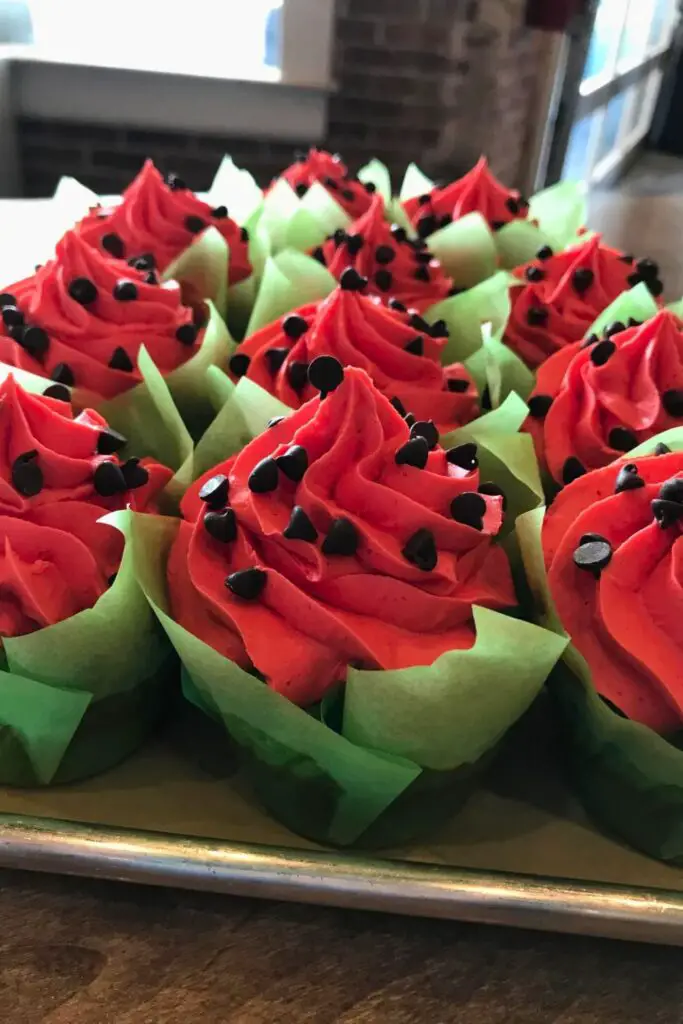
Step 5: Add Color – Let’s Get Creative!
Split your frosting into two bowls.
- Tint one bowl pink or red (to look like the watermelon flesh).
- Tint the other bowl green (for the rind).
Use gel coloring for more vibrant hues without watering down your frosting.
Step 6: Frost Like a Pro
There are two ways to frost:
Option A: Swirl Effect
Place both colors in a piping bag, side by side. When you squeeze, they’ll swirl together on top—beautiful and super watermelon-y.
Option B: Dual Layer
Frost a ring of green around the edge, then fill the center with pink. It’ll look just like a watermelon slice!
Top it off with mini chocolate chips or cute watermelon sprinkles.
Bonus Tip: Chill Before Piping
If your frosting feels too soft, chill it in the fridge for 10–15 minutes. It’ll firm up slightly and hold shape better while decorating.
Creative Watermelon Cupcake Variations
Want to add a twist to the classic version? Try one of these fun variations. Each one adds something special, whether it’s flavor, texture, or surprise.
1. Fresh Watermelon Bites Inside
Dice some fresh, seedless watermelon into tiny pieces. Gently fold them into the batter before baking.
These juicy little bits give the cupcakes a refreshing pop of natural watermelon flavor.
Tip: Pat the watermelon dry with a paper towel before adding to prevent soggy cupcakes.
2. Watermelon Jam Center
Core the center of each baked cupcake and fill it with a spoonful of watermelon jam or jelly.
Cover the hole with frosting, and voilà! You’ve got a surprise inside.
It’s like a jelly-filled donut… only better because it’s cake.
3. Cream Cheese Frosting Twist
If you’re not a fan of buttercream, use a cream cheese frosting base instead. The tanginess pairs really well with the sweet watermelon flavor.
You can still add the extract and colors for that signature look.
4. Watermelon Yogurt Cupcakes
Substitute the milk in your cupcake batter with watermelon-flavored yogurt. This will make the cake extra moist and subtly tangy.
This version is lighter and makes a fun brunch dessert!
5. Chocolate Watermelon Cupcakes
Add 2 tbsp of cocoa powder to the batter for a chocolaty base that still holds the watermelon flavor.
Kind of like a chocolate-dipped watermelon vibe—bold and unexpected!
6. Vegan Watermelon Cupcakes
Swap out eggs for unsweetened applesauce (1/4 cup per egg), and use plant-based milk like almond or oat milk. Choose a vegan butter, and you’re good to go.
Delicious and dairy-free!
Fun Serving Ideas for Watermelon Cupcakes

Once your cupcakes are baked, cooled, and beautifully frosted, it’s time to show them off!
You don’t need a fancy setup to impress—just a little creativity.
1. Watermelon Tray Display
Arrange your cupcakes on a large round tray like a watermelon slice:
- Green-frosted edges facing out.
- Pink-frosted centers in the middle.
- Chocolate chips sprinkled randomly.
It’ll look like you cut into an actual watermelon—totally Insta-worthy!
2. Picnic-Style Vibes
Serve cupcakes on a red-and-white gingham plate or tray to give picnic vibes.
Add a few fresh watermelon wedges around for color and theme.
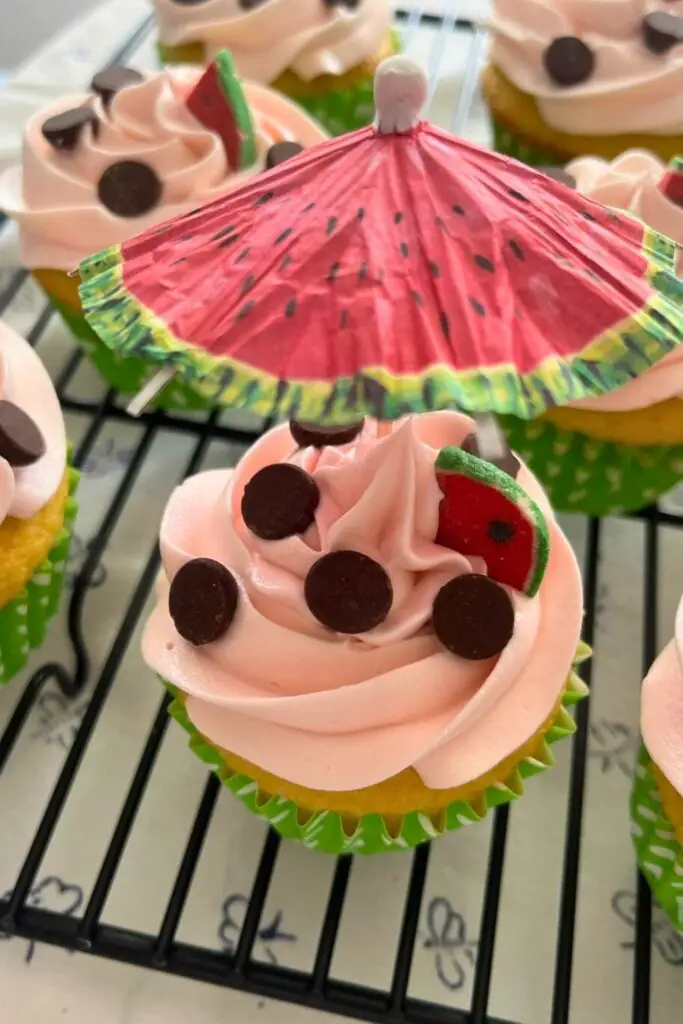
3. Use Watermelon Toppers or Flags
Stick cute toppers in the cupcakes:
- Mini watermelon slice printouts
- Small toothpick flags
- “Hello Summer” phrases
You can even use DIY toppers made from paper and straws. Super budget-friendly and fun!
4. Cupcake Party Jars
Layer a baked cupcake in a mason jar, add frosting, and top with sprinkles.
Seal it with a lid and gift it as a party favor or picnic treat. Looks fancy, but it’s easy!
5. Cupcake Tower
Stack your watermelon cupcakes on a tiered dessert stand. It creates height and catches everyone’s eye at birthday parties or baby showers.
Decorate the stand with real watermelon slices or green/pink flowers.
6. Watermelon Cupcake Bar
Let guests decorate their own!
Set up a small frosting station with:
- Pink and green frosting
- Mini chocolate chips
- Sprinkles
- Watermelon-flavored candies
Kids (and adults) will have a blast.
Conclusion: Watermelon Cupcakes Are a Slice of Joy!
If you’ve made it this far, you’re probably craving something sweet and summery. Watermelon cupcakes bring fun, color, and flavor all in one bite.
Whether baking for a crowd or just treating yourself, these cupcakes will make people smile.
They’re cute. They’re easy. They’re summer in a cupcake wrapper.
So whip up a batch, snap a few pics (they’re Instagram-worthy!), and enjoy every bite because life’s too short not to eat watermelon cupcakes.

Ella Foster, co-founder of FoodBears.com, is a skilled writer whose love for cooking fuels her creative work. Her passion for experimenting in the kitchen brings authentic flavor and culinary inspiration to every piece she crafts for the platform.


