
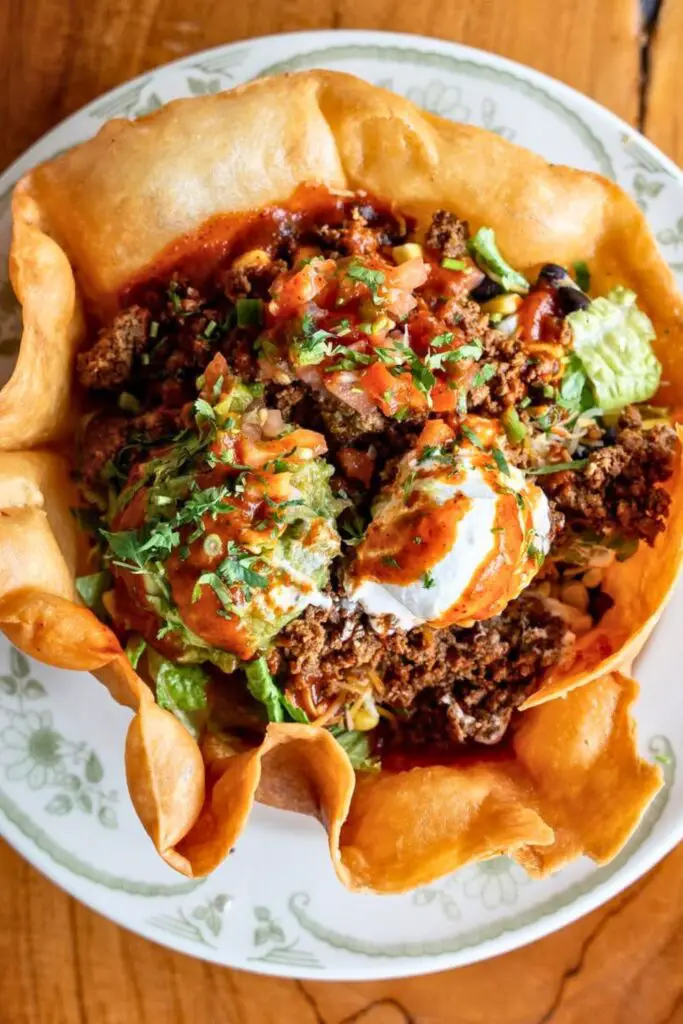
Let’s be honest—taco salads aren’t just salads. They’re a full-on flavor experience, especially when served in a crispy tortilla bowl.
Whether it’s Taco Tuesday, a family gathering, or just a “treat yourself” kind of dinner, this taco salad recipe will make you feel like a kitchen rockstar.
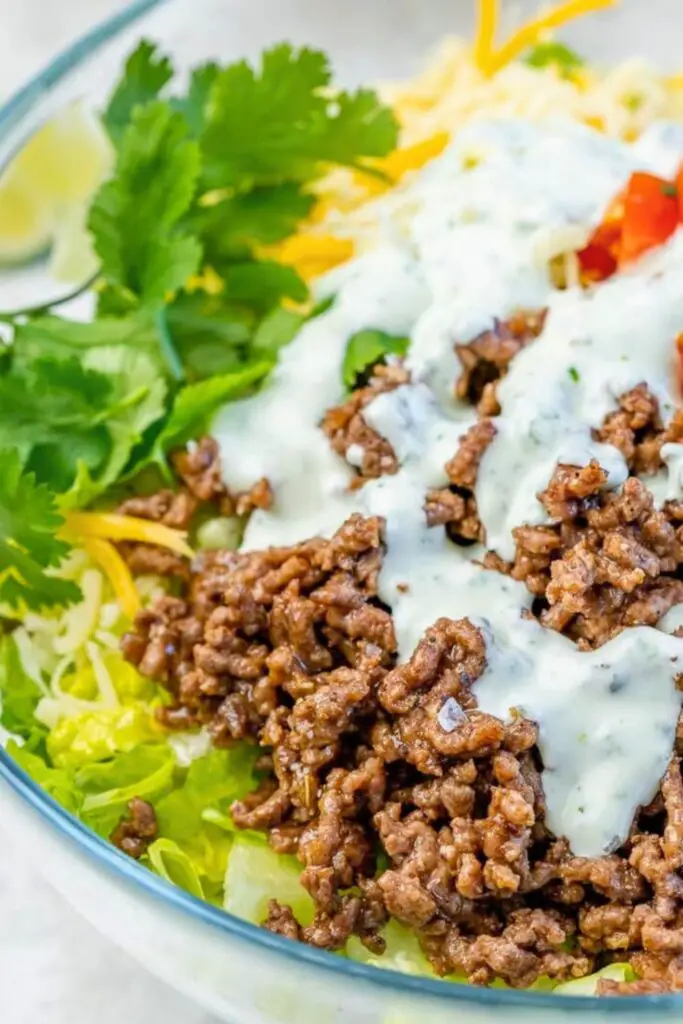
What makes this one special? Well, imagine a crunchy edible bowl filled with seasoned taco meat, crisp lettuce, juicy tomatoes, creamy avocados, and a zesty lime crema that ties everything together. Hungry yet? Let’s jump into this fiesta.
🛒 What You’ll Need to Make a Taco Salad Bowl
Before you even ponder layering those toppings, let’s get the base right—the iconic crispy tortilla bowl. Here’s a detailed breakdown of the ingredients and tools you’ll need to make them perfectly golden and crunchy every time.
Ingredients:
| Ingredient | Amount | Purpose |
|---|---|---|
| Flour tortillas | 10-inch size (1 per bowl) | It helps the tortilla puff up and develop crispy, golden-brown spots. Any high smoke-point oil, like avocado or canola, works, too. |
| Light olive oil | 2 tbsp per tortilla (for frying) | Helps the tortilla puff up and develop crispy, golden-brown spots. Any high smoke-point oil like avocado or canola works too. |
Why 10-inch tortillas?
They’re just the right size to form sturdy, deep bowls that hold plenty of taco goodness without tearing.
Tools You’ll Need:
- Large non-stick skillet – To lightly fry the tortilla and help it puff.
- Tongs or spatula – For flipping and shaping safely.
- Oven-safe bowl (with flat bottom) – This acts as your mold.
- Baking sheet – To bake multiple shells at once.
- Wire rack – To cool the shells without getting soggy.
Pro Tip: Use oven-safe bowls that are wide, deep, and have a flat base. This prevents the shell from tipping when it’s loaded with toppings.
🔥 How to Make a Crispy Tortilla Bowl (Step-by-Step Guide)
This step is pure magic. Watch a flat tortilla transform into a crunchy, golden taco bowl that’s as fun to eat as it is to fill.
Step 1: Heat the Oil and Fry the Tortilla
- Set your non-stick skillet over medium heat and add 2 tablespoons of oil.
- Once the oil is hot (not smoking), carefully place a tortilla into the skillet.
- Fry for 30 to 45 seconds per side, until light golden spots appear and the tortilla starts to puff and bubble.
Look for golden patches and slight air bubbles—that’s your sign it’s crispy enough to mold.
Step 2: Shape the Bowl While It’s Still Hot
- Immediately remove the tortilla and drape it over the back of an oven-safe bowl.
- Use the back of a ladle or a smaller bowl to press it gently into shape.
- The tortilla should form a shell-like shape around the bowl.
Work fast! Tortillas are easiest to shape when warm and soft. If you wait too long, they stiffen and crack.
Step 3: Bake for Ultimate Crunch
- Preheat your oven to 350°F (175°C).
- Place the shaped tortillas (still on their bowls or inverted) on a baking sheet.
- Bake for 12 to 14 minutes until the shell is crispy, light golden, and holds its shape.
Step 4: Cool on a Wire Rack
- Once out of the oven, carefully lift the tortilla bowls and place them upside-down on a wire rack.
- Let them cool completely.
Why a wire rack? It prevents steam from building up inside the bowl, which could make the bottom soggy.
Optional Tips for Extra Crispiness:
- Brush the tortilla with a little extra oil before baking.
- Sprinkle lightly with salt for added flavor.
- For a baked-only version, skip frying and directly press a raw tortilla into the bowl. Then bake for 15–18 minutes, though the texture will be a bit different.
🌮 How to Make Perfectly Seasoned Taco Meat
The heart of any taco salad is its meat; this version is bold, flavorful, and super juicy. Whether you’re feeding your family or planning a taco party, this easy step-by-step will ensure your taco meat turns out amazing every time.
Ingredients You’ll Need:
| Ingredient | Amount | Purpose |
|---|---|---|
| Ground beef | 1 lb (85% lean preferred) | Provides rich flavor and just enough fat for tenderness. |
| Taco seasoning | 1 packet or 2-3 tbsp homemade | Adds signature Tex-Mex flavor—smoky, savory, slightly spicy. |
| Water | ½ cup | Helps the seasoning blend into the meat for even coating. |
Optional Add-ins:
Want to boost the flavor? Try a splash of tomato paste, a pinch of brown sugar, or a few dashes of hot sauce while cooking.
Step-by-Step Instructions:
1. Brown the Ground Beef
- Place a large skillet over medium heat.
- Add the ground beef and break it up with a spatula as it cooks.
- Stir occasionally until no pink remains and the beef is fully browned.
Tip: Don’t rush this step—allow the meat to develop a little crust for better texture and flavor.
2. Drain the Excess Fat
- Once browned, spoon any extra grease using a slotted spoon or carefully drain it into a heat-safe container.
- Leaving just a little fat is okay, it helps hold flavor and moisture.
3. Add Taco Seasoning and Water
- Sprinkle taco seasoning evenly over the meat.
- Pour in ½ cup of water and stir well to coat every piece.
- Let it simmer for 3 to 5 minutes, stirring occasionally, until the water reduces and forms a slightly thick sauce.
Note: Don’t overcook, stop once the liquid mostly evaporates but the meat is still moist.
Why This Taco Meat Works:
- Balanced flavor: Salty, slightly spicy, and full of umami.
- Moist but not soggy: Perfect for salads, won’t weigh down the crispy tortilla bowl.
- Customizable: Use turkey or chicken instead of beef for a leaner option.
🌿 Make the Creamy Lime Crema (The Secret Sauce!)
Forget plain sour cream. This lime crema is creamy and tangy and completely elevates your taco salad. It’s so good that you’ll want to drizzle it over everything.
Ingredients You’ll Need:
| Ingredient | Amount | Purpose |
|---|---|---|
| Sour cream | ½ cup | Base of the sauce; adds cool, creamy texture. |
| Real mayo | ½ cup | Adds richness and smoothness. |
| Fresh lime juice | 2 tbsp | Brightens the sauce with tangy citrus. |
| Garlic powder | ½ tsp | Adds mild flavor without raw garlic bite. |
| Optional: Sriracha or hot sauce | To taste | For those who like a kick. |
Why use both sour cream and mayo?
Sour cream gives it tang, mayo gives it body. Together, they make the perfect taco salad dressing.
Step-by-Step Instructions:
1. Mix the Base
- Combine ½ cup sour cream and ½ cup mayo in a medium bowl.
- Stir until smooth and creamy.
2. Add the Flavor
- Squeeze in 2 tablespoons of fresh lime juice.
- Sprinkle in ½ teaspoon of garlic powder.
3. Spice it Up (Optional)
- Add a squirt of sriracha or a dash of your favorite hot sauce for heat.
- Mix until fully combined.
4. Chill for Best Flavor
- Let the crema rest in the fridge for at least 10 minutes before serving.
- This allows the garlic and lime to infuse the sauce fully.
Serving Tip: Pour it into a squeeze bottle for easy drizzling at taco bars or parties.
Ways to Use Lime Crema Beyond Taco Salad:
- Drizzle over fish or shrimp tacos
- Use as a dip for nachos or fries
- Spread on sandwiches or wraps
- Toss with roasted veggies
Storage:
- Store in an airtight container in the fridge.
- Lasts 3 to 5 days—if it lasts that long before you eat it all!
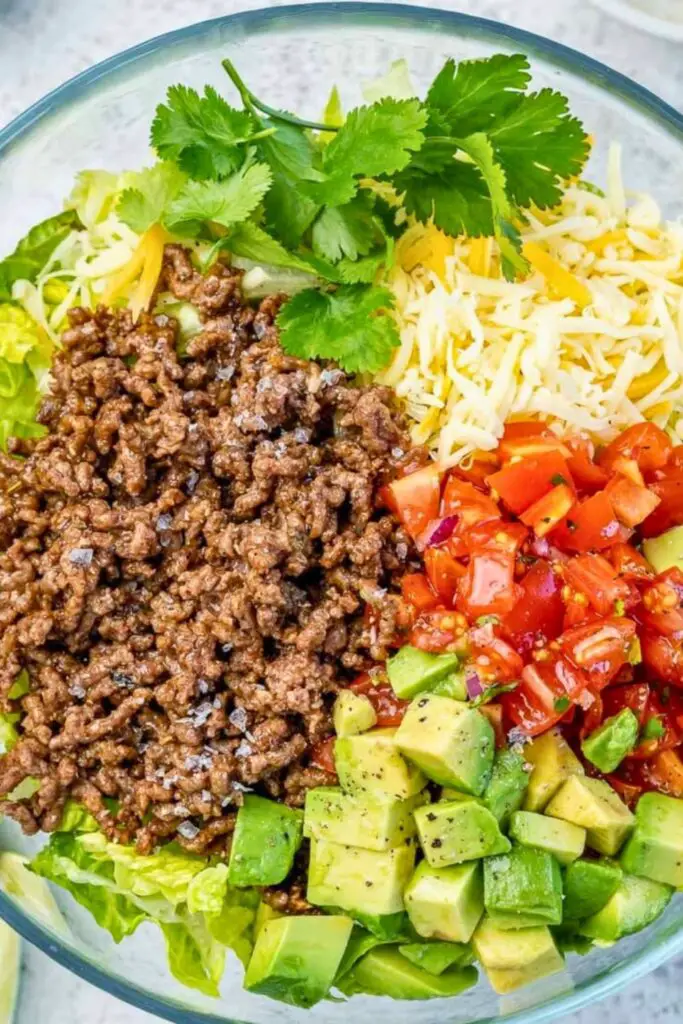
🥗 Prep Your Taco Salad Toppings Like a Pro
The secret to a vibrant, irresistible taco salad isn’t just the meat or the dressing—it’s the fresh toppings. These add crunch, creaminess, color, and bold flavor. Here’s how to prep each to make your salad pop with texture and taste.
1. Lettuce (The Crunch Base)
- What to use: Iceberg lettuce is the gold standard—ultra-crisp, hydrating, and well-suited to the weight of meat and sauce.
- How to prep:
- Rinse thoroughly and pat dry (a salad spinner helps here).
- Chop into thin strips or bite-sized chunks for easy scooping.
- Store in the fridge until ready to use for maximum crunch.
Pro Tip: You can mix in a little romaine or spring mix for added color and nutrients, but keep the iceberg as the foundation.
2. Tomatoes (Juicy & Bright)
- What to use: Fresh Roma or cherry tomatoes.
- How to prep:
- Dice them small so they distribute well throughout the salad.
- Optionally, drain on a paper towel to avoid watering down your bowl.
- Want a flavor upgrade? Use pico de gallo instead—it brings freshness and zest.
Flavor Tip: A sprinkle of salt on chopped tomatoes draws out their natural juices and enhances sweetness.
3. Onions (Kick of Sharpness)
- What to use: Red onions for bite, or green onions/chives for a milder profile.
- How to prep:
- Dice red onions finely so they don’t overpower each bite.
- Prefer less pungency? Soak them in cold water for 10 minutes to mellow the sharpness.
Fun Swap: Pickled red onions add a tangy twist and stunning color.
4. Avocado (Creamy Perfection)
- What to use: Ripe but firm avocados.
- How to prep:
- Slice in half, remove the pit, and cut into quarters.
- Peel the skin off each quarter (this is safer and easier than scooping).
- Dice into small cubes and toss gently with lime juice to prevent browning.
Pro Tip: Add just before serving so it doesn’t get mushy.
5. Cheese (Melty or Shredded Goodness)
- What to use: Shredded mild cheddar, sharp cheddar, or a Mexican cheese blend.
- How to prep:
- Pre-shredded cheese works fine, but freshly grated cheese melts better and has better flavor.
- Store chilled and sprinkle generously over hot meat to help it soften slightly.
Try This: Queso fresco or cotija for a crumbly, salty finish.
6. Extras for a Restaurant-Quality Finish
- Tortilla strips or crushed chips – Add crunch on top.
- Fresh cilantro – Roughly chop and sprinkle for herbal brightness.
- Black olives – Sliced and ready-to-use from a can.
- Corn kernels – Charred for a smoky-sweet vibe.
- Black beans – Rinsed and drained for added protein and texture.
- Lime wedges – For squeezing over just before eating.
Pro Serving Tip: Place each topping in separate bowls and let everyone customize their bowl. It turns your dinner into a build-your-own taco salad bar!
🍴 Assembling Your Restaurant-Style Taco Salad (Step-by-Step)
Once you’ve prepped all the components, it’s time to build the ultimate taco salad masterpiece. It’s more than just dumping things in a bowl—it’s about layering flavor and texture like a pro.
Step 1: Start with the Crispy Tortilla Bowl
- Gently place the cooled tortilla bowl on a wide plate.
- This helps catch any overflow and makes it easier to move without breaking.
Tip: If your bowl has uneven edges, snap off any sharp points for a smoother look.
Step 2: Add the Lettuce Base
- Fill about half of the tortilla bowl with your chopped iceberg lettuce.
- This creates the cushion for all the toppings and keeps the tortilla from getting soggy.
Pro Move: Keep the lettuce dry—wet greens = soggy bowl!
Step 3: Layer on the Taco Meat
- Add a generous scoop of seasoned taco meat on top of the lettuce.
- Spread it evenly, so every bite has a little beefy goodness.
Optional: If serving buffet-style, keep the meat warm in a covered dish so it doesn’t cool down before people serve themselves.
Step 4: Sprinkle on the Cheese
- Add a handful of shredded cheese directly over the warm meat.
- This helps it melt just a little, adding a delicious creamy layer.
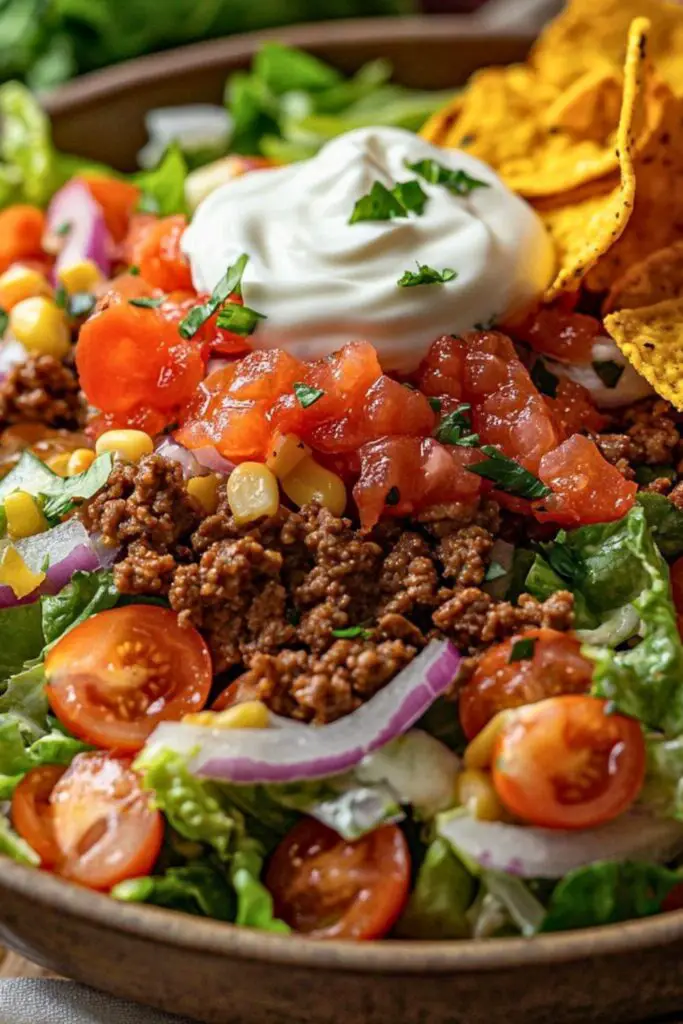
Step 5: Load Up the Fresh Toppings
In this order (for best texture):
- Tomatoes or pico de gallo
- Onions
- Avocado cubes
- Corn or beans (optional)
Don’t overdo it. You want a balance of toppings in each bite, not an overflowing tower.
Step 6: Add the Finishing Touches
- Tortilla strips or crushed chips for that satisfying crunch.
- Fresh cilantro for color and punchy flavor.
- A lime wedge on the side for those who love a citrusy kick.
Step 7: Drizzle with Lime Crema
- Generously spoon or drizzle your creamy lime sauce over the top.
- Want to get fancy? Use a squeeze bottle and zig-zag the crema across the top like in restaurants.
Be generous! This sauce acts as your dressing—it ties everything together.
Step 8: Serve and Dig In
- Grab a fork (or even a spoon!) and dive in.
- Eat from the top down, and when you’re close to finishing, break off parts of the bowl and use them as edible scoops.
- Don’t forget to eat the bowl—it’s the best part!
Pro Party Tip:
Hosting a group? Set up a DIY taco salad bar with:
- Multiple tortilla bowls
- Bowls of toppings
- Lime crema in squeeze bottles
- Hot sauce on the side
Let your guests build their masterpiece!
❤️ Why You’ll Love This Taco Salad Recipe
Taco salad isn’t just salad. It’s bold, customizable, satisfying, and downright fun to eat. Here’s why this specific recipe might become your go-to:
1. It’s a Whole Meal in One Bowl
This isn’t a side salad—it’s a full-on dinner. You’ve got:
- Protein: From juicy, seasoned ground beef
- Fiber: Thanks to fresh veggies and optional beans
- Crunch & Creaminess: With lettuce, tortilla, and that dreamy lime crema
Whether you’re feeding your family or meal-prepping lunches, this salad fills you up.
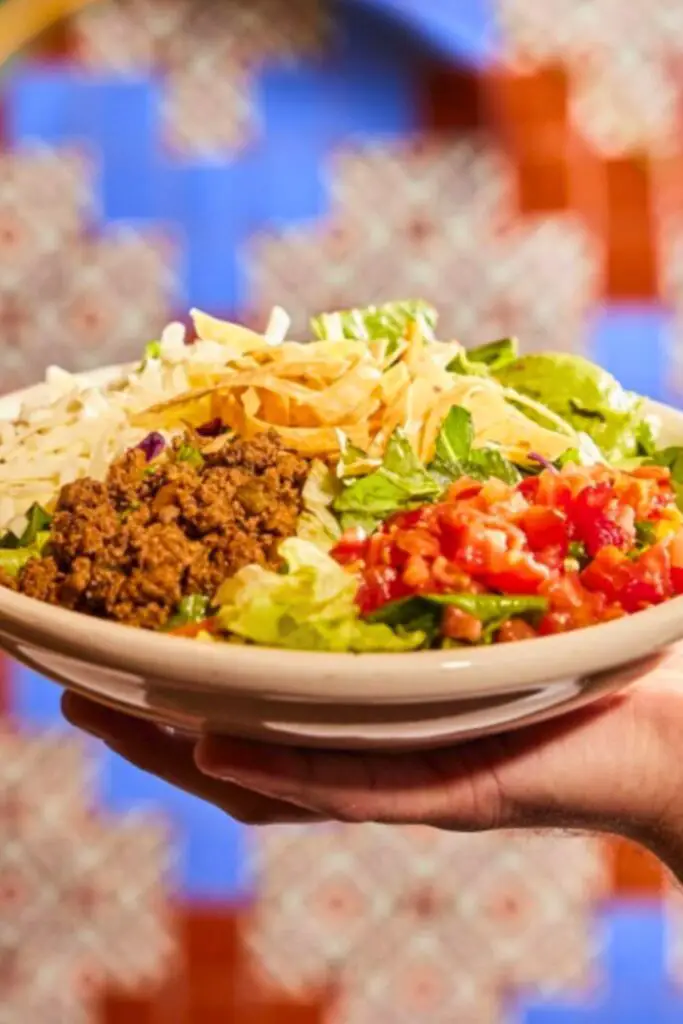
2. It’s a Showstopper—Perfect for Guests
That crispy tortilla bowl? Total wow factor. You’ll get compliments before anyone even takes a bite. Serve this at a party or a casual dinner, and you’ll look like a chef who has it together.
3. Completely Customizable
No two taco salads have to be alike. This recipe works with:
- Different proteins – beef, chicken, tofu, shrimp
- Veggies you love – corn, bell peppers, black beans
- Spice levels – add hot sauce, jalapeños, or keep it mild for kids
4. Budget-Friendly & Accessible
With simple, everyday ingredients, this dish doesn’t break the bank. You can make multiple servings using pantry staples and seasonal produce.
5. The Lime Crema Is Life-Changing
It’s zesty, creamy, and fresh all at once, like a cross between salad dressing and taco sauce. It brings everything together in the most magical way.
6. It’s Fun to Eat (and Yes, You Eat the Bowl!)
Who doesn’t love edible bowls? Tear off a crunchy piece with each bite and scoop up all those layers. It turns mealtime into a full experience.
✨ Tips to Make It Even Better
Want to elevate this already-awesome dish? Here are some expert tricks to help you nail it every time and impress your guests or just yourself.
1. Keep the Lettuce Dry
After rinsing your lettuce, pat it completely dry or spin it in a salad spinner. Wet lettuce will make your tortilla bowl soggy and ruin the crunch factor.
2. Season as You Go
- Add a pinch of salt to your tomatoes and avocados to enhance their flavor.
- Season your taco meat with additional cumin or smoked paprika for depth.
3. Toast Your Tortilla Strips
Instead of using store-bought crunchy toppings, slice up a tortilla, brush it with oil, and bake or fry until crisp. You’ll get better flavor and texture!
4. Use a Squeeze Bottle for the Dressing
It’s cleaner, prettier, and makes you feel like a professional. It’s also great to serve this at a party or let guests build their salads.
🌮 Pro Taco Salad Variations to Try
This recipe is just the beginning. Once you master the basic taco salad, you can switch it up for every taste, diet, and craving. Here are some tasty twists:
1. Chicken Taco Salad
Swap out the beef for grilled, shredded, or rotisserie chicken. Season with taco spices and lime juice for a lighter, leaner version.
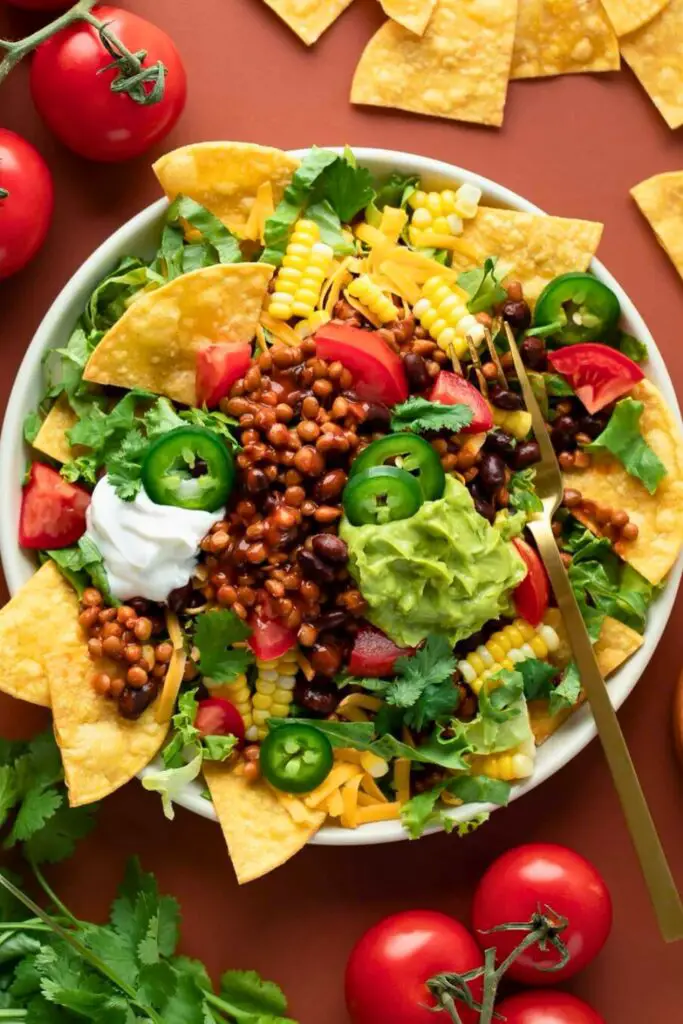
2. Vegetarian or Vegan Taco Salad
Ditch the meat and:
- Use seasoned black beans or pinto beans.
- Add grilled veggies like zucchini, bell pepper, or mushrooms.
- Use dairy-free cheese and vegan sour cream for a plant-based option.
Bonus: Add quinoa or brown rice for extra protein.
3. Shrimp Taco Salad
Grill or sauté shrimp with garlic, lime, and chili powder. Toss it on top for a seafood twist that pairs beautifully with the lime crema.
4. Dorito Taco Salad
Crush up some nacho cheese Doritos and mix them in for a fun, nostalgic kick. Kids (and adults) love this version!
5. Keto Taco Salad
Skip the tortilla bowl and use a bed of shredded romaine. Stick to full-fat cheese, ground beef, avocado, and crema. It’s low-carb and still super satisfying.
6. Taco Pasta Salad
Cook up some rotini pasta and toss it with taco-seasoned beef, veggies, and crema. Serve chilled for a picnic-friendly twist.
7. Taco Jar Salad (Great for Meal Prep!)
Layer everything in a mason jar:
- Crema
- Taco meat
- Cheese
- Tomatoes
- Onions
- Lettuce on top
When ready to eat, shake it up and pour into a bowl. Perfect for work lunches!
🌟 Final Thoughts
This taco salad recipe is your new go-to if you’ve been craving something crunchy, fresh, and flavorful. It’s a crowd-pleaser, meal-prep champion, and dinner party favorite all rolled into one crispy, edible bowl.
From the zesty lime crema to the juicy taco meat and that satisfying crunch of lettuce and tortilla strips—every bite feels like a fiesta.
The best part? It’s easy to customize, whether you’re cooking for picky eaters, spice lovers, or veggie fans. Make it your own, make it often, and don’t forget to drizzle that dressing like you mean it.
Taco Tuesday? More like a taco every day.
🥗 More Fresh & Flavorful Recipes You’ll Love
Looking for more easy, delicious salad recipes to shake up your weekly menu? Try these next:
👉 Delicious Tuna Salad Recipe in 25 Mins or Less!
Light, protein-packed, and perfect for lunches or summer meals. This one’s a total classic—done right.
👉 Creamy Chicken Salad Recipe You’ll Crave Weekly
A rich and comforting chicken salad with crunchy veggies and a tangy dressing that’s perfect in a sandwich or on its own.
👉 25-Minute Mexican Street Corn Salad Recipe You’ll Love
Sweet corn, creamy dressing, a hint of lime, and a little spice—this salad brings the taste of elote to your table without the mess.

Ella Foster, co-founder of FoodBears.com, is a skilled writer whose love for cooking fuels her creative work. Her passion for experimenting in the kitchen brings authentic flavor and culinary inspiration to every piece she crafts for the platform.