
There’s just something magical about the cooler air of fall, cozy sweaters, and the irresistible aroma of pumpkin spice wafting through the kitchen.
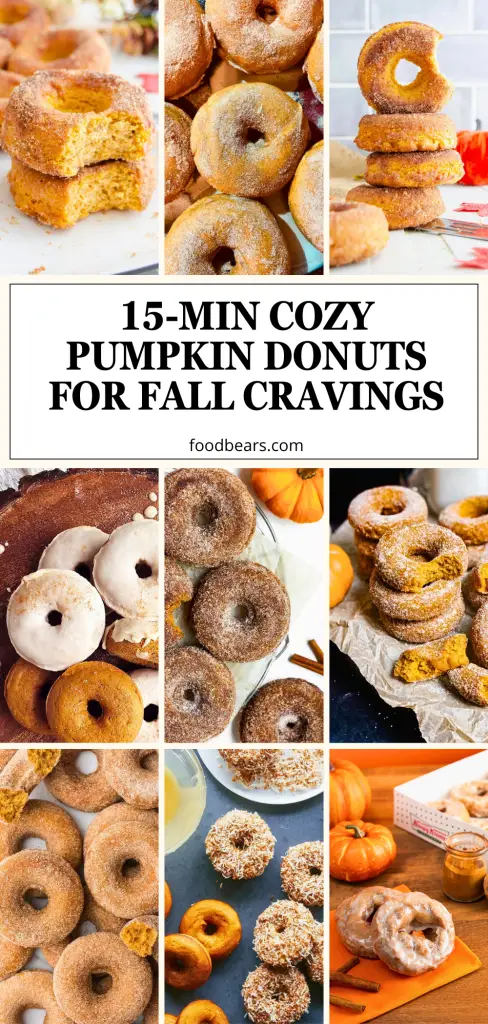
If you’re craving something soft, sweet, and perfectly spiced, these baked pumpkin donuts will hit the spot.
Whether you’re a seasoned baker or just starting, this beginner-friendly recipe brings warm, comforting flavors with simple ingredients and foolproof steps.
Let’s dive into this easy pumpkin donuts recipe, one that’s quick to whip up, fun for the whole family, and a total showstopper for any fall breakfast or dessert table.
🍁 Why You’ll Love These Pumpkin Donuts
Let’s be honest, fall just isn’t complete without pumpkin treats. And these baked pumpkin donuts? They’re the kind of thing that makes chilly mornings totally worth getting out of bed for.
Here’s why they’re about to become your favorite cozy-weather bake:
- Quick & Easy to Make: This is a simple stir-together recipe. No mixer required, no complicated steps, and it’s kid-friendly (no sharp tools or hot oil involved).
- Baked, Not Fried: Say goodbye to dealing with hot oil and messy cleanup. These donuts are baked in the oven, which means less fuss and a lighter texture.
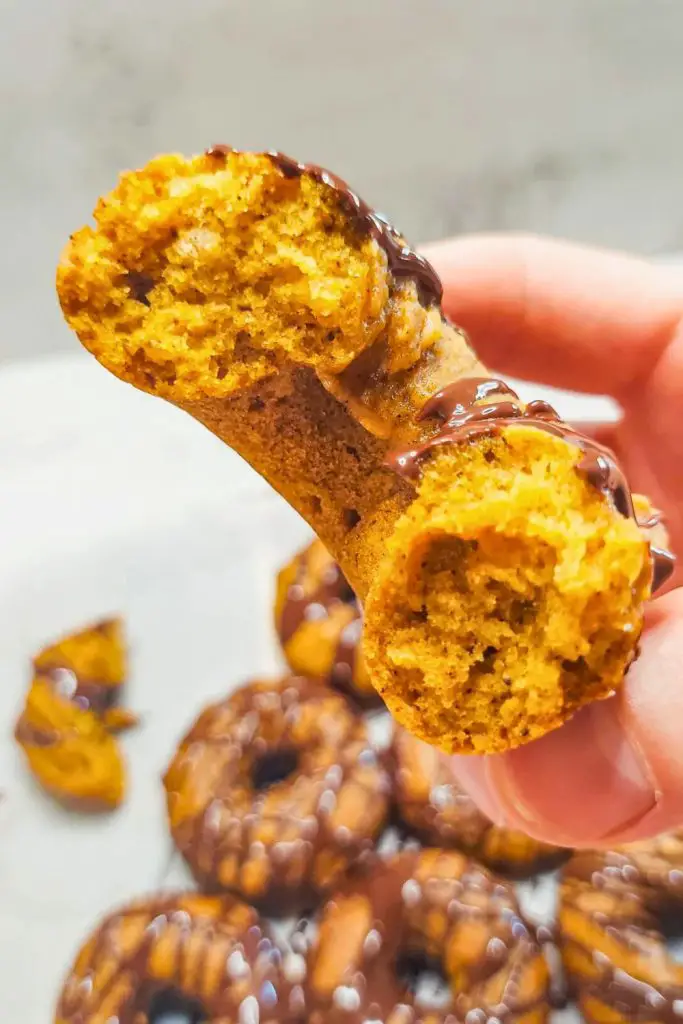
- Pumpkin-Forward Flavor: Thanks to the generous amount of pumpkin puree, every bite is moist, tender, and perfectly spiced.
- Loaded with Warm Spices: Pumpkin pie spice gives them that classic fall flavor you crave, but you can tweak it to suit your taste.
- Customizable Toppings: Love cinnamon sugar? Prefer a glossy maple glaze? You don’t have to choose. This recipe gives you both options.
- Moist, Not Greasy: The balance of oil, pumpkin, and egg yields a perfect soft texture, without being heavy or soggy.
- Perfect Make-Ahead Treat: Bake them fresh in the morning or prepare a day ahead. They store beautifully and taste amazing even at room temperature.
Whether you’re baking for a brunch gathering, sneaking one with your morning coffee, or handing them out at a Halloween party. These donuts deliver that comforting fall flavor in every bite. Honestly, they taste like October.
🧾 Ingredients You’ll Need
Here’s everything you need to bring these fluffy pumpkin donuts to life. You probably already have most of these in your pantry!
🥣 Dry Ingredients
| Ingredient | Measurement | Purpose |
|---|---|---|
| All-purpose flour | 1 ¾ cups (210g) | Base structure for the donuts |
| Baking powder | ½ teaspoon | Helps the donuts rise and stay fluffy |
| Baking soda | ¼ teaspoon | Reacts with acid in brown sugar for extra lift |
| Salt | ¼ teaspoon | Balances the sweetness and enhances flavor |
| Pumpkin pie spice | 2 teaspoons | Warm fall spice blend (cinnamon, nutmeg, etc.) |
💡 Optional: Want to make your own pumpkin pie spice? Mix cinnamon, ginger, nutmeg, allspice, and cloves or get creative with extras like cardamom or mace!
🧁 Wet Ingredients
| Ingredient | Measurement | Purpose |
|---|---|---|
| Pumpkin puree | 1 cup (225g) | Adds moisture, flavor, and that beautiful orange color |
| Vegetable oil | ¼ cup | Makes the donuts soft without being greasy |
| Egg (room temp) | 1 large | Provides structure and richness |
| Granulated sugar | ½ cup (100g) | Adds sweetness and a delicate crumb |
| Brown sugar | ½ cup (packed) | Adds moisture and a rich, molasses flavor |
| Vanilla extract | 2 teaspoons | Rounds out the flavor and brings warmth |
🥫 Pumpkin Tip: Not all canned pumpkin is created equal. Libby’s is a popular choice for good reason, it’s thick, smooth, and not too watery.
👨🍳 Step-by-Step: How to Make Pumpkin Donuts
If you’re ready to fill your kitchen with the scent of fall and treat yourself to something deliciously soft, warm, and pumpkin-spiced, this is the recipe for you.
These baked pumpkin donuts are easier than you think, and once you try them, you might never go back to store-bought again.
Let’s walk through it step by step:
🔥 Step 1: Preheat the Oven
Before you touch a mixing bowl, do this:
Set your oven to 350°F (175°C).
Why? Because getting your oven hot and ready ensures the donuts bake evenly. Cold ovens = flat donuts. While the oven preheats, prep your donut pans.
How to prep the pans:
- Use a nonstick baking spray or melted butter.
- Make sure every part of the donut wells is coated, especially the inner rings.
- You can use metal or silicone pans. Metal pans tend to bake faster and give a slightly crisper edge, while silicone is great for easy removal.
💡 Pro Tip: If you’re using silicone pans, place them on a sturdy baking sheet before filling. They’re floppy and hard to transfer alone.
🧂 Step 2: Mix the Dry Ingredients
In a large mixing bowl, sift together the following:
- 1 ¾ cups (210g) all-purpose flour
- ½ teaspoon baking powder
- ¼ teaspoon baking soda
- ¼ teaspoon salt
- 2 teaspoons pumpkin pie spice
Why sift?
Sifting breaks up any lumps and evenly distributes the leavening agents and spices throughout the mixture. It makes your batter smoother and your donuts lighter.
If you don’t have a sifter, use a fine-mesh strainer and gently tap it against your hand.
Once everything is sifted, give the dry mix a quick whisk to blend thoroughly.
🍁 Want to customize the spice mix? You can! Add extra cinnamon, toss in cardamom or a pinch of cloves, it’s your donut party.
🎃 Step 3: Mix the Wet Ingredients
In a separate medium bowl, combine all the wet stuff:
- 1 cup (225g) pumpkin puree
- ¼ cup vegetable oil
- 1 large egg (room temp)
- ½ cup (100g) granulated sugar
- ½ cup (packed) brown sugar
- 2 teaspoons vanilla extract
Grab a whisk and stir until the mixture is smooth and uniform.
Let’s talk texture:
Pumpkin puree is thick and can be slightly lumpy, especially when brown sugar is added to the mix. Whisking thoroughly helps dissolve the sugar, making your batter silky smooth.
🥄 Don’t skip the brown sugar, it adds depth, moisture, and that irresistible bakery flavor. You can use either light or dark brown sugar based on what you have.
And yes, you can absolutely use canned pumpkin. Homemade puree works too, but it should be well-drained and thick, not watery.
💬 “Libby’s” canned pumpkin is a cult favorite for good reason, it’s consistent and smooth.
🥣 Step 4: Combine Wet and Dry
Here’s where the magic happens.
Pour the wet mixture into the bowl of dry ingredients. Use a silicone spatula or a wooden spoon to gently fold the mixture. Stir only until you no longer see streaks of flour.
Why not overmix?
Overmixing activates gluten in the flour, which leads to chewy, dense donuts. We want these to be soft and cake-like, so mix with love and stop when the ingredients are just combined.
🎯 Aim for a thick, scoopable batter. It shouldn’t be runny like pancake batter, but it also shouldn’t be dry or crumbly.
If you see a few tiny lumps, that’s okay. Just make sure there are no pockets of dry flour.
🧁 Step 5: Fill Your Donut Pan
Time to get that batter into your donut wells!
The cleanest, easiest way:
Use a piping bag or a large zip-top bag with the corner snipped off. Spoon your batter into the bag, twist the top to seal, and squeeze it into the greased donut wells.
How full should the wells be?
Fill them about ⅔ full. That gives the donuts room to rise and puff up into a perfect donut shape without overflowing.
💡 If you want thicker, jumbo-style donuts, you can fill them a little more but adjust baking time accordingly.
This recipe yields 12 to 14 donuts, depending on the amount of batter you pipe per well. If you’re feeling bold and go for extra-thick donuts, expect around 10. Either way, yum.
No piping bag? You can spoon it in, but it’s messier and less precise.
⏲️ Step 6: Bake to Perfection
Now, pop those pans in the oven and let them bake for 10-12 minutes.
What to look for:
- The donuts should rise slightly and spring back when lightly pressed.
- A toothpick or skewer inserted into the thickest part should come out clean.
- The color will deepen slightly, taking on a golden hue around the edges.
🧁 Using different pans? Metal pans may bake faster, while deeper silicone molds might need an extra minute or two.
Important: Don’t overbake! These donuts are at their best when just cooked through, soft and tender with a moist crumb.
🥵 Cooling & Removing from the Pan
Once baked, remove the pans from the oven and let them cool for 5–10 minutes before inverting them.
To release the donuts:
- Run a small offset spatula or butter knife around the edges if needed.
- Gently flip the pan over or lift them out one by one.
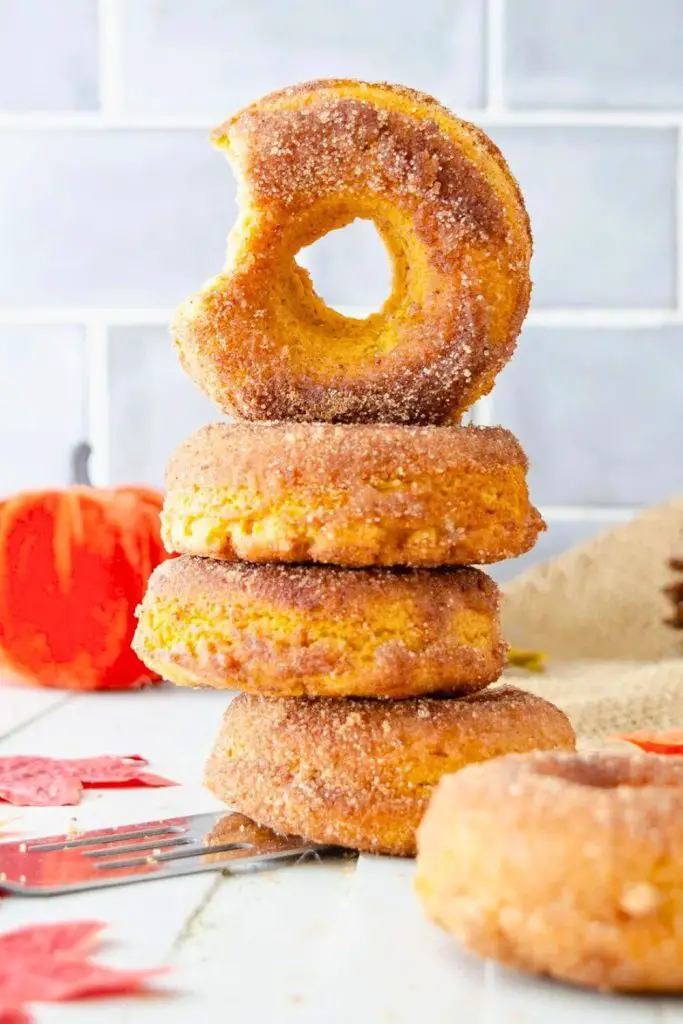
Let them cool completely on a wire rack before adding glaze or sugar. But if you’re going for cinnamon sugar, it’s best to coat while they’re still slightly warm.
👃 The smell alone will tempt you to eat one right out of the pan and honestly, we support that.
🍭 Two Irresistible Topping Options
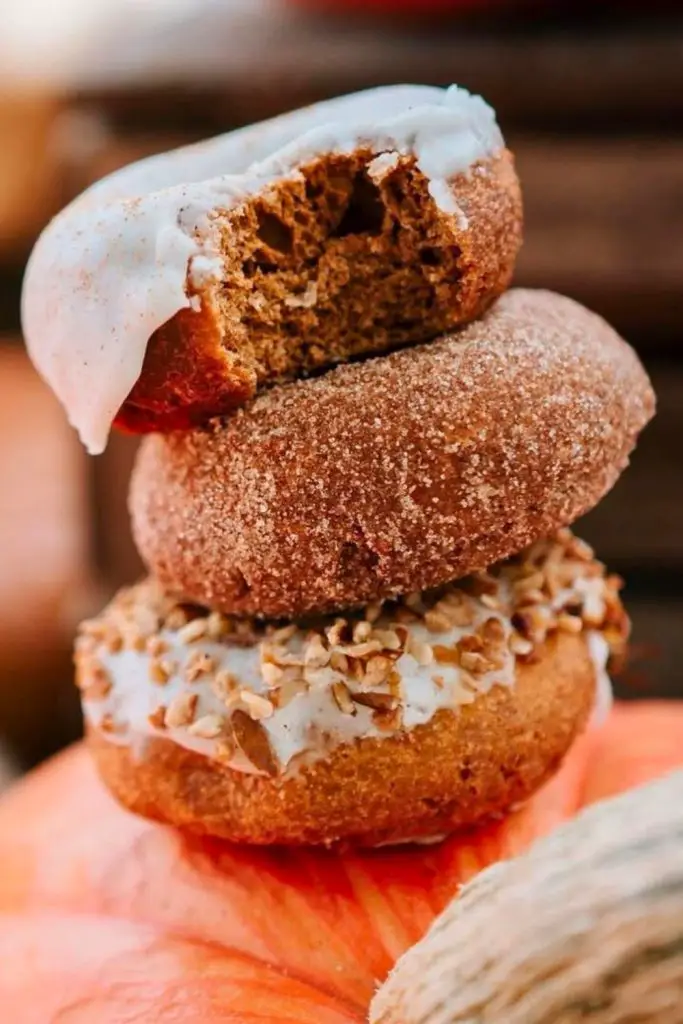
Freshly baked pumpkin donuts are already a treat on their own, but when you add one of these easy toppings? Game over. You’ve taken them from ‘mmm’ to ‘OMG’.
Whether you’re in the mood for a classic cinnamon-sugar crunch or a dreamy maple glaze, both of these finishes bring out the best in these pumpkin beauties.
Let’s break down both options and how to get them just right.
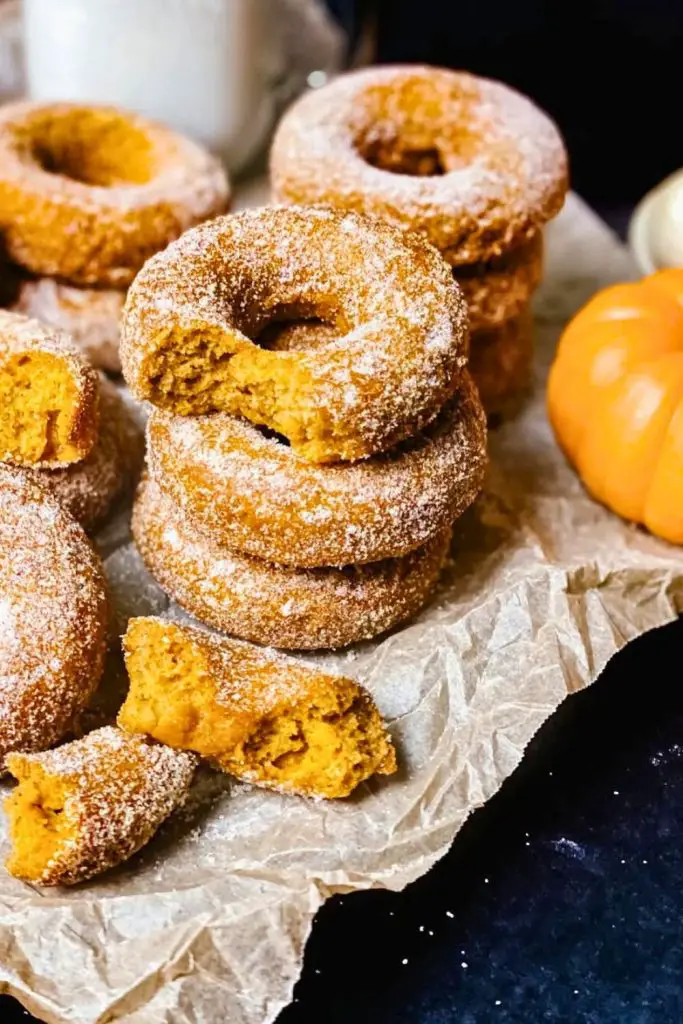
✨ Option 1: Classic Cinnamon Sugar
There’s a reason this one’s a favorite: it’s warm, cozy, and gives the donuts that nostalgic bakery-style finish. Cinnamon sugar is also the fastest topping to make, and it only requires two ingredients:
What You’ll Need:
| Ingredient | Amount |
|---|---|
| Granulated sugar | ½ cup |
| Ground cinnamon | 1½ teaspoons |
Instructions:
- Combine sugar and cinnamon in a shallow bowl or plate.
- While your donuts are still warm (but not hot), gently roll them in the mixture.
But here’s the secret trick: If the sugar isn’t sticking as much as you’d like, lightly brush the donuts with melted butter before rolling them in the sugar. This acts like glue, giving you a thick, even coating.
🍁 Bonus Tip: Add a pinch of cardamom, nutmeg, or even pumpkin pie spice to the mix for a fall-forward twist.
Great For:
- Morning coffee pairings
- Brunch spreads
- Fall bake sales
- Lazy Sunday baking when you want instant gratification
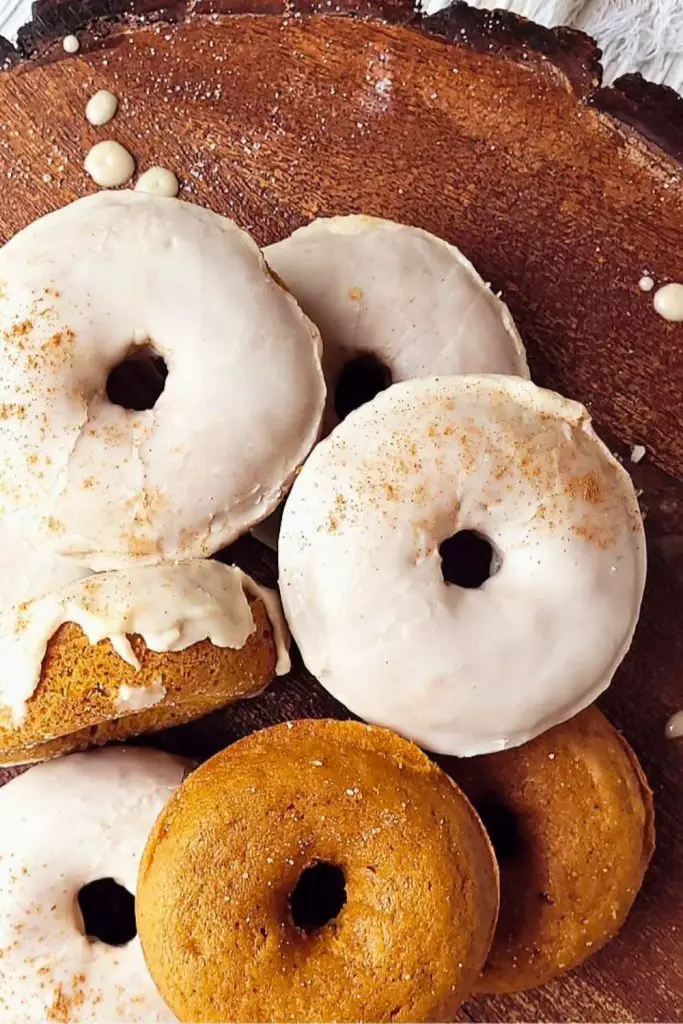
🍁 Option 2: Dreamy Maple Glaze
This topping is all about indulgence. Sweet, sticky, and laced with real maple flavor, these donuts are in dessert territory. It’s thicker than a standard glaze and beautifully coats each donut in a shiny, drizzle-worthy finish.
What You’ll Need:
| Ingredient | Amount |
|---|---|
| Powdered sugar | 1 cup (120g) |
| Maple syrup | 2 tablespoons |
| Milk (or water) | 2 teaspoons (adjust as needed) |
| Pinch of salt | Optional, for flavor depth |
Instructions:
- In a bowl, combine powdered sugar and maple syrup.
- Add milk a little at a time while whisking until it reaches your desired thickness.
- Add a tiny pinch of salt (optional but highly recommended) to balance out the sweetness.
- Spoon the glaze over cooled donuts and let it drip down the sides naturally.
💡 Want a thinner glaze? Add a splash more milk.
💡 Want a richer flavor? Swap some of the milk with melted butter for a velvety finish.
Pro Tip: If your donuts are too warm, the glaze will melt off. For the best glossy finish, glaze them after they’ve cooled to room temperature.
Glaze Add-Ons:
- Add cinnamon or nutmeg to the glaze for spice and color.
- Stir in a touch of espresso powder for a pumpkin-spice latte vibe.
- Use vanilla or almond extract to tweak the flavor profile.
✅ Pro Tips for Pumpkin Donut Success
These baked donuts are simple, but a few smart tips can take them from good to unforgettable. Here’s how to get pro-level results every time:
1. Don’t Overmix the Batter
Once your wet and dry ingredients come together, mix them gently, only until they are fully combined. Overmixing activates gluten, resulting in chewy, dense donuts rather than the soft and fluffy ones typically desired.
2. Grease the Donut Pan Thoroughly
Even with nonstick pans, generously grease every nook of your donut wells, including the center posts. Stick-free removal means pretty donuts that stay whole.
3. Use a Piping Bag for Easy Filling
Spoonfuls are messy and uneven. A piping bag (or a zip-top bag with the corner snipped) provides clean control, fills the wells evenly, and speeds up the entire process.
4. Don’t Overfill the Donut Wells
Aim to fill them about two-thirds full. This gives them space to puff up without spilling over and losing their classic shape.
5. Check Doneness Early
Start checking your donuts at the 10-minute mark. Every oven is different, and overbaking can cause them to dry out. They’re done when:
- The tops spring back when lightly pressed
- A skewer comes out clean
🎨 Customize Your Pumpkin Donuts
| Add-In / Topping | How to Use It | Flavor Boost |
|---|---|---|
| Mini Chocolate Chips | Fold ½ cup into the batter before baking | Pumpkin + chocolate = rich and cozy |
| Chopped Walnuts or Pecans | Press into the glaze while still wet | Adds crunch and nuttiness |
| Espresso Powder | Add ½ tsp to the glaze or batter | Pumpkin spice latte flavor |
| Cream Cheese Drizzle | Mix cream cheese, powdered sugar & milk; drizzle on cooled donuts | Tangy & sweet like pumpkin cheesecake |
| Maple Glaze with Sea Salt | Add flaky sea salt after glazing | Sweet-salty contrast, bakery-style |
| Pumpkin Pie Spice Glaze | Stir a pinch into the maple glaze | Layered fall spice flavor |
| Streusel Topping | Sprinkle over batter before baking (butter + brown sugar + flour + cinnamon) | Crumbly, coffee cake-style topping |
| Crushed Graham Crackers | Add on top of the glaze for crunch and color | S’mores-inspired texture + taste |
| Toasted Coconut Flakes | Add on top of glaze for crunch and color | Adds tropical sweetness to the spice |
| Orange Zest | Mix a little zest into the glaze or batter | Bright citrus notes for balance |
🎃 Final Thoughts: Bake the Cozy Into Your Day
If you’re looking for a quick, comforting, and undeniably delicious fall treat, these baked pumpkin donuts are it. With their pillowy texture, warm spices, and customizable toppings, they strike the perfect balance between indulgence and simplicity.
Whether you’re sipping coffee in your favorite hoodie, planning a festive brunch, or just craving something homemade on a chilly morning, this recipe is your cozy go-to. No frying, no fuss. Just pure fall bliss in every bite.
So go ahead, grease that donut pan, open that can of pumpkin, and treat yourself. You deserve it. 🍩
🍂 More Fall Recipes You’ll Love
Ready to keep the pumpkin party going? Try these seasonal favorites next:
🧁 Best Pumpkin Cream Cheese Muffins Recipe »
Super soft muffins swirled with a tangy cream cheese center—like bakery magic, made easy at home.
🥧 The Best Pumpkin Crisp Recipe for Fall »
A buttery oat topping over silky pumpkin filling. All the pie vibes, none of the crust stress.
🍫 Healthy Pumpkin Blondies Recipe for Cozy Nights »
Moist, chewy, and chocolate-studded with less guilt and full-on flavor.

Ella Foster, co-founder of FoodBears.com, is a skilled writer whose love for cooking fuels her creative work. Her passion for experimenting in the kitchen brings authentic flavor and culinary inspiration to every piece she crafts for the platform.