
There’s something magical about pumpkin desserts once the crisp fall air settles in.
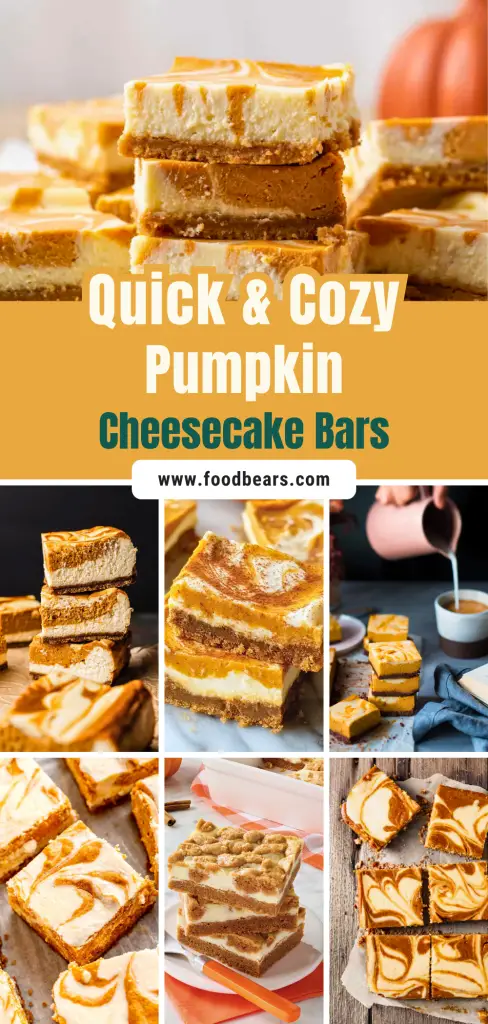
And if you’re craving something that blends the cozy spice of pumpkin pie with the luscious creaminess of cheesecake, pumpkin cheesecake bars are your answer.
They’re a little fancy, super easy to slice, and a guaranteed show-stopper at your next fall gathering.
In this post, we’re walking you through a carefully tested, step-by-step pumpkin cheesecake bar recipe that anyone can make.
Whether you’re prepping for Thanksgiving, a fall bake sale, or need a sweet treat with your coffee, this recipe hits the spot every time.
🎃 Why You’ll Love These Pumpkin Cheesecake Bars
There’s something undeniably comforting about the combination of creamy cheesecake and cozy pumpkin spice.
These Pumpkin Cheesecake Bars bring the best of both worlds together in one dessert, easy to make, easy to serve, and impossible to resist.
Here’s why these bars will win over your fall dessert cravings:
- The Texture Is Everything: The cheesecake is ultra-smooth, dense yet creamy, and bakes to perfection without cracks. No water bath needed!
- Swirls of Fall Flavor: With homemade pumpkin pie spice and real pumpkin puree blended into a portion of the batter, every bite has just the right amount of seasonal warmth.
- Effortless Yet Impressive: Thanks to the marbled swirl and clean slices, these look bakery-worthy but are super simple to make.
- Perfect for Sharing: Whether you’re heading to a potluck, hosting Thanksgiving, or planning a cozy fall night, these bars are easy to portion and travel well.
- Customizable for Fun Variations: Add nuts, swap the crust, or play with toppings. This recipe gives you room to make it your own.
Once you taste that first forkful of silky cheesecake layered with spiced pumpkin, all sitting on a buttery graham cracker crust. You’ll know why this will be your go-to fall dessert from now on.
📝 Ingredients You’ll Need
Here’s a breakdown of all the ingredients you’ll need to make both the crust and the cheesecake filling. You likely have most of these on hand already!
| Ingredient | Amount | Purpose |
|---|---|---|
| Graham cracker crumbs | 1½ cups | Forms the base crust |
| Granulated sugar (crust) | 2 tbsp | Sweetens the crust |
| Light brown sugar (crust) | 1 tbsp, packed | Adds a deeper, caramel-like flavor to the crust |
| Butter (salted or unsalted) | 7 tbsp, melted | Binds the crust ingredients |
| Salt (optional) | Pinch | Enhances flavor if using unsalted butter |
| Cream cheese (brick-style) | 24 oz (3 blocks) | Forms the rich and creamy base of the cheesecake |
| Granulated sugar (filling) | ¾ cup | Sweetens the cheesecake batter |
| Light brown sugar (filling) | ¼ cup, packed | Adds extra warmth and complexity |
| Sour cream | ½ cup | Balances sweetness, adds tang and creaminess |
| Vanilla extract | 1 tsp | Enhances the overall flavor |
| Eggs | 3 large, room temp | Binds and sets the cheesecake during baking |
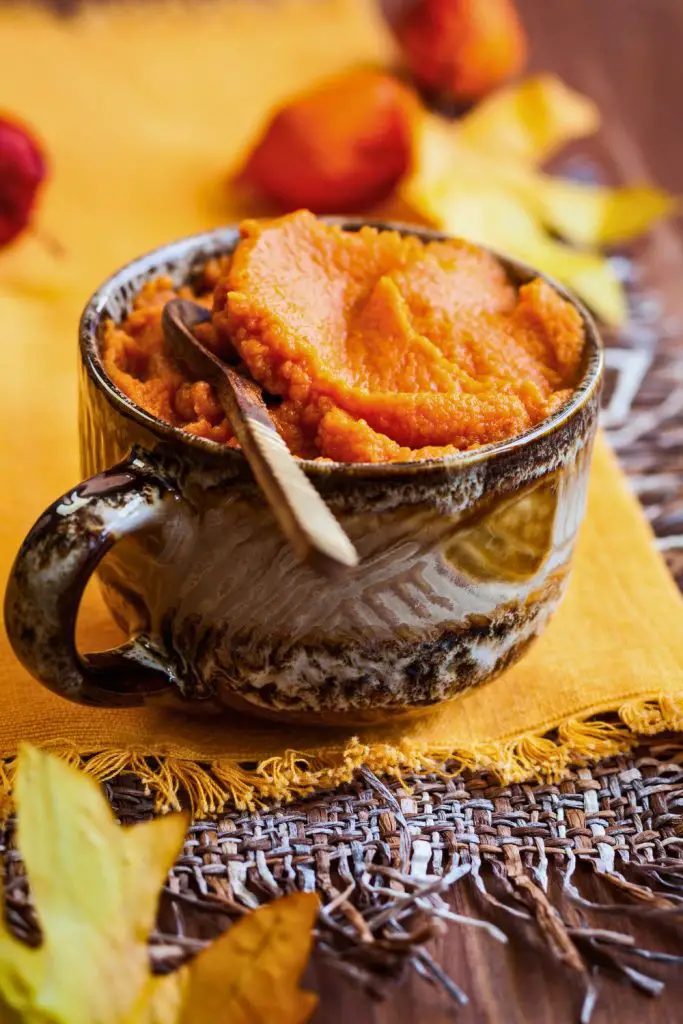
| Pumpkin puree | ⅔ cup | Provides natural pumpkin flavor (not pie filling!) |
| Pumpkin pie spice | 1½ tsp | Infuses the pumpkin layer with classic fall flavor |
🔍 Note: Be sure to use brick-style cream cheese, not the kind in tubs. Tubs contain too much air and moisture, which will ruin your cheesecake’s texture.
🍰 Step-by-Step: How to Make Pumpkin Cheesecake Bars

Making these pumpkin cheesecake bars might look fancy, but each step is surprisingly easy and worth it. We’ll walk you through every detail so you get a creamy, flavorful, and beautifully swirled dessert without any cracks or mishaps.
🔥 Step 1: Preheat the Oven
Before you touch any ingredients, preheat your oven to 325°F (163°C). A lower temperature ensures the cheesecake bakes slowly and evenly, preventing cracks and a rubbery texture.
This is one of those times when the oven must be fully preheated before baking. Cheesecake is sensitive to temperature shifts, and starting in a cold oven can lead to uneven cooking or a soggy crust.
So turn it on and give it time while you prep the crust!
🍪 Step 2: Make the Graham Cracker Crust
Every great cheesecake bar starts with a solid crust. And Graham crackers are the classic for a reason. They’re buttery, crunchy, and have just the right amount of sweetness.
Here’s what you’ll need:
- 1½ cups graham cracker crumbs
- 2 tablespoons granulated sugar
- 1 tablespoon light brown sugar (firmly packed)
- 7 tablespoons melted butter
- Optional: pinch of salt (especially if your butter is unsalted)
What to do:
- Grab a medium mixing bowl and pour in your graham cracker crumbs.
- Add both the granulated and brown sugar.
- Use a fork to mix everything, breaking up any clumps of brown sugar.
- Pour in the melted butter and add a pinch of salt if needed.
- Mix again until all crumbs are moistened and the mixture looks like wet sand. A fork works better than a spoon here. It helps evenly distribute the butter without creating big lumps.
👉 Pro Tip: Don’t skip the brown sugar. It adds a deeper, slightly caramelized flavor that elevates the entire crust.
🧺 Step 3: Press Crust Into Pan
Time to form your base.
Here’s how:
- Line a 9×9-inch baking pan with parchment paper. This makes removing and slicing the bars so much easier later.
- Pour your crumb mixture into the pan.
- Press the crumbs evenly across the bottom. Use the flat bottom of a measuring cup to get a firm, even layer.
Don’t bother pressing the crumbs up the sides—this is a bar recipe, not a traditional cheesecake.
Why parchment paper? Two reasons:
- It helps prevent cracking by allowing the cheesecake to shrink slightly as it cools.
- It acts like a sling for clean lifting after chilling.
Once your crust is firmly packed down, set the pan aside. No need to pre-bake it!
🧁 Step 4: Make the Cheesecake Batter
Now, let’s move to the star of the show: the cheesecake filling.
Here’s what you’ll need:
- 24 oz (three 8 oz blocks) brick-style cream cheese, softened
- ¾ cup granulated sugar
- ¼ cup light brown sugar (packed)
- ½ cup sour cream
- 1 teaspoon vanilla extract
Steps:
- In a large mixing bowl, add all three blocks of softened cream cheese.
- 🧊 Softening Tip: Let them sit at room temp for a few hours, or microwave each (unwrapped) for 10 seconds at 50% power.
- Add the granulated sugar and brown sugar.
- Using an electric hand mixer (or a stand mixer on low speed), beat everything together until smooth, creamy, and lump-free.
- Add in the sour cream and vanilla extract.
- Mix again just until fully incorporated.
👉 Why sour cream? It’s the secret to that classic, tangy cheesecake flavor and helps balance out the sweetness.
🥚 Step 5: Add Eggs Carefully
Eggs are essential, but they can also ruin your cheesecake if handled wrong.
Here’s the right way to do it:
- Crack 3 large eggs into a small bowl.
- Beat them lightly with a fork. Don’t whisk, just a light mix.
- Add them to the cheesecake batter one at a time, mixing gently after each addition.
Important:
Do not overbeat. Overmixing eggs incorporates excess air, which causes:
- Cracks
- A spongy, mealy texture
- Ugly surface bubbles
Keep your mixer on low speed, and switch to a spatula toward the end to ensure everything is well-blended without overworking the batter.
🎃 Step 6: Create the Pumpkin Batter
Now comes the fun fall twist: the pumpkin swirl.
What to do:
- Measure out 1½ cups of your finished cheesecake batter into a separate bowl.
- Don’t worry about being perfectly precise—it doesn’t need to be exact.
- To this portion, add:
- ⅔ cup pumpkin puree (not pumpkin pie filling!)
- 1½ teaspoons pumpkin pie spice (store-bought or homemade)
Stir until the pumpkin is fully blended and the batter is a beautiful orange color.
👉 Note: Be sure your can says “pumpkin puree”—the pie filling has added sugar and spices and won’t work properly.
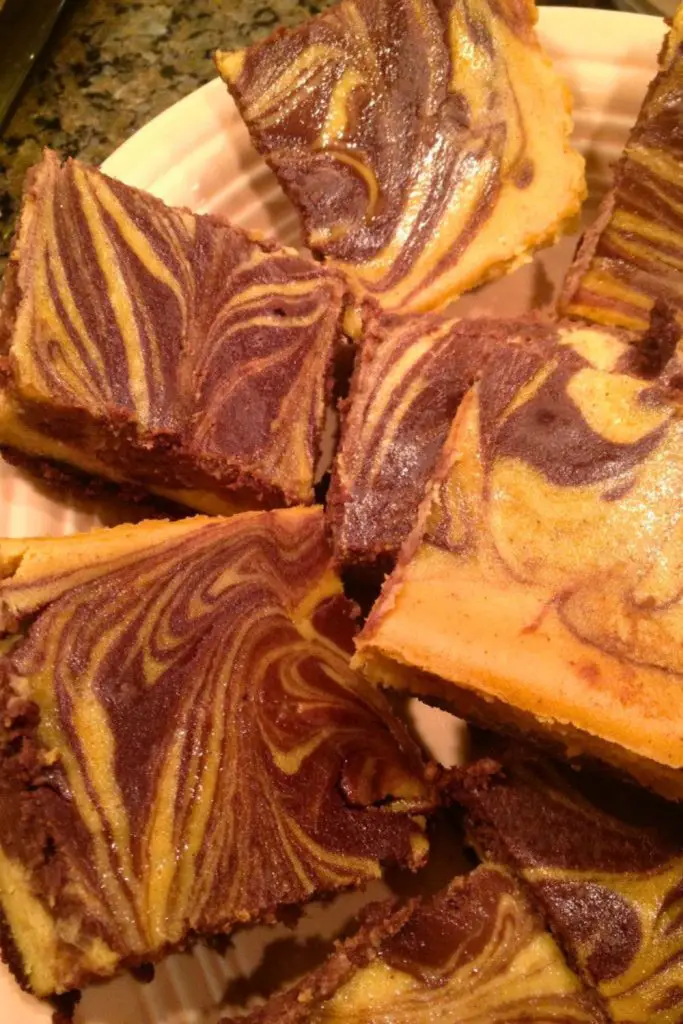
🌀 Step 7: Swirl the Cheesecake and Pumpkin Batters
This step adds that bakery-style wow factor, and it’s super easy.
Here’s how:
- Grab your pan with the unbaked crust.
- Start with a big spoonful of the plain cheesecake batter and drop it randomly across the crust.
- Add a smaller spoonful of pumpkin batter next to each one.
- Alternate between the two until the pan is mostly covered.
👉 Pro Tip: Make the plain dollops a bit larger since you have more of that batter.
Now for the swirl:
- Use a butter knife to swirl the batters together gently.
- Go up and down through the pan, then rotate and go side to side.
- Don’t overmix! You want ribbons and contrast, not a fully blended batter.
It might not look perfect now, but it will settle as it bakes into a gorgeous marbled top.
⏱️ Step 8: Bake to Perfection
Place the pan on the center rack of your preheated 325°F oven.
Bake Time: About 40–45 minutes
- Use a metal pan for best results. Glass or ceramic pans may take 5–10 minutes longer.
How to check doneness:
- Gently shake the pan.
- The edges should be set.
- The center should jiggle slightly, like gelatin, not liquid.
If the middle is still very wet, bake in 5-minute increments and check again. Do not overbake or it’ll dry out.
❄️ Step 9: Cool and Chill
Resist the temptation to dig in right away; cheesecake needs time to set.
Here’s the cooling process:
- Let the bars cool in the pan at room temperature until no longer warm (about 1 hour).
- Then transfer the whole pan to the refrigerator.
- Chill for at least 6 hours, but ideally overnight.
This cooling period helps the texture firm up and makes slicing neat and easy.
👉 Bonus Tip: If you’re in a hurry, don’t try to freeze it to speed things up. Cheesecake that’s not cooled slowly can develop cracks or an uneven texture.
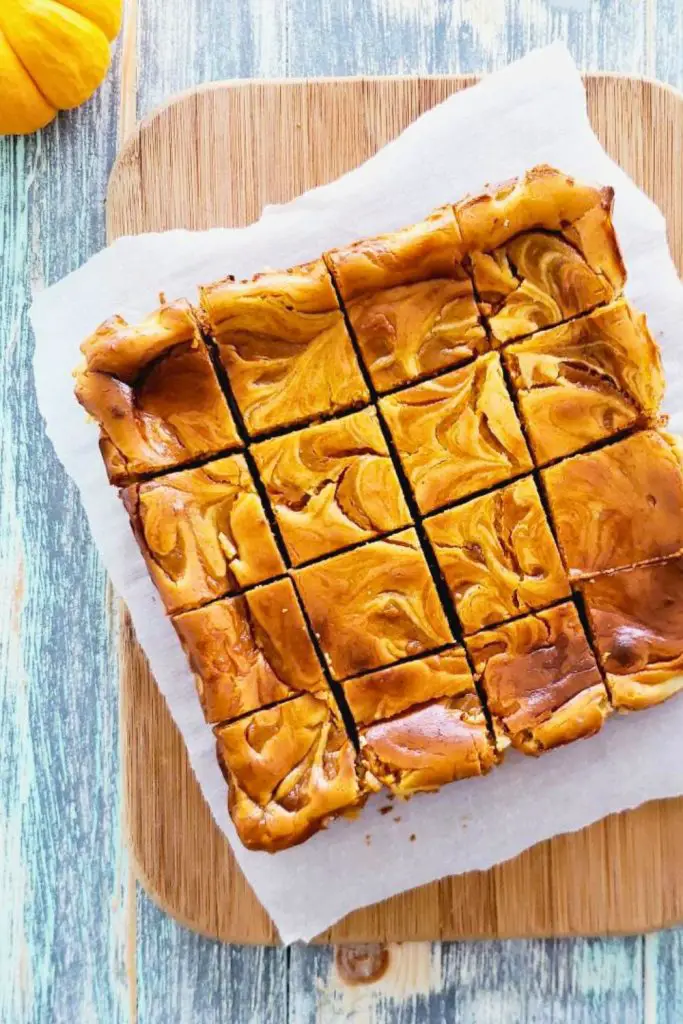
🔪 Step 10: Slice and Serve
The moment you’ve been waiting for!
How to get perfect bars:
- Lift the whole cheesecake slab out of the pan using the parchment paper.
- Place it on a cutting board.
- Use a sharp, clean knife to slice into bars or squares.
- Wipe the knife clean between each cut for crisp edges.
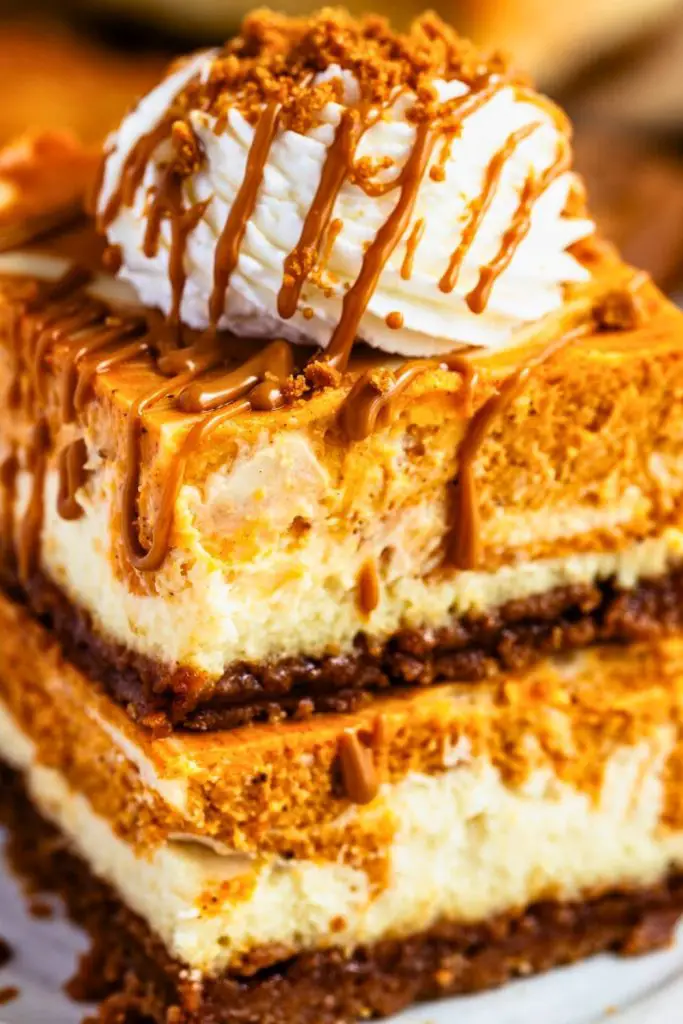
You’ll see the beautiful swirl pattern in every slice and feel that perfect cheesecake creaminess as your knife glides through.
Serving Ideas:
- Top with whipped cream
- Drizzle with caramel sauce
- Sprinkle with cinnamon or nutmeg
- Serve with hot coffee, cider, or a pumpkin spice latte
✅ Pro Tips for Pumpkin Cheesecake Bar Success
Want to make your pumpkin cheesecake bars extra amazing? These pro tips will help you avoid common cheesecake mishaps and make sure every batch turns out bakery-level gorgeous and delicious.
🎯 1. Use Brick-Style Cream Cheese—Always
Skip the spreadable stuff in tubs. Tub cream cheese is too soft and has added moisture and stabilizers that ruin the creamy texture. Stick to the 8-oz bricks for the best results.
⏰ 2. Let Your Cream Cheese Soften Properly
Room temperature cream cheese blends smoothly and helps avoid those stubborn little lumps. Leave it out for a few hours before baking, or microwave briefly on low power.
🧂 3. Don’t Overbeat the Eggs
This is the #1 reason cheesecakes crack or become mealy. Beat your eggs in a separate bowl, then stir them into the batter one at a time, just until combined. More air = more problems.
❄️ 4. Cool Gradually
Let the cheesecake cool to room temperature before chilling. Sudden temperature changes can cause cracks or sinking. Be patient—it’s worth it.
🔪 5. Use Parchment Paper
Lining your pan makes lifting and slicing the bars a breeze. It also reduces the risk of cracking by giving the cheesecake freedom to contract as it cools.
🍁 Fun Variations to Try
Looking to switch things up? This recipe is a great base for creative twists. You can play with the crust, fillings, or even how you swirl it.
Here’s a list of tasty ideas to try:
| Variation | How to Do It |
|---|---|
| Gingersnap Crust | Swap graham crackers for crushed gingersnap cookies. Adds a spicy holiday kick. |
| Oreo Crust | Use chocolate cookie crumbs instead of graham crackers for a rich, dark base. |
| Maple Pumpkin Swirl | Add 1 tbsp maple syrup to the pumpkin batter for cozy maple flavor. |
| Chocolate Chip Cheesecake | Stir mini chocolate chips into the plain batter before swirling. |
| Nutty Pumpkin Layer | Mix chopped pecans into the pumpkin batter or sprinkle on top before baking. |
| Pumpkin-Chai Flavor | Replace pumpkin spice with 1½ tsp chai spice blend for a warming twist. |
| Mini Muffin-Style Bars | Use a muffin tin lined with paper cups for cute, portable cheesecake bites. |
| Salted Caramel Topping | Drizzle caramel over each slice before serving and finish with a pinch of sea salt. |
🍽️ How to Serve Pumpkin Cheesecake Bars
These bars are as versatile as they are delicious. Whether you’re dressing them up for a dinner party or slicing one for a mid-week snack, there’s no wrong way to enjoy them.
🍂 For a Cozy Fall Gathering
Plate each bar with a dollop of fresh whipped cream or a scoop of vanilla bean ice cream, then drizzle with warm caramel sauce. Add a dash of cinnamon for extra flair.
🧁 For Casual Snacking
Keep them chilled and ready in the fridge. Serve with hot coffee, chai tea, or spiced cider. They’re perfect for sharing—or sneaking a second slice.
🎉 For Entertaining
Make ahead and slice into smaller squares for a dessert tray. Add a few candied pecans on top or a light dusting of powdered sugar to impress guests.
🎃 Final Thoughts: A Cozy Fall Treat You’ll Crave Year-Round
These pumpkin cheesecake bars are everything we love about fall: spiced, creamy, sweet, and comforting. They’re easier than traditional cheesecake but just as satisfying.
Whether you’re serving a crowd or saving a batch just for you (no judgment here!), this recipe will quickly become a seasonal favorite.
Save it, pin it, print it, make sure you try it!
🍂 You Might Also Love:
If you’re obsessed with pumpkin season (we get it!), here are a few more irresistible recipes to try next:
- 15-Min Pumpkin Donuts Gen Z Can’t Stop Baking – Soft, fluffy, and coated in cinnamon sugar. These are the viral donuts everyone’s talking about!
- Quick 5-Ingredient Pumpkin Mousse for Fall – A no-bake treat that’s light, creamy, and ready in minutes.
- The Best Pumpkin Bread Pudding You’ll Need – A cozy, custardy classic with all the fall flavors packed into one dreamy dessert.
Happy baking and don’t forget to share your pumpkin creations with friends, family, or your social feed. 🎃✨

Ella Foster, co-founder of FoodBears.com, is a skilled writer whose love for cooking fuels her creative work. Her passion for experimenting in the kitchen brings authentic flavor and culinary inspiration to every piece she crafts for the platform.