
Let’s face it, brownies are never out of season. Whether it’s a chilly autumn night, a holiday gathering, or just a random Wednesday where you need a little pick-me-up, a good brownie hits the spot.
But what if you could enjoy a decadent, gooey, chocolatey treat that also happens to be gluten-free, dairy-free, and low-carb?
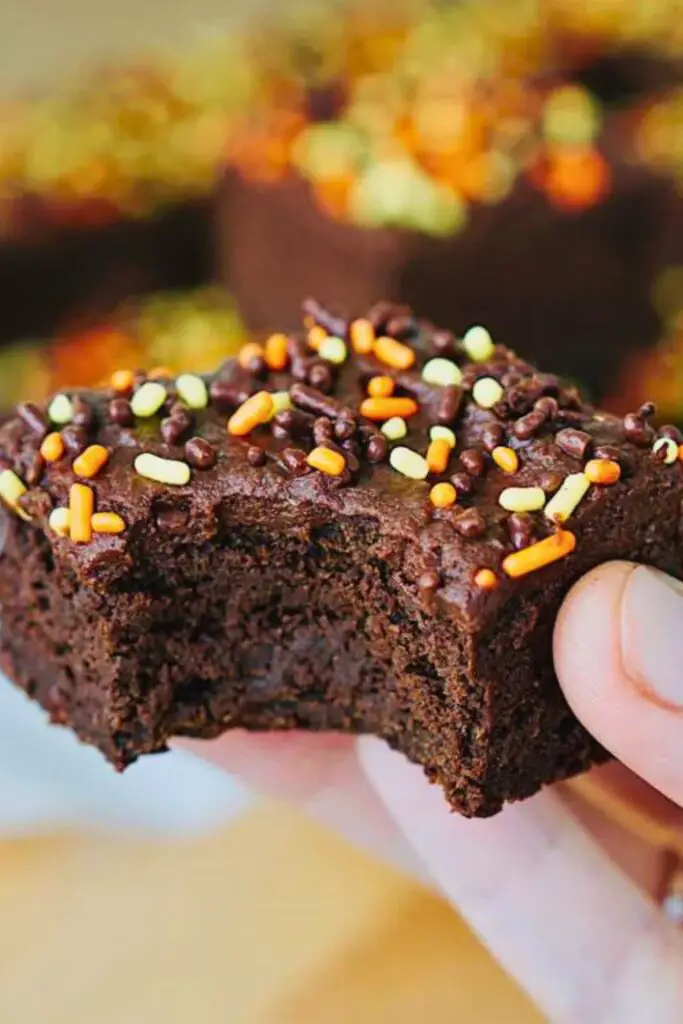
Enter: Pumpkin Brownies.
Now, before you raise your eyebrow at the mention of pumpkin in brownies, let’s make one thing clear. You won’t taste the pumpkin. What you’ll taste is decadent chocolate goodness with a perfectly fudgy texture that melts in your mouth.
This recipe is a game-changer. Not only does it use just one bowl (yes, one!), but it also features clean ingredients you probably already have in your kitchen. And did we mention it’s foolproof?
So grab your measuring cups and let’s get baking!
Why You’ll Fall in Love with These Pumpkin Brownies
These aren’t your average brownies. They’re fudgy, moist, and chocolatey—but with a healthy twist that makes them completely guilt-free. What makes these brownies so special? Let’s break it down:
⭐ 1. They’re Guilt-Free Yet Indulgent
These brownies are made without dairy, gluten, or refined flour, making them ideal for those with dietary restrictions or anyone who prefers a lighter dessert. You won’t believe they’re made with clean, wholesome ingredients.
⭐ 2. Hidden Veggies—Without the Taste
Yes, there’s pumpkin in them. But here’s the secret: you won’t taste it. The pumpkin is purely there for its magical ability to make these brownies extra moist and soft. Even pumpkin skeptics won’t notice it’s there.
⭐ 3. One Bowl, Zero Hassle
Nobody likes a pile of dirty dishes after baking. This recipe uses just one bowl, making it a favorite for busy days and last-minute dessert cravings. You mix, pour, and bake—done!
⭐ 4. Loved by Everyone
These brownies have passed the toughest test: picky eaters. The original creator made them for family, friends, and even co-workers, and they all approved. That’s saying something.
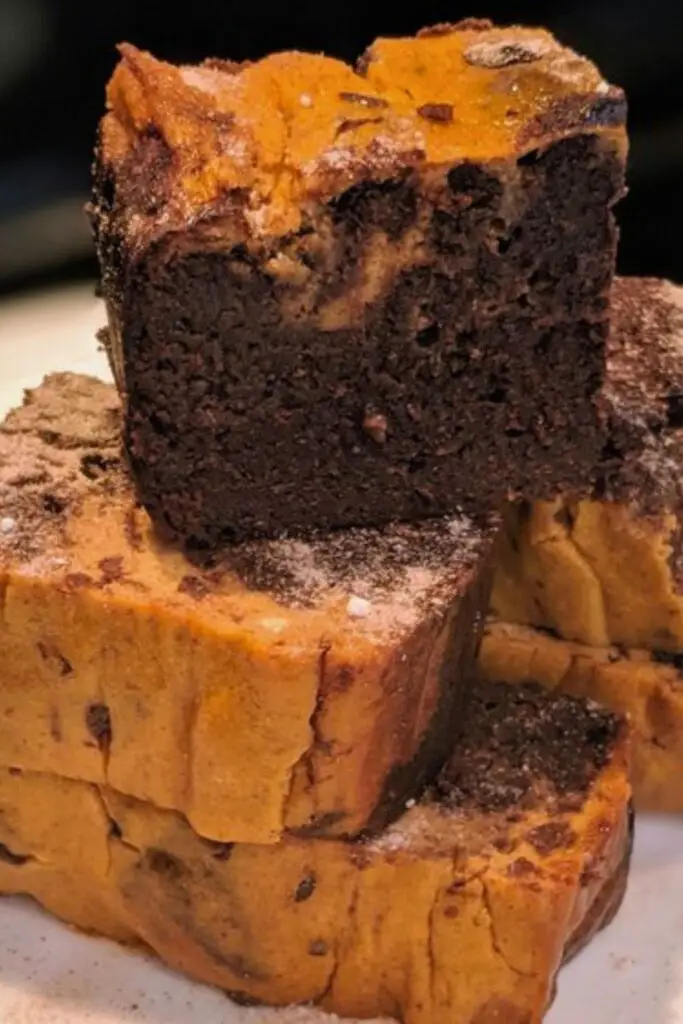
⭐ 5. Fudgy, Moist, and Perfectly Chocolatey
Thanks to the lack of flour and the addition of chocolate chips, these brownies come out fudgy yet light. No cakey, dry texture here, just rich chocolate goodness in every bite.
Ingredients You’ll Need

This recipe is simple and uses ingredients you probably already have in your kitchen. Here’s a complete table of measurements and tools to help you prep easily:
| Ingredient | Measurement | Purpose |
|---|---|---|
| Pumpkin Puree | 1 cup | Adds moisture and soft texture |
| Nut Butter (almond or peanut) | 1/2 cup | Provides fat and structure; makes it rich |
| Maple Syrup or Honey | 1/3 cup | Natural sweetener |
| Unsweetened Cocoa Powder | 1/2 cup | Adds deep chocolate flavor |
| Baking Soda | 1/2 teaspoon | Helps the batter rise slightly |
| Sea Salt | 1/4 teaspoon | Balances sweetness and enhances flavor |
| Vanilla Extract | 1 teaspoon | Boosts overall flavor |
| Dairy-Free Chocolate Chips | 1/3 cup + extra for top | Chocolatey richness; melts into the brownies |
📝 Tip: Make sure you’re using pure pumpkin puree and not pumpkin pie filling, which contains added sugar and spices.
🧰 Tools & Equipment You’ll Need
| Tool | Use |
|---|---|
| Large Mixing Bowl | For mixing all ingredients in one place |
| Rubber Spatula or Spoon | To stir and fold the batter |
| Measuring Cups & Spoons | For accuracy and consistent texture |
| 8×8-inch Baking Pan | Ideal pan size for thick, fudgy brownies |
| Parchment Paper (optional) | Makes for easy removal and cleaner edges |
| Oven | Preheat to 350°F (175°C) for baking |
| Refrigerator | Essential for chilling brownies after baking |
Step-by-Step: How to Make Pumpkin Brownies from Scratch
Let’s get into the heart of this recipe, the actual baking! These pumpkin brownies come together in six simple steps.
No fancy kitchen gadgets. No complicated techniques. Just one bowl, one pan, and a whole lot of fudgy goodness.
Step 1: Preheat and Prep
Before proceeding, preheat your oven to 350°F (175°C).
While the oven warms up, prepare your baking dish. Grab an 8×8-inch baking pan; this is the ideal size to give your brownies that thick, chewy center with crispy edges.
Pro tip: Line your pan with parchment paper, leaving a little overhang on the sides. This makes removing the brownies from the pan later a breeze. If you don’t have parchment, no worries. Just grease your pan lightly with coconut oil or nonstick spray.
This step might feel routine, but don’t skip it. A properly preheated oven and prepared pan set the stage for baking success.
Step 2: Mix It All in One Bowl
Now for the fun part, mixing everything!
Grab your large mixing bowl and your spatula (or a big spoon if that’s what you have on hand). Combine all your wet and dry ingredients in the same bowl.
Start by adding the following:
- 1 cup pumpkin puree
- 1/2 cup almond or peanut butter
- 1/3 cup maple syrup (or honey)
- 1/2 cup unsweetened cocoa powder
- 1/2 teaspoon baking soda
- 1/4 teaspoon sea salt
- 1 teaspoon vanilla extract
Now mix. Stir until everything comes together in a thick, glossy batter.
It might look dense at first, but keep stirring. The pumpkin and nut butter will loosen up the mixture and smooth it out. The cocoa powder can be a bit stubborn, so scrape the sides of the bowl and keep folding it in.
You’ll notice the batter starting to resemble a rich chocolate pudding. It’ll be thick and velvety, but not dry. That’s your cue that things are going well.
Why this step works:
Mixing everything in one bowl isn’t just about convenience (though we love that!). It helps the ingredients incorporate evenly.
The pumpkin gives the batter moisture. The nut butter adds richness and structure. The cocoa powder brings the chocolatey base. Together, it’s pure harmony.
Step 3: Add Chocolate Chips
Time to dial up the indulgence.
Once your batter is mixed, it’s time to fold in 1/3 cup of dairy-free chocolate chips. This is the part where the brownie goes from “healthy treat” to “straight-up dessert heaven.”
Gently fold the chips into the batter using your spatula. Be sure they’re evenly distributed; every bite should have a melty, gooey pocket of chocolate.
You can also get creative here:
- Want extra crunch? Add chopped nuts.
- Craving a fall twist? Add cinnamon or pumpkin spice.
- Feeling fancy? Use a mix of dark and semi-sweet chips.
But honestly, even as it is, this recipe is a 10/10.
Note: Save a small handful of chips to sprinkle on top after you pour the batter into the pan. They make the brownies look bakery-worthy!
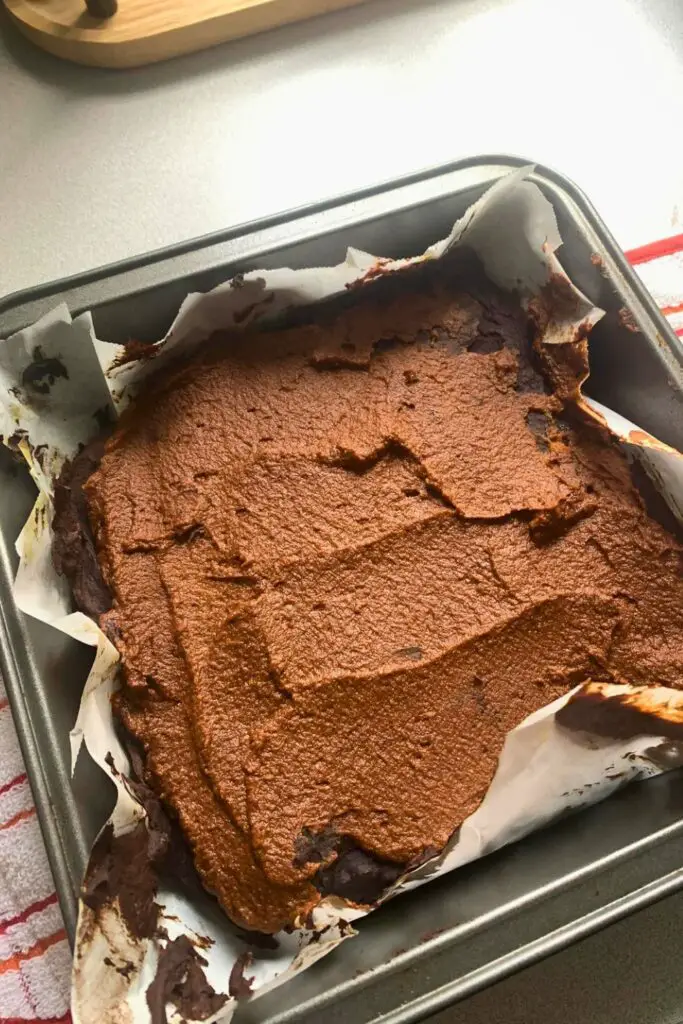
Step 4: Pour and Spread
Now that your batter is loaded with chocolatey goodness, it’s time to transfer it to your prepared baking pan.
Scoop the batter into the pan and use a spatula to spread it out evenly. It’ll be thick, that’s precisely what you want. Don’t worry if it takes a few extra swipes to smooth it out. Just make sure the surface is level so it bakes evenly.
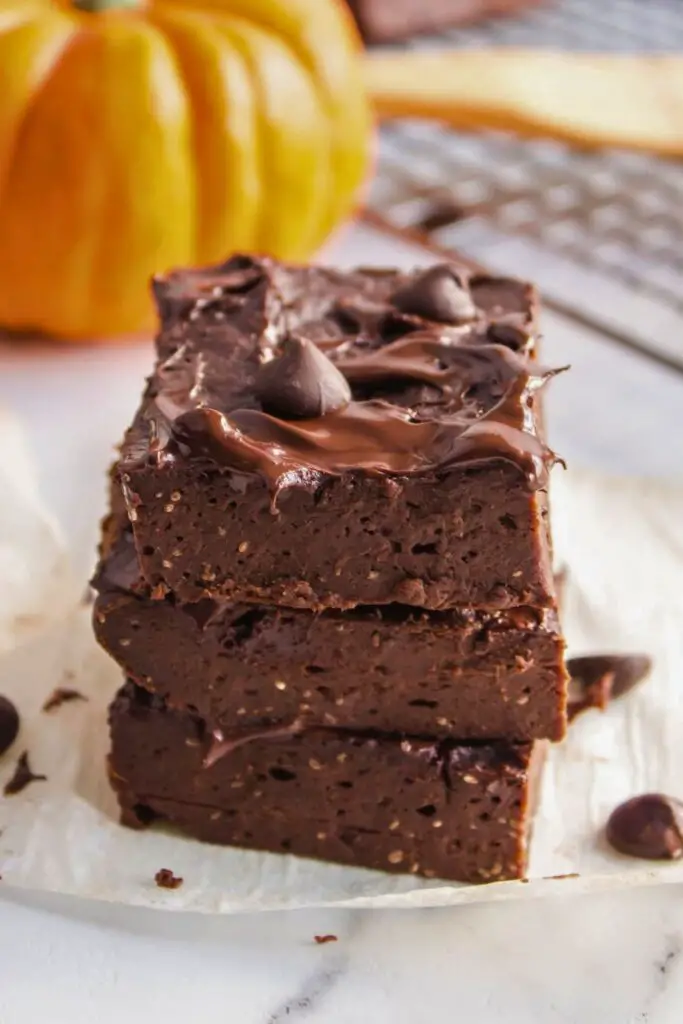
Before popping it into the oven, sprinkle those extra chocolate chips right on top. They’ll melt into the top and create that irresistible brownie crust we all know and love.
This step is also where the magic starts to feel real. The smell. The texture. The anticipation. You’re minutes away from something amazing.
Step 5: Bake It Just Right
Slide your pan into the oven and set a timer for 25–30 minutes.
Every oven is different, so start checking around the 25-minute mark. You want the edges to look slightly firm and the center to be just set. Insert a toothpick in the middle, and it should come out with a few moist crumbs, but not raw batter.
Avoid overbaking! These brownies are meant to be soft, rich, and fudgy, not dry or cakey. Even if the center seems a bit soft when you pull it out, that’s okay. They’ll firm up as they cool.
Pro tip: Let the aroma guide you. When your kitchen starts smelling like rich cocoa and warm pumpkin spice, you’re getting close.
What makes this step so powerful is its forgiving nature. There’s no need to worry about eggs or flour, so the texture won’t become rubbery or dense if you let it bake a little longer. However, if you nail the timing, you’re in for next-level fudginess.
Step 6: Let Them Cool (Important!)
This is the most important and most overlooked step.
Once your brownies are out of the oven, let them cool completely in the pan. I know it’s tempting to slice right into them, but patience pays off here.
After about 20–30 minutes, once they’ve cooled to room temperature, cover the pan with foil or wrap and place it in the refrigerator for at least 30 minutes.
This chilling step is the secret to getting that rich, fudgy texture that almost sticks to your teeth, in the best way possible. It gives the chocolate chips time to re-solidify slightly, and it helps the brownies set so they slice beautifully without crumbling.
Think of it like a reset button for the structure of the brownie. It transforms your batch from “just okay” to “Instagram-worthy.”
Once chilled, grab the parchment edges and lift the brownies out of the pan. Use a sharp knife to slice them into squares. Wipe the knife clean between cuts for those picture-perfect edges.
And then? Dig in. You earned it.
Tips for the Best Pumpkin Brownies
Want to make sure your pumpkin brownies come out perfect every single time? Here are some pro tips and tricks straight from the original creator’s experience and a few extras to level up your brownie game.
🎃 1. Don’t Skip the Fridge Time
This is the #1 tip mentioned in the video, and it’s crucial. Once your brownies are baked, let them cool at room temperature, then cover and refrigerate for at least 30 minutes.
This simple step is what makes them fudgy, dense, and delicious. It locks in the moisture and gives the brownies that gooey, chewy texture we all crave.
Why it matters: Freshly baked brownies can crumble when cut too soon, chilling helps them hold their shape and enhances the chocolate flavor.
🍫 2. Use High-Quality Cocoa Powder and Chocolate Chips
The chocolate is front and center in this recipe, so make it count. Use unsweetened cocoa powder that’s rich and deep in color. Also, opt for dairy-free semi-sweet or dark chocolate chips; they melt beautifully and add a decadent touch.
Optional tip: A mix of mini and regular chocolate chips adds a surprise to every bite.
🥄 3. Stir Thoroughly, But Don’t Overmix
Since this is a flourless recipe, you don’t have to worry about developing gluten. However, you should still mix the batter well until smooth and consistent, especially to fully incorporate the cocoa powder. Scrape the sides of the bowl and the bottom to catch any hidden dry spots.
💡 4. Choose the Right Nut Butter
Almond butter offers a milder flavor, while peanut butter adds a rich, nutty depth. Both work great. Just make sure your nut butter is natural and smooth, the kind with only nuts and maybe salt listed as ingredients.
Avoid: Dry or chunky butters, as they can affect the final texture.
🌱 5. Add a Dash of Spices (Optional)
While the original recipe keeps it simple, you can enhance the fall vibes by adding a pinch of cinnamon, nutmeg, or pumpkin spice. These flavors complement the cocoa, making the brownies feel extra seasonal.
Serving Suggestions: How to Enjoy Pumpkin Brownies
These brownies are incredibly versatile. Whether you’re serving them fresh out of the fridge or dressing them up for dessert night, here are a few delicious ways to enjoy them:
🍨 1. Serve Warm with Ice Cream (A La Mode Style)
Pop a brownie square in the microwave for about 10–15 seconds, then top it with a scoop of vanilla coconut ice cream or dairy-free chocolate gelato. Add a drizzle of maple syrup or melted nut butter for an extra wow factor.
☕ 2. Pair with a Cozy Fall Drink
Enjoy your pumpkin brownie with a warm chai latte, spiced hot cocoa, or pumpkin cream cold brew. The combination of chocolate and spice is a match made in heaven for the fall season.
🍂 3. Top with Coconut Whip and Cinnamon
Make your brownies feel extra special with a dollop of whipped coconut cream and a dash of ground cinnamon. It adds a creamy contrast, making each bite feel indulgent.
🧺 4. Pack for a Fall Picnic or Snack Box
Because they’re gluten- and dairy-free, these brownies are great for lunchboxes or meal prepping. Slice and store them in parchment paper squares for grab-and-go treats.
🎁 5. Wrap as a Healthy Holiday Gift
Slice them into neat squares, stack them in parchment, and tie with twine for an adorable homemade gift. Add a tag that says, “You won’t believe these are healthy!”—because they won’t!
Pumpkin Brownie Variations You’ll Want to Try
Want to get creative with your pumpkin brownies? Try these delicious mix-ins, toppings, and flavor swaps to customize the recipe to your taste or occasion:
| Variation | How to Make It |
|---|---|
| Nutty Pumpkin Brownies | Fold in 1/4 cup chopped walnuts or pecans into the batter for extra crunch. |
| Pumpkin Spice Brownies | Add 1/2 tsp cinnamon and 1/4 tsp pumpkin spice to the batter for cozy fall vibes. |
| Mocha Pumpkin Brownies | Stir in 1 tsp instant espresso powder to deepen the chocolate flavor. |
| Swirled Almond Butter Top | Drizzle almond or peanut butter on top before baking, and swirl with a knife. |
| Protein-Packed Brownies | Add 1 scoop of chocolate plant protein powder and reduce cocoa by 2 tbsp. |
| Pumpkin Cheesecake Brownies | Swirl in a dairy-free cream cheese mixture before baking. |
| Chili-Chocolate Kick | Add a pinch of cayenne or chili powder for a spicy surprise. |
| Double Chocolate Chunk | Use chopped dark chocolate chunks in place of or alongside chocolate chips. |
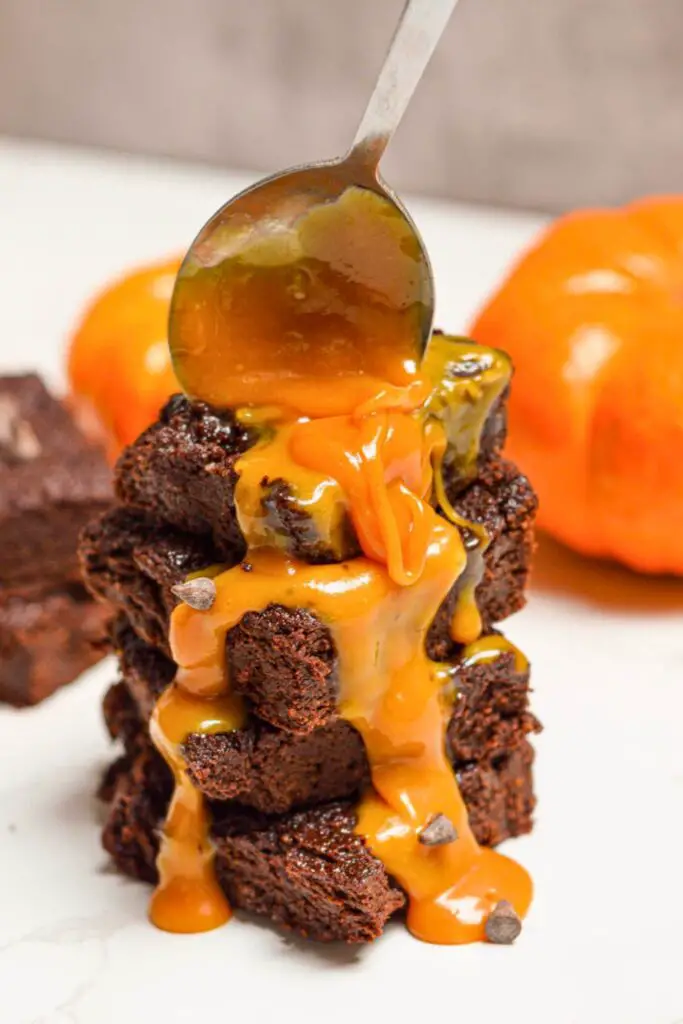
| Salted Caramel Drizzle | Drizzle dairy-free caramel sauce over the top after baking and sprinkle sea salt. |
| Mini Pumpkin Brownie Bites | Bake in a muffin tin for bite-sized treats. Adjust bake time to 18–20 mins. |
Final Thoughts
These pumpkin brownies are one of those recipes that feel too good to be true. They’re delicious enough to bring to a party, but wholesome enough to snack on any day of the week. Plus, they’re a great way to sneak in some veggies without anyone noticing.
Whether you’re celebrating the holidays, meal prepping, or just baking for fun, this is a go-to recipe that never disappoints.
If you’ve tried these, we’d love to hear how they turned out! Leave a comment, share a photo, and spread the love for brownies.
You May Also Love:
If you enjoyed this recipe, don’t miss these other cozy fall treats that are just as easy and delicious:
- 🎃 Cozy Pumpkin Cake Recipe Perfect for Fall
Moist layers, dreamy frosting, and a hint of pumpkin flavor in every bite. - 🥞 Best Pumpkin Pancakes Recipe for Fall Mornings
Fluffy, dairy-free pancakes that make every fall breakfast extra special. - 🍞 Best Pumpkin Bread Recipe for Busy Moms
Quick, simple, and perfect for lunchboxes or weekend baking with the kids.

Ella Foster, co-founder of FoodBears.com, is a skilled writer whose love for cooking fuels her creative work. Her passion for experimenting in the kitchen brings authentic flavor and culinary inspiration to every piece she crafts for the platform.