
There’s just something about summer desserts that hits differently. Light, juicy, and loaded with vibrant colors, they satisfy your sweet tooth and make you feel like you’re on vacation. And this summer fruit cake? It’s the ultimate summer treat.
Whether hosting a garden brunch, bringing dessert to a BBQ, or craving something refreshing, this fruit-filled cake brings sunshine to every bite. It’s easy to make, tastes divine, and looks like something from a fancy bakery.
Let’s dive into every juicy detail, shall we?
Why This Summer Fruit Cake is So Popular
Let’s be honest. Traditional fruit cakes (heavy ones loaded with dried fruits) aren’t for everyone. This summer version is a totally different story.
Here’s why people are obsessed with it:
- Light and moist vanilla sponge – not dense or dry
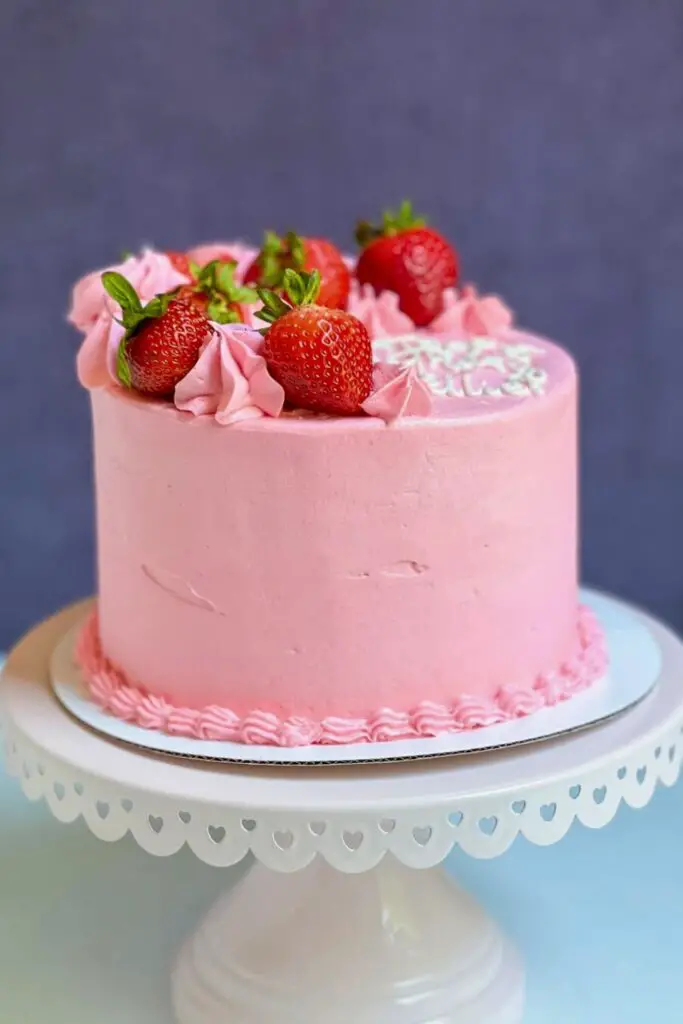
- Real, fresh fruits – strawberries, mangoes, blueberries—you name it!
- Whipped cream topping – soft, not overly sweet
- No fancy tools are needed – just basic kitchen stuff
This cake feels like a cool breeze on a hot day. It’s bright, airy, and melts in your mouth.
What Fruits Work Best in Summer Fruit Cake?
You have plenty of options when it comes to fruits. Use what’s in season, what you love, or what’s already in your fridge.
Here’s a quick list of summer fruit favorites:
- Strawberries – classic, juicy, and sweet
- Blueberries – tiny bursts of flavor
- Raspberries – tart and vibrant
- Peaches – soft, juicy, and summery
- Mangoes – tropical and smooth
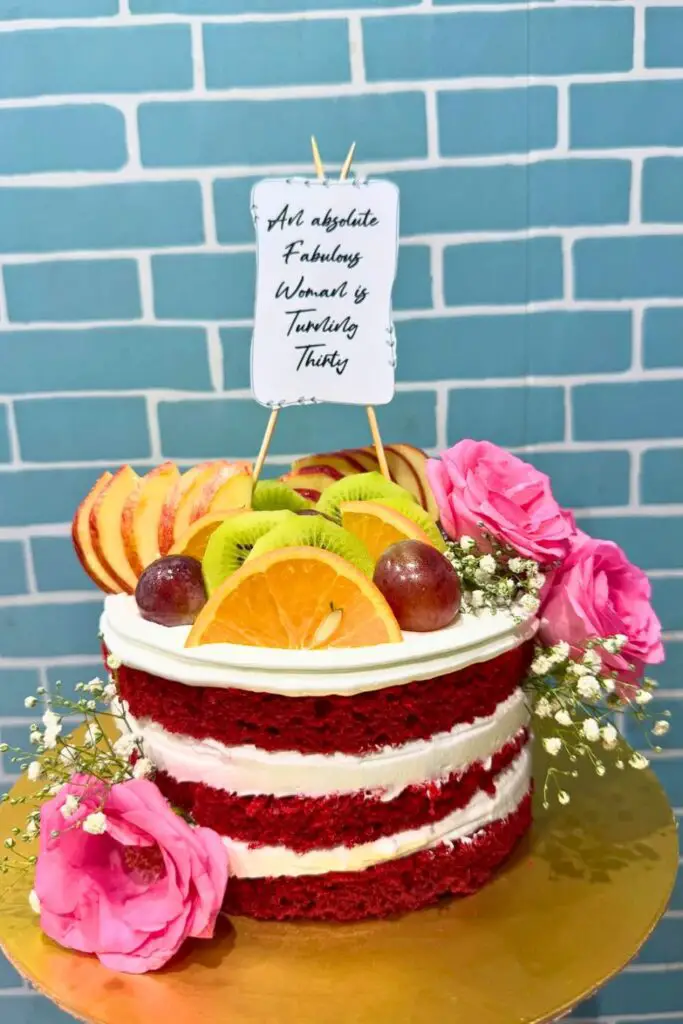
- Kiwis – a touch of tang and a pop of green
- Pineapple – sweet and bold
- Cherries – rich in color and flavor
Pro Tip: Always wash, dry, and slice your fruits before placing them on the cake. Wet fruit can make the cake soggy.
Ingredients
Here’s a clear, easy-to-read breakdown of everything you’ll need for the sponge, topping, and decoration.
| Component | Ingredient | Measurement |
|---|---|---|
| Dry Ingredients | All-purpose flour | 1½ cups (190g) |
| Baking powder | 1½ teaspoons | |
| Salt | ¼ teaspoon | |
| Wet Ingredients | Unsalted butter (room temp) | ½ cup (1 stick, 113g) |
| Granulated sugar | ¾ cup (150g) | |
| Eggs | 3 large | |
| Vanilla extract | 1 teaspoon | |
| Whole milk | ½ cup (120ml) | |
| Whipped Cream | Heavy whipping cream (chilled) | 1 cup (240ml) |
| Powdered sugar | 2 tablespoons | |
| Fruit Toppings | Mixed fresh summer fruits | 2 to 3 cups, chopped |
How to Make Summer Fruit Cake (Step-by-Step)
This recipe is perfect for beginners and seasoned bakers alike. We will walk through each step slowly so nothing feels overwhelming.
By this end, you’ll have a gorgeous summer fruit cake that’s bakery-worthy but made in your cozy kitchen.
Step 1: Preheat and Prepare the Pan
Preheat your oven to 350°F (175°C).
This gives your oven enough time to reach the perfect baking temperature. Don’t skip preheating starting with a cold oven can cause uneven baking.
Prepare your cake pan:
- Use an 8-inch round cake pan (a springform pan works too).
- Grease the bottom and sides with a bit of butter or cooking spray.
- Line the bottom with parchment paper. This helps the cake release cleanly without breaking.
Pro Tip: If you’re using a dark or glass pan, reduce the temperature to 325°F. These pans get hotter and can brown the edges too quickly.
Step 2: Combine the Dry Ingredients
In a medium-sized mixing bowl:
- Add 1½ cups all-purpose flour
- Add 1½ teaspoons baking powder
- Add ¼ teaspoon salt
Use a whisk or fork to mix them evenly. This ensures the baking powder spreads throughout the batter and gives you an even rise.
Why sift the flour?
If your flour is clumpy or compacted, sifting makes it lighter and easier to mix. It’s optional but helpful!
Step 3: Cream the Butter and Sugar
In a large mixing bowl:
- Add ½ cup (1 stick) of room-temperature butter
- Add ¾ cup granulated sugar
Use a hand or stand mixer to beat the mixture on medium speed for 2 to 3 minutes. You want it to look pale, fluffy, and creamy.
This step is important! It incorporates air into the batter and makes your cake light and tender.
If your butter is too cold:
Cut it into cubes and let it sit at room temperature for 15 minutes, or microwave it for 5 seconds at a time (don’t melt it).
Step 4: Add the Eggs and Vanilla
Now, we’ll add:
- 3 large eggs, one at a time
- 1 teaspoon vanilla extract
Here’s how:
- Crack in the first egg.
- Beat on low until it fully mixes in.
- Repeat for the second and third eggs.
- Add the vanilla and give it one last mix.
Why go one at a time?
It keeps the batter from curdling and helps everything blend smoothly.
Troubleshooting tip: If your batter starts to separate or look grainy, don’t panic! It usually comes back together once you add the dry ingredients.
Step 5: Combine Wet and Dry Ingredients
Time to mix everything together!
Alternate adding:
- The dry flour mixture
- The ½ cup of milk
Here’s the sequence:
- Add half of the flour mixture to the egg-butter mix.
- Mix on low just until combined.
- Add half the milk. Stir gently.
- Add the remaining flour.
- Pour in the rest of the milk.
Important: Do not overmix. Overmixing activates the flour gluten, making your cake chewy instead of soft.
Mix just until everything is incorporated and you no longer see dry flour. The batter should be smooth and creamy.
Step 6: Pour and Bake
Pour the batter into your prepared cake pan. Use a spatula to spread it evenly.
Tap the pan gently on the counter a few times. This will pop any large air bubbles and help your cake bake evenly.
Slide the pan into the preheated oven and bake for 30–35 minutes.
How to know it’s done:
- The top will be golden brown.
- The edges will pull slightly away from the sides.
- A toothpick inserted in the center should come out clean or with a few moist crumbs (not wet batter).
Don’t open the oven too early!
Opening it before 25 minutes can cause the cake to sink.
Step 7: Cool the Cake Properly
Once baked, take the cake out of the oven and place it on a cooling rack.
- Let it sit in the pan for 10 minutes.
- Then, carefully remove it from the pan and let it cool completely on the rack.
If you’re in a rush, don’t refrigerate a hot cake it can make it rubbery and dense.
Tip: Place a towel over the cake while it cools to keep the top soft and moist.
Step 8: Make the Whipped Cream
Now comes the fun part!
In a chilled mixing bowl, add:
- 1 cup heavy whipping cream
- 2 tablespoons powdered sugar
Use a hand or stand mixer to whip the cream:
- Start slowly to avoid splashing.
- Increase speed gradually.
- Beat until soft peaks form.
What are soft peaks?
When you lift the beaters, the cream holds a gentle peak that droops slightly. Don’t overwhip; otherwise, it turns grainy or becomes butter.
Want flavored cream? Add ½ teaspoon vanilla extract or lemon zest for a flavor kick.
Step 9: Decorate with Fresh Summer Fruits
Now that your cake is cool and your cream is fluffy, it’s time to make it shine!
Steps to decorate:
- Place your cake on a serving plate.
- Use a spatula to spread whipped cream evenly across the top.
- Add your chopped and sliced fresh fruits:
- Strawberries (halved or quartered)
- Mango cubes
- Blueberries
- Kiwi slices
- Peaches
- Raspberries
Start from the center, work outwards, or arrange in colorful rows, circles, or abstract art—get creative!
Extra ideas:
- Drizzle honey or lemon glaze for added shine.
- Sprinkle shredded coconut or toasted almonds.
- Add a few fresh mint leaves for contrast and aroma.
Serving Tip: Chill the decorated cake for 15–20 minutes before serving. It helps set the cream and makes slicing easier.
Making the Whipped Cream Topping
Let’s talk about the crown jewel of this cake—the whipped cream. It’s not just a topping. The cool breeze balances out the sweetness of the fruits and sponge. It’s lighter than buttercream, perfect for a hot summer day.
What You’ll Need:
- 1 cup (240 ml) heavy whipping cream, chilled
- 2 tablespoons powdered sugar
- Optional: ½ teaspoon vanilla extract or lemon zest for flavor
Step-by-Step Instructions:
1. Chill Everything First
Before grabbing your mixer, put the mixing bowl and beaters/whisk in the freezer for 10–15 minutes.
Why?
Cold tools help the cream whip up faster and hold its shape better.
2. Add Ingredients
Take the chilled bowl out. Add:
- The cold whipping cream
- Powdered sugar
- Optional flavor add-ins (vanilla or lemon zest)
3. Start Whipping
Use a hand or stand mixer:
- Start on low speed for 30 seconds (so the cream doesn’t splash).
- Increase to medium-high and whip for about 3–4 minutes.
You’re looking for soft peaks where the cream:
- Holds a shape when you lift the whisk
- But the tip gently falls over
Don’t over-whip!
If you keep mixing past this point, the cream can become grainy or turn into butter.
Whipped Cream Troubleshooting:
| Issue | Fix |
|---|---|
| Cream isn’t thickening | Make sure it’s cold; continue whipping |
| Turned grainy or clumpy | Add 1–2 tbsp more cream and mix gently |
| No electric mixer? | Use a whisk, but be ready for a workout! |
Decorating Your Summer Cake

Now that your cake is cool and the whipped cream is whipped to perfection, it’s time to get creative.
Think of your cake like a blank canvas and your fruits as paint. Let’s turn this into a showstopper!
Step-by-Step Decorating Instructions:
1. Level the Cake (Optional)
If your cake has a domed top, use a serrated knife to level it gently. This gives you a flat surface to work with.
2. Add the Whipped Cream
Use a rubber spatula or offset spatula to:
- Spread the whipped cream across the top of the cake
- You can keep it rustic with swoops and swirls or make it smooth and clean
Tip: For extra elegance, pipe small whipped cream swirls around the edge with a piping bag and star tip.
3. Add the Fresh Fruit
You can go with:
- Randomly scattered fruit: Looks natural and easy to do
- Concentric circles: Neatly layer fruit slices from the center outward
- Sectioned rainbow: Group fruits by color for that Instagram-perfect look
Great fruit pairings:
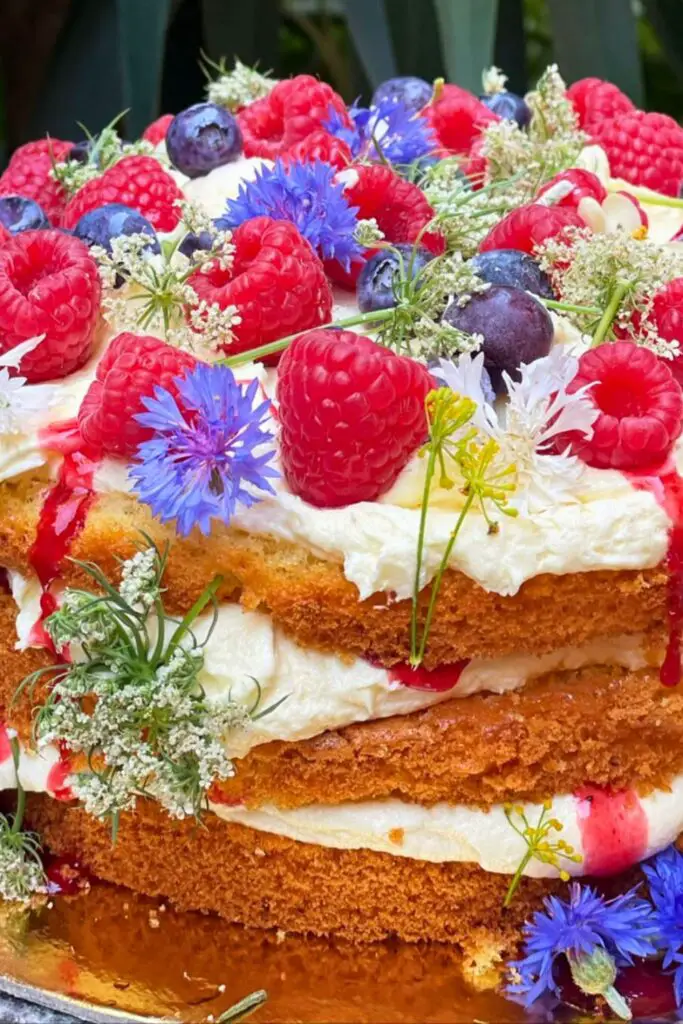
- Strawberries + blueberries + kiwi
- Peaches + raspberries + blackberries
- Mango + pineapple + mint leaves
4. Optional Finishing Touches
Want to give your cake that professional “bakery” touch? Try these:
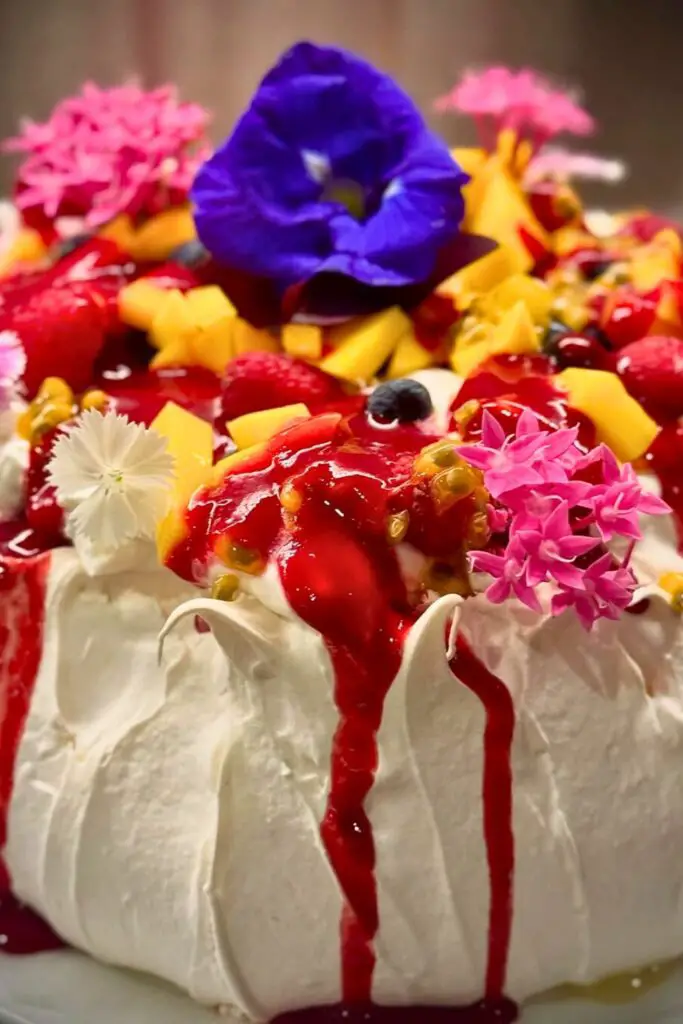
- Glossy glaze: Brush warm apricot jam + water mix on the fruits for shine
- Edible flowers: A few pansies or violets can make it look stunning
- Coconut flakes or chopped nuts: Sprinkle for crunch and contrast
5. Chill Before Serving
Place the decorated cake in the fridge for 15–30 minutes. This firms up the cream and helps everything stay in place when slicing.
Tips to Make It Perfect Every Time
Even the simplest cake can go sideways without the right techniques. Here are my tips and tricks that make all the difference, whether it’s your first cake or your 50th.
1. Bring Ingredients to Room Temperature
- Cold butter doesn’t cream properly.
- Cold eggs won’t mix evenly.
- Cold milk might cause the batter to curdle.
Tip: Remove everything from the fridge 30–45 minutes before starting. This will make your batter smoother, and your cake rise better.
2. Don’t Overmix the Batter
Once the flour goes in, mix just until combined.
Overmixing activates the gluten, making your cake dense or chewy instead of soft and tender.
3. Use Fresh, Ripe Fruit
Unripe or sour fruits can ruin the flavor.
- Taste the fruit first. Is it sweet and juicy? Perfect.
- Wash, dry, and cut just before decorating to keep it fresh.
4. Chill Your Whipped Cream Tools
Place your bowl and beaters in the freezer for 10–15 minutes before whipping cream. Cold tools = faster whipping and better structure.
5. Don’t Skip Parchment Paper
It’s the secret to a cake that slides right out of the pan.
Grease the pan, then add parchment on the bottom. No sticking, no crumbling.
6. Let the Cake Cool Completely
Warm cake + whipped cream = a melted mess.
Let the cake cool on a wire rack for at least 1 hour before decorating.
7. Slice with a Hot Knife
Run a sharp knife under hot water, wipe it dry, and then slice.
It glides through cream and fruit for clean, neat slices.
Storing and Saving Leftovers
Let’s be honest—you may not have leftovers. But if you do, here’s how to keep them fresh and tasty for as long as possible.
1. Store in the Fridge (Short-Term)
Place the leftover cake in an airtight container and store it in the refrigerator.
- Stays fresh for 2–3 days
- The cream may start to soften the sponge by Day 3, but it’s still safe and delicious
Tip: Add a layer of plastic wrap over the cut surface to prevent it from drying out.
2. Store Components Separately (Make Ahead Option)
Want to prep in advance?
- Bake and cool the sponge cake, then wrap it tightly in plastic wrap
- Store in the fridge for up to 3 days, or freeze for up to 1 month
- Whip the cream and decorate just before serving
This way, you get fresh texture and flavor even if you’re prepping early.
3. Freezing (Cake Only)
The whipped cream and fruit won’t freeze well, but the plain sponge cake does!
- Wrap the cooled cake in plastic wrap + aluminum foil
- Store in the freezer for up to 1 month
- Thaw overnight in the fridge before decorating
4. Don’t Store in Warm Places
Avoid leaving the cake at room temperature for over 1 hour, especially if the weather is hot. The whipped cream can melt or spoil.
If you’re serving it at a picnic or party, try this trick:
- Keep the cake on a chilled platter or over an ice pack
- Serve in small portions, and put the rest back in the fridge
Final Thoughts: A Cake That Sings of Summer
If summer had a flavor, this cake would be it.
It’s soft, juicy, sweet, and cooling, everything a summer dessert should be. Plus, it looks like a rainbow and tastes like a dream.
Whether you’re baking for a crowd or just treating yourself, this summer fruit cake is guaranteed to make you smile.
So go ahead and bake the sunshine in your kitchen. Your taste buds (and your Instagram feed) will thank you.

Ella Foster, co-founder of FoodBears.com, is a skilled writer whose love for cooking fuels her creative work. Her passion for experimenting in the kitchen brings authentic flavor and culinary inspiration to every piece she crafts for the platform.