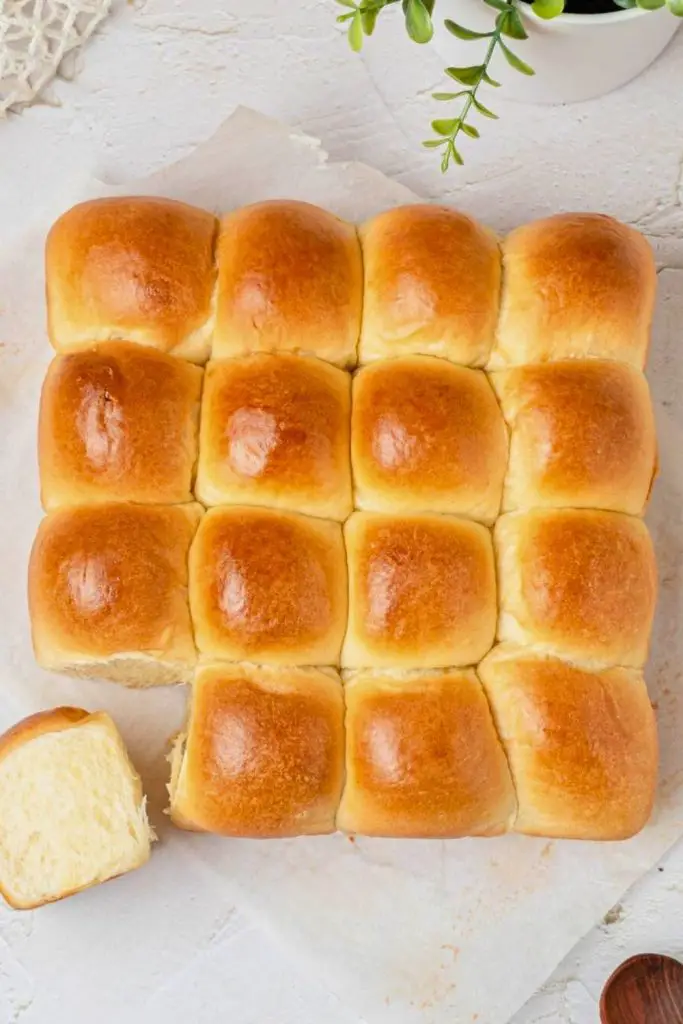
There’s nothing more comforting than the smell of warm, golden dinner rolls baking in the oven. They’re soft, fluffy, and melt in your mouth the moment you take a bite.
Imagine pulling apart a tall, cotton-candy-soft roll, spreading it with butter, and watching it melt pure happiness.
In this guide, we’re going to make the most irresistible dinner rolls from scratch. Don’t worry, the steps are simple, the ingredients are basic, and the results?
Absolutely bakery-worthy. Whether it’s for a holiday dinner, a cozy fall evening, or just because you’re craving fresh bread, these rolls will become a staple in your home.
Why You’ll Love This Dinner Rolls Recipe
There’s just something magical about homemade bread. The moment your kitchen fills with the warm, buttery smell of freshly baked dinner rolls, you know you’re in for a treat.
These rolls aren’t just bread; they’re little pillows of joy that bring people together around the table.
Here’s why this recipe will quickly become a family favorite:
- Simple ingredients you already have. No complicated shopping trips required. Everything you need is likely sitting in your pantry or fridge right now.
- Soft and fluffy every time. The dough is moist and tender, producing melt-in-your-mouth rolls that taste like they came from your favorite restaurant.
- Beginner-friendly process. Even if you’ve never made bread before, this recipe walks you through each step clearly. No fancy tools required, just patience and love.
- Perfect for any occasion. Whether it’s Thanksgiving, Christmas dinner, or just a cozy weeknight meal, these rolls are always a hit.
- Customizable to your taste. You can keep them plain, brush with garlic butter, sprinkle with herbs, or drizzle with honey butter for a sweet twist.
There’s also an extra layer of satisfaction that comes from making bread from scratch. It’s not just about eating, it’s about creating. You mix, knead, wait, shape, and bake.
Then, when those golden rolls hit the table, you feel a sense of pride. And trust me, the first bite will prove its worth every step.
Ingredients You’ll Need
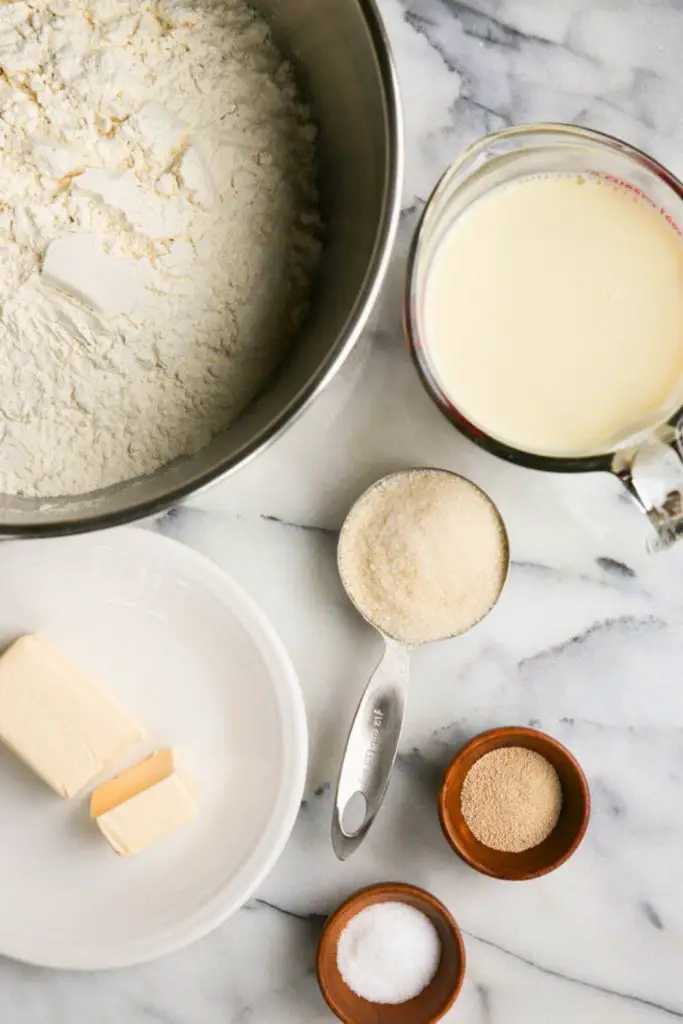
Let’s keep things simple and organized. Below is a clear breakdown of what you’ll need to make these rolls. Each ingredient plays an important role, so don’t skip or substitute unless necessary.
| Ingredient | Amount | Purpose & Notes |
|---|---|---|
| Whole Milk (warm) | 1 ½ cups (about 110°F) | Activates the yeast and makes the dough rich and tender. Warm, not hot. |
| Granulated Sugar | ⅓ cup (divided) | A little for the yeast to feed on, the rest for gentle sweetness. |
| Active Dry Yeast | 1 tablespoon | The magic ingredient that makes the rolls rise. |
| Unsalted Butter | 4 tablespoons (melted) | Adds richness, softness, and that irresistible buttery flavor. |
| Salt | 1 ¼ teaspoons | Balances out sweetness and enhances flavor. |
| All-Purpose Flour | Just under 4 cups | The backbone of the rolls. Be sure to measure correctly for best results. |
Pro Tips on Ingredients:
- Milk temperature matters: Too hot and you’ll kill the yeast, too cold and it won’t activate. Aim for warm like baby’s bathwater.
- Flour measuring trick: Spoon flour into your measuring cup, then level it with a knife. Scooping directly can pack too much flour and make the rolls dense.
- Butter choice: Unsalted is best since you control the salt, but if you only have salted butter, reduce the added salt slightly.
When you gather these six ingredients, you’re already halfway to creating bakery-style dinner rolls. The best part? You probably don’t even need a grocery store run, they’re that simple.
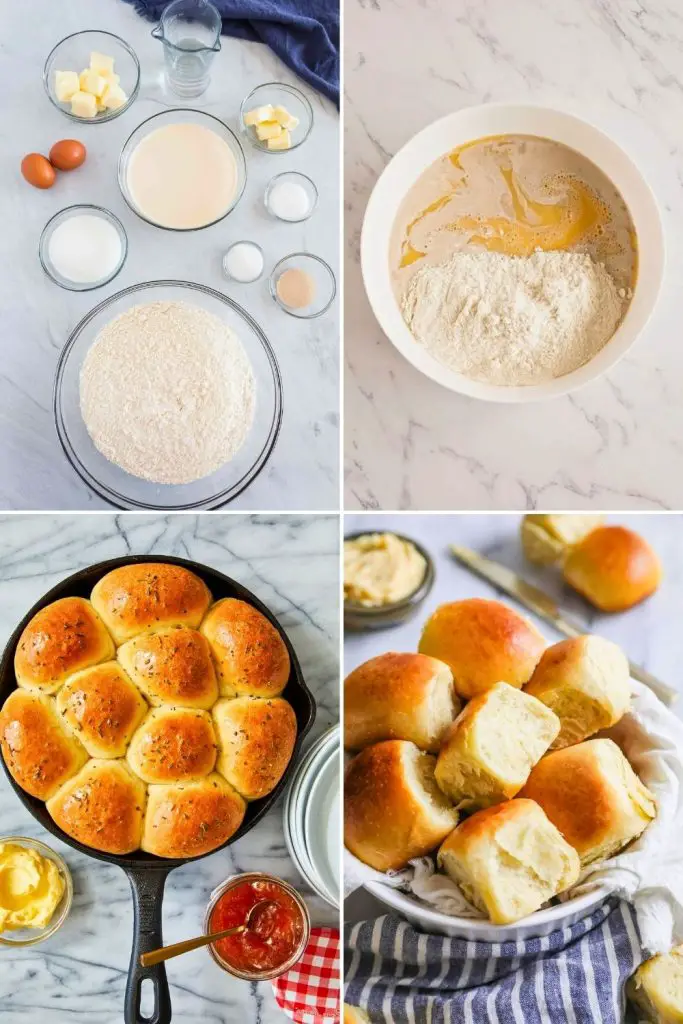
How to Make Dinner Rolls (Step-by-Step Guide)
Making dinner rolls from scratch might seem like a challenge at first, but once you get into the rhythm, it feels surprisingly easy and rewarding.
Think of it like a little kitchen project: you mix, you knead, you wait, and suddenly, your home smells like a bakery.
The reward? Soft, fluffy rolls that melt in your mouth and impress anyone sitting at your table.
Let’s break it down step by step, so you can create the fluffiest dinner rolls every single time.
Step 1: Activate the Yeast
The foundation of every fluffy dinner roll is yeast. Without it, you’d end up with flat, dense bread instead of pillowy-soft rolls.
- Start with 1 ½ cups of whole milk, warmed to about 110°F. This is the sweet spot, warm enough to wake up the yeast but not so hot that it kills it. If you don’t have a thermometer, dip a finger in. It should feel like warm bathwater.
- Stir in 1 tablespoon of sugar. Yeast loves sugar; it’s food that helps it activate.
- Sprinkle 1 tablespoon of active dry yeast over the top of the warm milk mixture. Don’t stir yet; just let it sit for a minute.
- After a minute, whisk gently and leave it for 5 minutes. You’ll see the yeast bloom and get foamy, a sign it’s alive and ready to do its job.
👉 Pro Tip: If after 5–10 minutes the yeast hasn’t bubbled up, it’s dead. Toss it out and start again with fresh yeast.
This step might seem small, but it’s the most important. Activated yeast is what gives your rolls that sky-high fluffiness.
Step 2: Mix the Dough Base
Now that the yeast is ready, it’s time to build the dough.
- To the yeast mixture, add 4 tablespoons of melted unsalted butter, the remaining sugar (about ¼ cup), and 1 ¼ teaspoons of salt. This combo brings flavor and softness.
- Begin adding all-purpose flour, aiming for a total of just under 4 cups. Start slow, adding ½ cup at a time, and whisk between each addition.
At first, whisking works beautifully. It blends the flour in quickly and evenly, and you’ll see the dough start to thicken. Eventually, though, it’ll become too heavy for a whisk. That’s when you switch tools.
- If you have a stand mixer: Attach the dough hook. It does the hard work of kneading for you.
- If you don’t: Use a sturdy spatula to stir until it gets too thick, then turn it out and knead by hand.
👉 Pro Tip: Don’t dump all the flour at once. Gradual addition keeps the dough light instead of heavy and dense.
At this stage, you’ll have a soft, sticky dough that’s starting to take shape.
Step 3: Knead the Dough
Kneading is where the dough develops strength. Think of it as giving the rolls their backbone.
- If using a mixer, set it to speed 2 and knead for about 2 minutes after all the flour is incorporated.
- By hand, knead for about 8–10 minutes, pushing the dough away with the heel of your hand, folding it back over itself, and repeating.
What you’re looking for:
- Dough that’s soft and tacky, but not wet or messy.
- If you press it lightly with clean, dry fingers, it shouldn’t stick.
👉 Pro Tip: If the dough is sticking like glue, add 1–2 tablespoons of flour at a time until it’s workable. Be cautious, though; too much flour makes heavy rolls.
This stage creates the elasticity that traps air bubbles during rising. And those bubbles? They’re what give you cloud-like rolls.
Step 4: First Rise (Proofing)
Now that the dough is kneaded, it needs time to rest and grow.
- Lightly oil a large mixing bowl.
- Place the dough inside, turning it once to coat all sides with oil (this prevents sticking and keeps it moist).
- Cover the bowl with plastic wrap.
- Let it sit in a warm place for about 2 hours, or until it doubles in size.
Not sure where to put it? Try these tricks:
- Oven method: Preheat your oven to the lowest setting for 2 minutes, then turn it off. Place the dough inside on a towel.
- Microwave method: Heat a damp kitchen towel for 1 minute, then place the dough inside the microwave with the door closed.
👉 Pro Tip: The warmer the environment, the faster it rises. But don’t rush it, good things take time.
Watching your dough double is like magic; it’s alive and working just for you.
Step 5: Shape the Rolls
This is where the fun begins. You’re turning one big dough ball into individual rolls.
- Lightly flour a clean surface.
- Turn the dough out and gently punch it down to release excess air.
- Divide into 15 even pieces (a 9×13 pan fits 15 rolls perfectly).
- First, cut the dough into 3 equal parts.
- Slice each into 5 smaller pieces.
- Roll each piece into a ball.
Two easy rolling methods:
- Palm roll: Cup the dough in your palm and roll until smooth.
- Surface roll: Place the surface roll on the counter, wrap your hand around it, and roll in a circular motion.
Place rolls in the greased 9×13 pan, evenly spaced.
👉 Pro Tip: Don’t stress over perfect sizes. Slight variations give them a rustic, homemade charm.
Step 6: Second Rise
Now your rolls need one more nap before baking.
- Cover the pan with plastic wrap.
- Let the rolls rise in a warm spot for about 1 hour, or until puffed and touching each other.
Use the microwave warm-towel trick again if needed. By the end, they’ll look soft and airy, ready for baking.
This second rise is what gives dinner rolls their classic tall, fluffy shape.
Step 7: Bake to Golden Perfection
Finally, it’s time to bake.
- Preheat your oven to 375°F about 15 minutes before baking.
- Place the rolls on the middle rack.
- Bake for 23–25 minutes, until golden-brown on top.
👉 Pro Tip: Rotate the pan halfway through if your oven has hot spots.
When you pull them out, your kitchen will smell like heaven.
Step 8: Butter Glaze and Finishing Touches
Want bakery-style shine and flavor? Add the finishing touches while rolls are still hot.
- Brush tops with 1 tablespoon melted butter. This gives them a golden glow.
- Sprinkle with kosher salt if you like a savory kick.
The butter seeps in, making the rolls richer and softer. That glistening top is irresistible.
Step 9: Cool and Serve
Patience is tough here, but a short wait makes a big difference.
- Let rolls cool for at least 10 minutes before digging in.
- Serve warm with butter, honey butter, or garlic spread.
These rolls are versatile, too. Use them for:
- Sliders: Perfect for mini sandwiches.
- Holiday meals: A must-have alongside turkey or ham.
- Everyday snacks: With peanut butter, jam, or just plain butter.
👉 Pro Tip: If you can’t resist and eat one while still hot, you’re not alone. That’s when they’re at their absolute fluffiest.
The Joy of Homemade Dinner Rolls
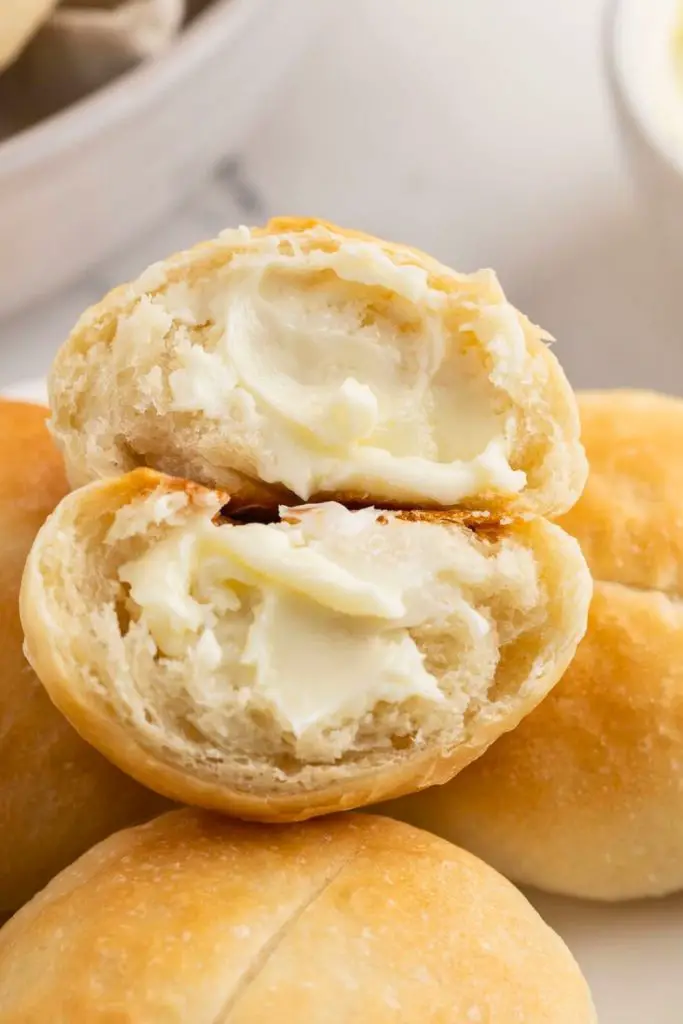
There’s something special about pulling a tray of freshly baked dinner rolls out of the oven. It’s not just about the food, but the feeling that comes with it.
The golden tops, the buttery aroma, and the way steam escapes as you break one open all create a sense of comfort and accomplishment.
Making your own dinner rolls isn’t just cooking. It’s slowing down, taking time for yourself and your loved ones, and enjoying the process. Every step matters, from kneading the dough to watching it rise, and finally serving it warm on the table.
Homemade rolls also have a nostalgic quality. They remind us of family gatherings, Sunday dinners, and holiday feasts.
Unlike store-bought bread, these rolls carry the love and effort you put into them. That first bite is more than just food; it’s a little victory.
And let’s not forget versatility. These rolls are the kind that everyone reaches for. You can serve them alongside soups, roast chicken, or hearty stews.
They also double up as slider buns for pulled pork or even sweet little sandwiches with peanut butter and jam. Once you’ve tried homemade dinner rolls, you’ll never want to go back to the packaged kind.
Variations to Try

The beauty of this dinner roll recipe is how flexible it is. With a few tweaks, you can transform the base dough into something brand new.
Here’s a table of fun variations to experiment with:
| Variation | How to Make It | Flavor Profile |
|---|---|---|
| Garlic Parmesan Rolls | Add 1 tsp garlic powder to the dough. Brush baked rolls with garlic butter and sprinkle with parmesan. | Savory, cheesy, restaurant-style flavor. |
| Herb Butter Rolls | Mix 1 tbsp chopped fresh herbs (like rosemary, thyme, or parsley) into the dough. Finish with herb-infused butter. | Fresh, fragrant, perfect for holiday meals. |
| Honey Butter Rolls | Replace sugar with honey in the dough. Serve warm with whipped honey butter. | Sweet, soft, and melt-in-your-mouth. |
| Cheese-Stuffed Rolls | Wrap each dough ball around a cube of mozzarella or cheddar before baking. | Gooey, cheesy center with a soft outside. |
| Cinnamon Sugar Rolls | Roll dough balls in melted butter, then cinnamon sugar before baking. | Roll dough balls in melted butter, then in cinnamon sugar before baking. |
| Whole Wheat Rolls | Swap half the all-purpose flour with whole wheat flour. | Slightly nutty, hearty, and wholesome. |
| Everything Bagel Rolls | Brush tops with egg wash and sprinkle with everything bagel seasoning before baking. | Crunchy, savory, and bold. |
👉 Pro Tip: Start with the base recipe once or twice, then get creative. You’ll quickly find your family’s favorite twist.
Final Thoughts
Homemade dinner rolls are one of those recipes that never go out of style. They’re soft, buttery, and filled with the kind of warmth that makes any meal feel special.
From the very first step of proofing the yeast to pulling golden rolls out of the oven, the process is just as rewarding as the final bite.
Whether you’re making these for a holiday spread, a cozy Sunday dinner, or simply because fresh bread makes everything better, these rolls will always impress.
With simple pantry ingredients, foolproof steps, and endless variations, you can keep this recipe on repeat and never get tired of it.
So next time you’re planning a meal, skip the store-bought bread and make these rolls from scratch. One bite of that soft, fluffy texture with melted butter, and you’ll see why homemade always wins.
More Recipes to Bake and Enjoy
If you loved these dinner rolls, you’ll want to try more comforting, crowd-pleasing recipes from my kitchen:
- 🧈 Best Cornbread Recipe in 35 Minutes for Fall – Moist, fluffy, and perfect with honey butter or chili.
- 🥦 Sweet & Spicy Brussels Sprouts Recipe in 30 Mins – Crispy, caramelized sprouts with a tangy balsamic glaze twist.
- 🍄 Quick Stuffed Mushrooms Recipe for Busy Nights – Easy, cheesy, and perfect for light appetizers or holiday parties.
Each of these recipes is quick, approachable, and guaranteed to bring flavor (and compliments!) to your table.


Ella Foster, co-founder of FoodBears.com, is a skilled writer whose love for cooking fuels her creative work. Her passion for experimenting in the kitchen brings authentic flavor and culinary inspiration to every piece she crafts for the platform.