Building your own pizza oven is a rewarding project that brings delicious, authentic pizza to your backyard.
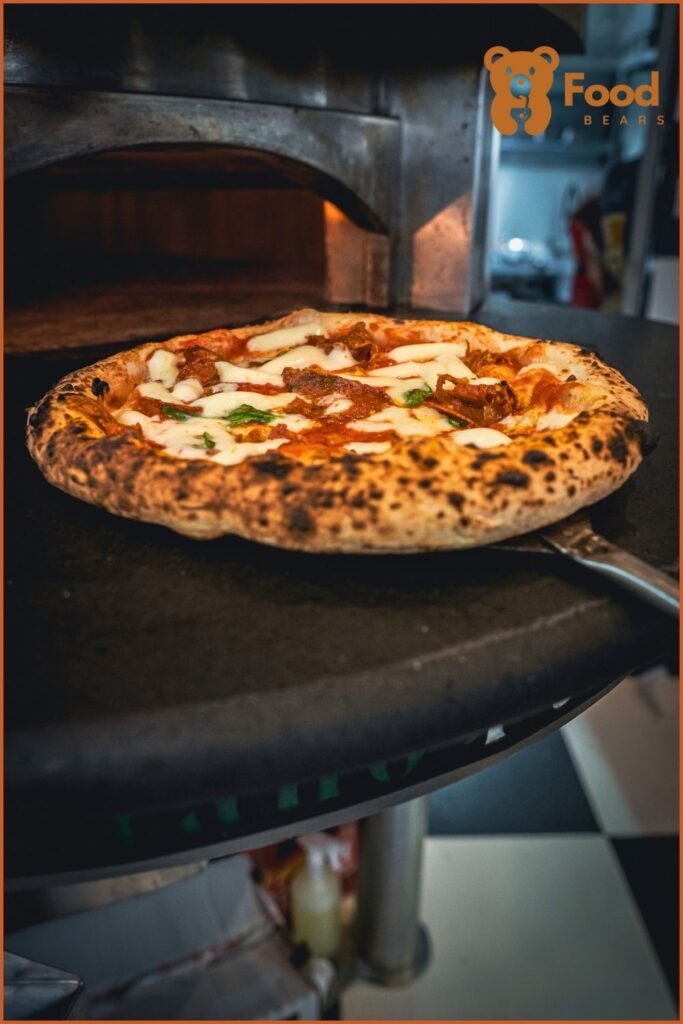
With just a few affordable materials and some time, you can create a wood-fired pizza oven. This type of oven can reach temperatures between 750 to 800 degrees Fahrenheit, perfect for baking pizzas in just a couple of minutes.
I’ve found that constructing a wood-fired pizza oven is not only a fun DIY activity but also an excellent addition to any outdoor living space.
Whether you’re considering a dome-shaped or barrel vault design, each type offers unique benefits. A dome shape is traditional, while the barrel vault can serve double duty as a bread oven.
For those new to masonry, starting with a simple brick pizza oven can be much easier. Digging and prepping the pad site, building a concrete pad with 2x10s, and compacting the base with gravel are all critical steps.
Follow along, and I’ll guide you through each part of the process, ensuring you have a functional and beautiful oven by the end.
1. Understanding Pizza Oven Fundamentals
Building your own pizza oven involves choosing the right oven type and using suitable materials. This ensures efficiency and great-tasting pizzas.
Types of Pizza Ovens
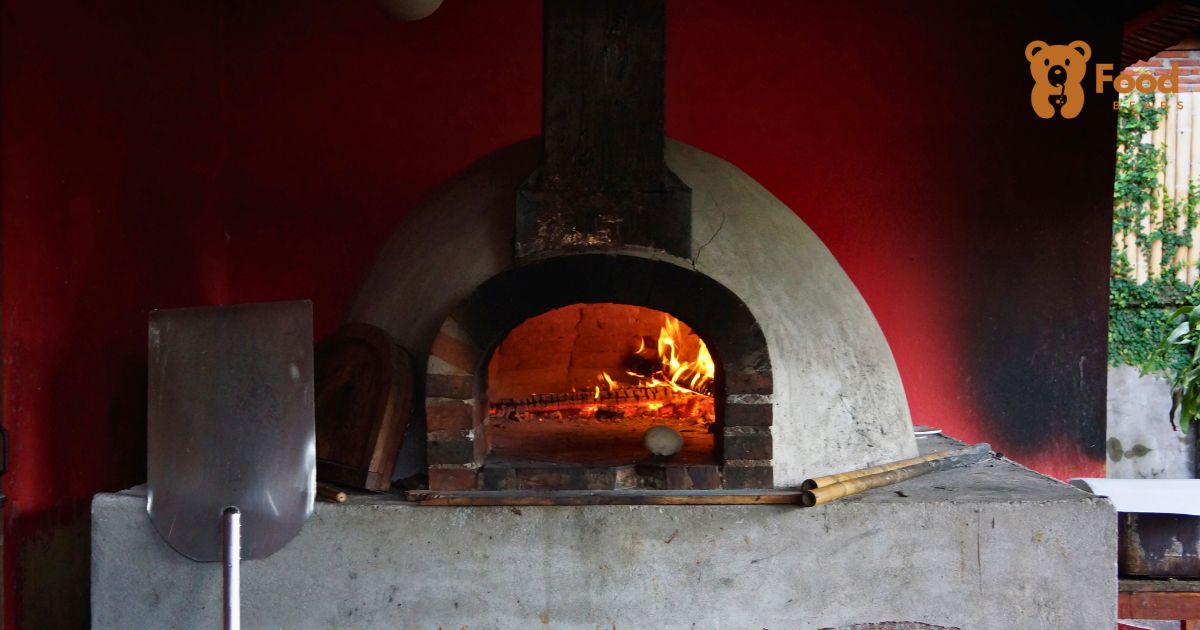
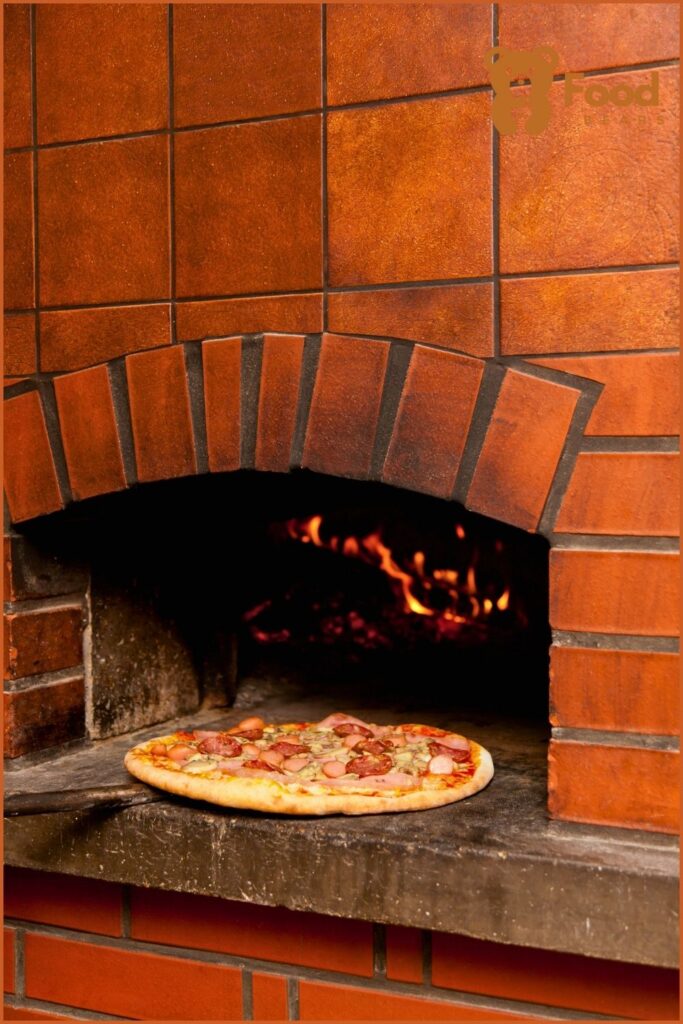
Wood-fired pizza ovens are popular for their ability to reach high temperatures and impart a unique smoky flavor.
There are two main types:
- Dome-shaped ovens
- Barrel vault ovens
Dome-shaped ovens are great for evenly distributing heat, while barrel vault ovens, which have a tunnel-like design, are traditionally used for baking bread.
Brick ovens can also be classified based on their shape and heat source. Their design allows for optimal heat retention and distribution, which is essential for cooking pizzas quickly and evenly.
They often use fire bricks, which are known for their ability to withstand high temperatures.
Materials Overview
When choosing materials, it is crucial to focus on heat retention and durability. Fire bricks are the preferred choice for constructing the oven floor and walls due to their high heat resistance. They ensure that the pizza cooks evenly and thoroughly.
For insulation, materials like ceramic fiber blankets or a mix of vermiculite and perlite are effective. These materials help retain heat within the oven chamber, improving efficiency and reducing cooking time.
It’s also essential to build a solid base, often made of concrete, to support the oven’s weight and structure.
2. Planning Your Pizza Oven
Before you start building your DIY pizza oven, you need to plan its location, design, and specifications and gather the necessary tools and materials. This ensures a smooth and successful construction process.
A. Selecting the Right Location
The first step is choosing the right spot for your outdoor pizza oven. Look for an area that is flat, stable, and away from anything flammable. You want to ensure it’s close enough to your kitchen for convenience but not so close that smoke becomes an issue.
Consider the prevailing wind direction to avoid smoke blowing into seating areas. Another factor is the distance from your home and neighbors to comply with local regulations.
Decide whether you want it on your patio, garden, or a separate backyard area. Make sure there’s enough space around the oven for cooking and socializing. It’s also important to have easy access to wood storage and a prep area for making pizza.
B. Design and Specifications
When designing the pizza oven, consider size, shape, and material. Research different designs to see which suits your needs. If you are new to masonry, I recommend starting with a simple dome or barrel shape.
Decide on the oven’s inner dimensions. The door should be about 63% of the oven’s height to retain heat while allowing easy access. Brick or stone is popular for home improvement projects because they retain heat well and look attractive.
You’ll need an insulating layer for heat retention. Plans can vary based on the style and size you want. Some designs include a chimney to direct smoke away, ensuring a better cooking environment.
C. Tools and Materials Required
Gathering the right tools and materials is crucial. You will need bricks, refractory cement, and an insulating material like a ceramic fiber blanket. For tools, you’ll need a trowel, spirit level, and possibly a wet saw to cut bricks to size.
Here is a basic list to get started:
- Bricks: For the dome and base.
- Refractory Cement: For bonding the bricks.
- Insulating Material: To retain heat.
- Trowel and Spirit Level: For precise construction.
- Wet Saw: If brick cutting is necessary.
Prepare a workspace to keep your tools and materials organized. Having everything ready can save time and reduce frustration during the construction phase.
3. Building the Foundation
Building a strong foundation is crucial for your pizza oven. It ensures stability and durability. There are two main aspects to focus on creating a solid base and adding insulation and base layers. These steps involve materials like pavers, bricks, mortar, and cement boards.
Creating a Solid Base
To begin with, I lay out the foundation using cinderblocks or pavers. I prefer cinderblocks because they are inexpensive and available at stores like Home Depot. I stagger them to avoid the need for mortar, ensuring a stable base.
Next, I check that the ground is level. Using a spirit level, I make adjustments by adding or removing soil. I want my base to be perfectly flat, as any unevenness can compromise the structure.
I then place a cement board on top of the blocks for additional stability. This board acts as a strong support layer. Sometimes, I use a concrete slab instead, especially if I plan to build a larger forno. This offers even more stability.
Insulation and Base Layers
After creating the base, I add insulation. Insulation is important because it keeps heat in the oven, which helps make better pizzas. I often use a layer of sand and firebricks for this.
I start with a 4-inch layer of sand. The sand helps in leveling the surface and provides a good insulating layer. Once the sand is in place, I lay down a layer of firebricks.
Firebricks are essential as they can withstand high temperatures. I get mine from local stores like Lowe’s. Each brick is laid closely together, with minimal gaps to ensure even heat distribution.
Sometimes, I use a mix of fireclay and sand to fill in the gaps between the bricks. This provides additional insulation and ensures I have a smooth, flat surface for cooking.
4. Constructing the Oven Dome
Building the oven dome involves careful shaping and proper insulation to ensure it effectively retains heat. Key elements include using firebrick and mortar to create a sturdy structure and applying insulation to optimize heat retention.
Shaping the Dome
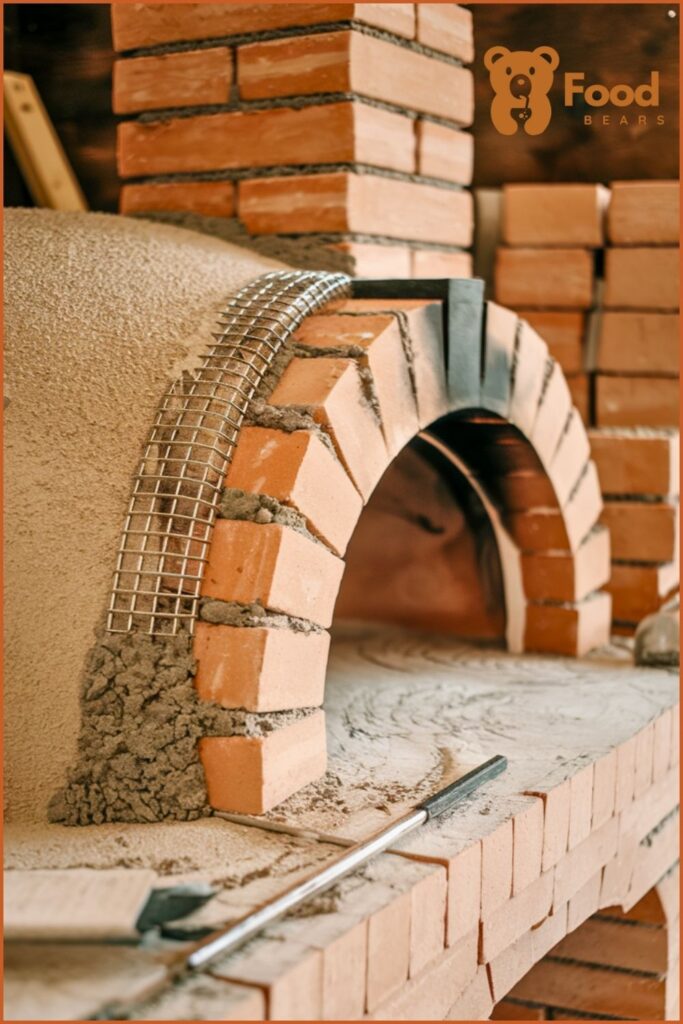
To start shaping the dome, I lay firebricks in a circular pattern, creating the base layer. Using an angle grinder, I systematically cut the bricks to fit the dome’s curvature accurately.
A common approach to a wood-fired oven is to utilize a dome mold made from materials like an exercise ball, which provides a precise, even shape.
Next, I lay the firebricks in a herringbone pattern. This pattern is crucial for distributing heat evenly within the oven.
Each brick is secured with high-heat mortar. I proceed layer by layer, maintaining the correct angle and curvature, ensuring structural integrity while removing any supports once the mortar sets properly.
Dome Insulation
Insulating the dome is essential for heat retention. I start by applying a layer of insulating mortar over the completed dome. This material helps to keep the heat inside and provides an even cooking temperature. Fireproof insulation blankets, wrapped tightly around the dome surface, might be used for added efficiency.
For further insulation, I use masonry mix to create a protective layer over the insulation. This layer shields the oven from weather while holding the heat inside during cooking. These combined layers ensure the oven maintains the high temperatures necessary for a perfect cook.
5. Adding the Chimney and Door
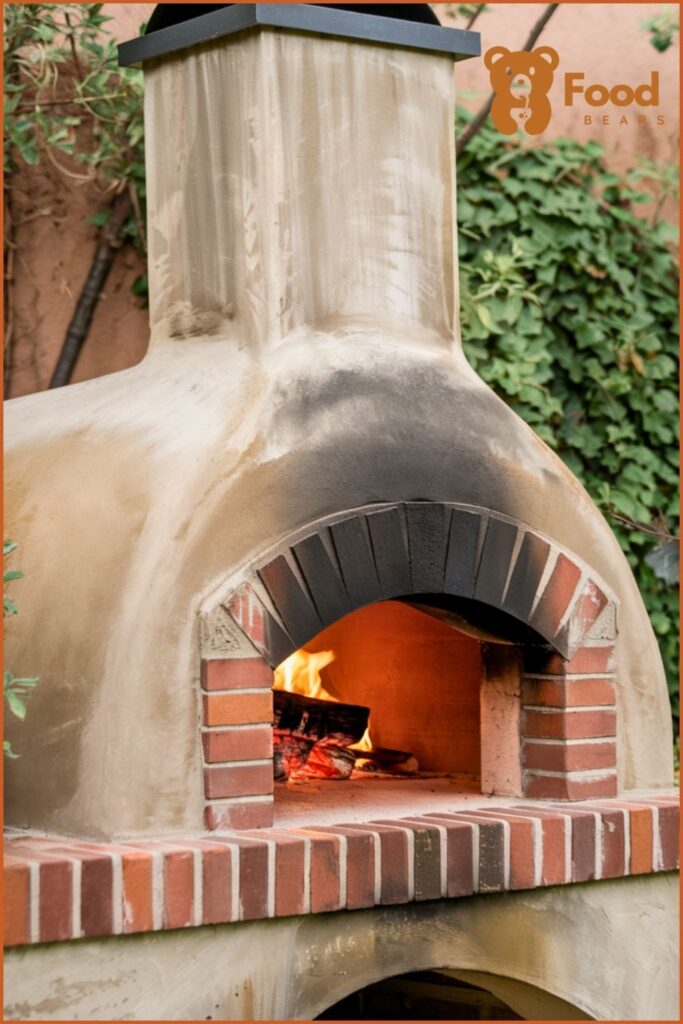
When building your pizza oven, adding the chimney and door is crucial for proper ventilation and heat management. The chimney helps in controlling airflow, while the door retains heat and controls the internal temperature.
Chimney Installation
The first step in installing the chimney is choosing its location. It should be placed near the top of the oven but not directly over the cooking area. This allows smoke to escape without heat loss. I suggest a clay or stainless steel pipe for durability.
Next, cut a hole in the oven dome. The hole should be slightly smaller than the diameter of the chimney pipe. Insert the chimney pipe into the hole and seal around it with a mix of clay and sand or refractory cement. This ensures it stays secure and leak-proof.
Make sure the chimney is tall enough to enhance the draft but not so tall that it becomes unstable. A height of 18-24 inches is generally sufficient. This setup will help your wood-fired oven maintain a consistent temperature and efficiently remove smoke.
Door Design and Function
The door of your pizza oven serves multiple purposes. It helps retain heat, controls airflow, and keeps out debris when the oven is not in use. For durability, I recommend using materials like steel or cast iron.
First, measure the opening of your oven and cut the door to fit snugly. A well-fitted door will prevent heat from escaping. Consider attaching a handle that stays cool to the touch for easy maneuvering.
Your door should be able to be partially opened or fully closed. This allows you to manage the air entering your oven, which in turn controls the combustion of your wood. A door with an adjustable vent could be beneficial for fine-tuning this process.
6. Finishing Touches
Adding the finishing touches to your pizza oven enhances both its usability and appearance.
By applying stucco or plaster and incorporating custom aesthetics, you ensure that your brick oven not only works efficiently but also looks great in your backyard.
Applying Stucco or Plaster
I start by applying stucco or plaster to improve the oven’s insulation and aesthetics.
First, I mix the plaster according to the manufacturer’s instructions. Then, I apply a base coat to seal any gaps in the brickwork.
This helps make the oven more energy-efficient by retaining heat better.
After the base coat dries, which usually takes about 24 hours, I apply a finish coat.
This second layer smooths out rough patches and provides a polished look. I use a trowel or a plastering tool to achieve a smooth and even surface. If I prefer, I can add a bit of texture for a rustic appearance.
For a wood-fired oven, proper insulation from the plaster is critical in maintaining optimal cooking temperatures.
Custom Aesthetics
Next, I focus on custom aesthetics to make the oven blend seamlessly with my outdoor space.
For a personalized look, I can add decorative tiles or colored stucco. These elements not only enhance the appearance but also make the structure more visually appealing.
Using tiles around the oven’s opening can add a touch of elegance and color.
I might also install a stone countertop adjacent to the oven to create a food preparation area, providing both functionality and style. Additionally, a small overhang can protect against rain and snow, increasing the oven’s durability.
Including these features makes my brick oven a focal point in the backyard, enhancing the overall outdoor cooking experience.
For those who used a metal stand or cinder blocks for the base, it’s important to cover these elements with stucco or another material to maintain a cohesive look.
A well-finished oven not only achieves high performance but also complements the outdoor setting, maximizing both beauty and function.
Adding seating areas around the oven is another custom touch that can make gatherings more enjoyable.
Curing and Maintenance

Curing your pizza oven ensures its longevity and performance by slowly drying out any moisture within the structure.
Long-term oven care involves regular maintenance to keep your oven functioning at its best.
Curing the Oven Properly
The curing process is critical and involves starting a series of small fires over several days.
The goal is to gradually bring the oven up to temperature without causing any cracks.
I begin by placing small pieces of wood in the center of the oven. Fire starters help ignite the wood without needing aggressive tools.
Once the small fire is going, I let it burn for around an hour.
I gradually increase the size of the fires each day. On the first day, a small fire with minimal heat is used, and by the fifth day, the oven should be able to handle a much larger fire.
Keeping the oven door slightly ajar, with about a one-inch gap, will ensure proper airflow.
Long-term Oven Care
Consistent maintenance keeps my pizza oven in top condition. After curing, I check for any visible cracks and seal them as necessary.
It’s important to clean ash and any leftover wood pieces regularly to prevent buildup.
During regular use, I avoid using too much wood at once. A steady, moderate fire is sufficient to get the heat up.
After cooking, I let the oven cool down naturally. It’s best to avoid cooling it down quickly with water to prevent thermal shock, which can cause damage.
Seasonal check-ups involve inspecting the structure. Then, I ensure the chimney and flue are clean to maintain good airflow.

Ella Foster, co-founder of FoodBears.com, is a skilled writer whose love for cooking fuels her creative work. Her passion for experimenting in the kitchen brings authentic flavor and culinary inspiration to every piece she crafts for the platform.