
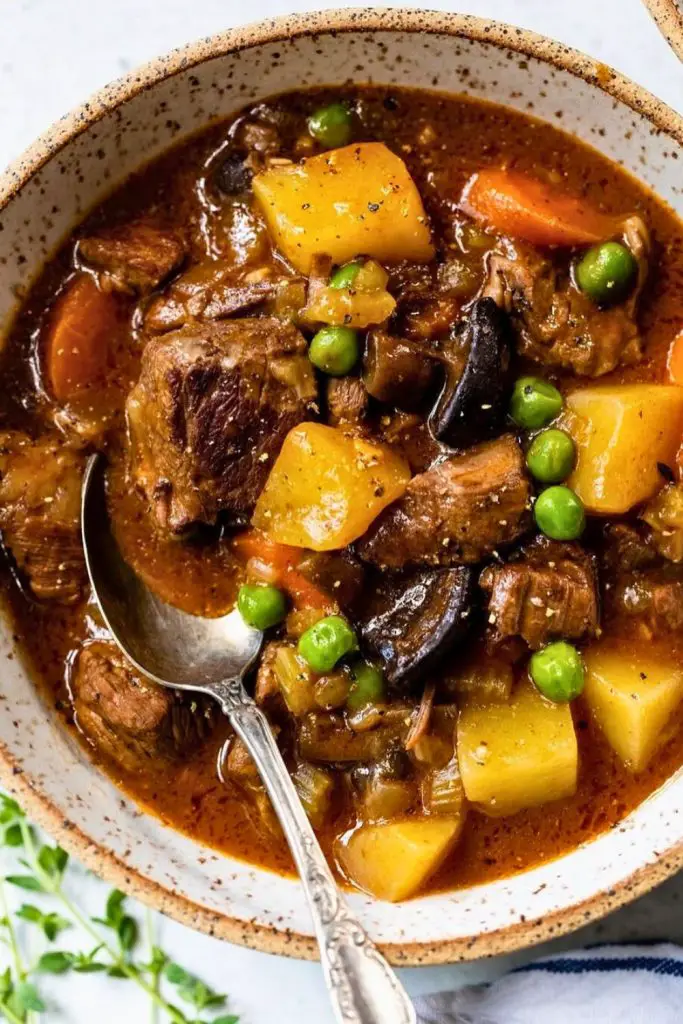
There’s something magical about a warm bowl of beef stew. Whether it’s a chilly winter night or just one of those days when you crave comfort food, beef stew always hits the spot.
In today’s post, we’re diving deep into how to make the perfect beef stew step-by-step, from prepping your veggies to that final flavor-packed bite.
This isn’t just any beef stew recipe. It’s rich, thick, savory, and made with love (and a few cooking secrets you’ll want to steal).
So grab your favorite Dutch oven or crockpot because we’re about to turn simple ingredients into a cozy masterpiece.
Why This Beef Stew Recipe Works
This beef stew recipe isn’t just good, it’s exceptional. It stands out for several reasons, all of which stem from brilliant technique and thoughtful layering of flavors.
1. Searing the Meat First Locks in Flavor
Instead of just tossing raw beef into the pot, this recipe starts by searing the meat over medium-high heat. That step creates a delicious brown crust known as the Maillard reaction.
Not only does it develop a deep, beefy flavor, but it also leaves flavorful bits (called fond) at the bottom of the pan. Those bits dissolve into the broth later, adding layers of complexity.
2. Smart Veggie Timing Keeps Texture Perfect
Rather than cooking all the vegetables together from the start, this recipe adds celery and potatoes later in the process.
Celery cooks faster than carrots and onions, so saving it for the final 30 minutes ensures it stays tender-crisp, rather than becoming soggy or mushy.
Potatoes are added during the last half hour, allowing them to absorb the stew’s flavor while retaining their shape.
3. A Flavorful Stew Base Built from Scratch
Garlic paste, tomato paste, and Better Than Bouillon beef base create a savory, umami-rich foundation.
Flour is added and cooked off before the stock, creating a smooth texture without a raw flour taste.
Herbs like rosemary, thyme, and bay leaves add earthiness and aroma, while Worcestershire sauce introduces a rich, meaty flavor.
4. Simmering Low and Slow Makes the Beef Fork-Tender
The stew simmers for about 90 minutes, allowing the connective tissue in the beef sufficient time to break down. This is what transforms it from chewy to melt-in-your-mouth tender.
Whether you’re simmering on the stovetop or baking it at 300°F in the oven, the long cook is key to building that comfort food quality.
5. Final Seasoning and Optional Add-Ins Let You Customize
After everything is fully cooked, the stew is seasoned to taste with pantry staples, including salt, pepper, garlic powder, onion powder, and a pinch of cayenne.
Then, frozen peas are added for color and a hint of sweetness. These last-minute steps ensure that the flavors are bold and balanced, allowing you to adjust the recipe exactly as you like it.
Ingredients You’ll Need

Here’s a full breakdown of the ingredients along with measurements, so you can gather everything you need before you get started:
| Ingredient | Measurement | Notes |
|---|---|---|
| Chuck roast (or stew beef) | 2 pounds | Cut into bite-sized cubes; look for good marbling |
| Salt | To taste | Quartered, skin on or off, is optional |
| Avocado oil | 2–3 tablespoons | For searing beef and sautéing vegetables |
| Red potatoes | 4–5 medium | Sliced; added in the last 30 minutes to preserve texture |
| Carrots | 3–4 large | Peeled and chopped into bite-sized pieces |
| Celery stalks | 2–3 | Optional but highly recommended; you can use beef bouillon cubes instead |
| Yellow onion | 1 large | Diced |
| Garlic paste | 2 tablespoons | Substitute with minced fresh garlic if preferred |
| Tomato paste | 2 tablespoons | Adds richness and depth |
| Better Than Bouillon (beef) | 1 tablespoon | Add in the final 10 minutes for color and sweetness |
| All-purpose flour | 2 tablespoons | Used to thicken the stew |
| Beef broth or stock | 3 cups | Forms the base of the stew; low sodium preferred for better control |
| Fresh rosemary | 1–2 sprigs | Remove stems before serving |
| Fresh thyme | 1–2 sprigs | Remove stems before serving |
| Bay leaves | 2 | Remove before serving |
| Worcestershire sauce | 1 tablespoon | Adds deep umami flavor |
| Frozen peas (optional) | ½ to 1 cup | Add in final 10 minutes for color and sweetness |
| Black pepper | To taste | Added in final seasoning |
| Garlic powder | ½ teaspoon (or to taste) | Adjust to preference |
| Onion powder | ½ teaspoon (or to taste) | Optional, for more savory depth |
| Cayenne pepper (optional) | A pinch | Adds heat, optional, but great if you like spice |
| Chopped parsley (garnish) | 1–2 tablespoons | Optional, adds freshness and color |
💡 Tip: All measurements are flexible. Don’t be afraid to taste and adjust seasoning at the end for perfect balance!
Step-by-Step: How to Make the Perfect Beef Stew
Crafting the perfect pot of beef stew doesn’t require a culinary school education, just a little technique and the right approach.
Whether you’re cooking for your family or meal-prepping comfort food for the week, this guide walks you through each essential step, with personal tips that make all the difference.
Let’s break it down from start to finish:
Step 1: Prep the Veggies Like a Pro
Great beef stew starts with great veggies, and prep is everything.
Start with the potatoes.
We’re using red potatoes in this recipe because they hold their shape well and don’t turn to mush after a long simmer.
Leave the skins on for texture and nutrition, or peel them if you prefer a smoother bite. Quarter the potatoes or halve them if they’re small so that each piece is roughly the same size. This ensures they cook evenly.
Next, the carrots.
Peel them and chop into uniform bite-sized rounds. Carrots add natural sweetness and that classic stew flavor. They’ll cook down a bit, but keeping the pieces thick enough ensures they don’t dissolve into the broth.
Time for celery.
Here’s a trick: slice it up, but don’t add it in just yet. Celery cooks faster than carrots and potatoes, so we’ll wait until the final 30 minutes of cooking to add it. That way, you get a tender bite without any mushiness.
Finally, the onion.
Dice one yellow onion into small, even pieces. This adds aromatics and flavor that blend right into the base of the stew. It’s one of those ingredients you don’t really notice, but you’d miss if it weren’t there.
🔪 Pro tip: A sharp knife makes all the difference here. You’ll slice cleaner and faster, and your veggies won’t get bruised or torn.
Step 2: Choose the Right Beef & Sear for Flavor
The soul of beef stew? The beef, of course.
We’re using 2 pounds of chuck roast, cut into hearty chunks. Chuck roast is the ideal cut for stews because of its marbling, which consists of thin streaks of white fat throughout the meat. That fat melts down during cooking, transforming tough muscle into fork-tender bites.
Before you throw it in the pot, season the beef with salt only. Skip the pepper or herbs at this point. Why? Because we’re about to sear the meat over high heat, and seasonings like black pepper or dried herbs tend to burn and turn bitter. Salt is just enough to start flavoring the meat while allowing that golden crust to form.
Heat a heavy-bottomed Dutch oven or skillet over medium-high heat and add a few tablespoons of avocado oil. When the oil is shimmering, lay down the beef chunks in a single layer, working in batches if necessary.
Let them cook undisturbed for 2–3 minutes to build that brown, caramelized crust. Flip and repeat until all sides are browned. Don’t worry about cooking the beef through; that’ll happen later. Right now, we’re just building flavor.
🔥 Do NOT skip this step. Searing the beef adds richness and body to the final dish. Plus, all the crispy bits left in the pot? That’s called fond, and it’s gold for your broth.
Once browned, remove the beef and set it aside. Keep the pot you’re about to use again.
Step 3: Sauté the Flavor Base
Now that your beef is seared and your pot is loaded with flavor bits, it’s time to build the aromatic foundation of the stew.
Reduce the heat to medium and add a bit of avocado oil if the pot looks dry.
Toss in your diced onions and carrots. We’re still holding off on the celery for later. Let them cook for a few minutes until the onions turn translucent and the carrots begin to soften just slightly.
Stir frequently, gently scraping the bottom of the pot to loosen some of the stuck-on goodness from the beef sear.
Now it’s time for a flavor bomb:
- 2 tablespoons of garlic paste
- 2 tablespoons of tomato paste
- 1 tablespoon of Better Than Bouillon beef base (or beef bouillon powder)
Stir well to coat the veggies. You’ll smell the transformation almost instantly, rich, savory, slightly sweet, and irresistible.
To thicken the stew and give it body, sprinkle in 2 tablespoons of all-purpose flour. Stir continuously for 1 to 2 minutes, or until the flour coats everything and no dry bits remain.
You’re not looking for a roux here, just enough to build a silky, thickened base for the broth.
🥄 Cook that flour through; no one likes a raw flour taste in their stew.
Step 4: Build the Broth
Once your flour is incorporated, it’s time to turn that flavor base into a full-on stew.
Slowly pour in 3 cups of beef broth while stirring. Raise the heat to high to bring everything to a rolling simmer. This activates the flour as a thickening agent, starting to develop the stew’s texture.
As the broth starts to bubble, scrape the bottom and sides of the pot thoroughly to remove any residue. You want to lift any stuck-on bits into the liquid to infuse every bite with deep flavor.
Now add the herbs and secret weapons:
- 2 sprigs fresh rosemary
- 2 sprigs fresh thyme
- 2 bay leaves
- 1 tablespoon Worcestershire sauce (yes, that sauce with the name nobody can pronounce)
Stir it all together and bring back the seared beef, nestling it into the liquid so it’s mostly submerged.
At this point, your kitchen smells amazing.
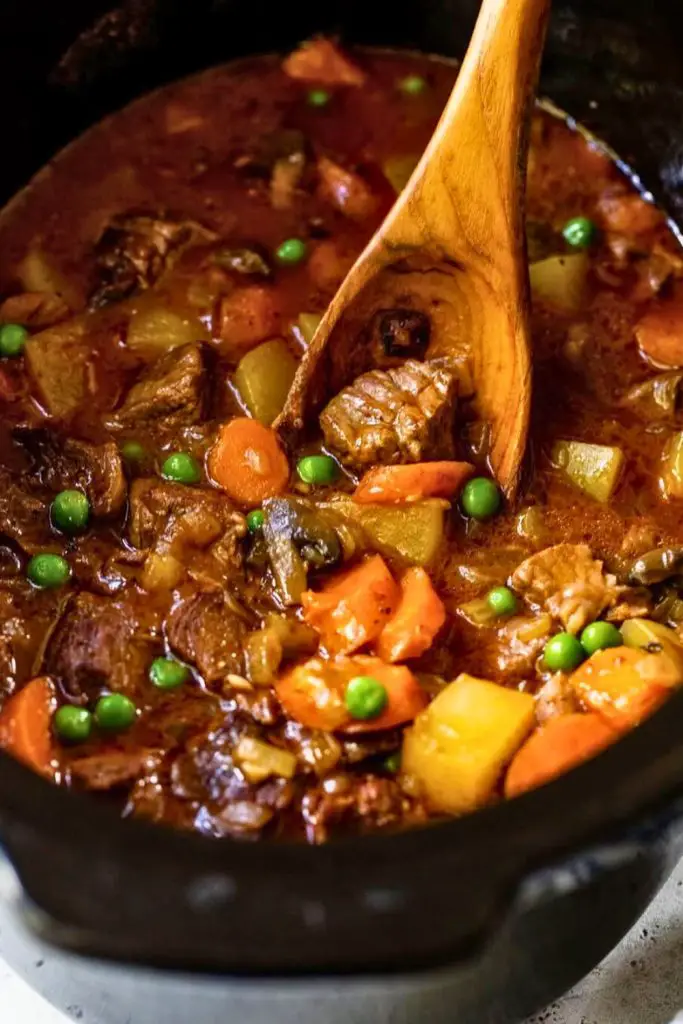
Step 5: Slow Simmer to Tender Perfection
Now for the part where magic happens, low and slow cooking.
Place a lid on your Dutch oven and reduce the heat to medium-low. Let the stew simmer gently for 90 minutes, checking and stirring occasionally to prevent sticking.
This slow cooking melts the connective tissue in the beef, breaking it down into fall-apart bites.
If you prefer to use your oven, place the covered pot in a preheated oven at 300°F for the same amount of time. Both methods work beautifully.
During this stage, your broth thickens slightly and takes on a glossy finish. The vegetables infuse the liquid with sweetness, and the herbs do their job of adding that earthy, woodsy depth.
🕐 Check the stew every 30 minutes or so. Stir it, ensuring that nothing sticks to the bottom, and adjust the heat as necessary.
Step 7: Final Seasoning Touches
After 90 minutes of gentle simmering, your beef should be getting tender, and the broth should be rich and thick.
Now it’s time to season to taste. Start with small amounts and adjust:
- Salt
- Black pepper
- Garlic powder
- Onion powder
- Cayenne pepper (optional, for a subtle kick)
Taste. Adjust. Taste again. This is your stew, make it yours.
🎯 Remember, seasoning at the end ensures the flavors don’t get dull or muted from long cooking. You’re dialing everything up to 11 here.
Also, this is the time to remove the herb stems and bay leaves. You’ve squeezed every ounce of flavor out of them, and nobody wants a twig in their spoon.
Step 8: Optional Peas & Garnish
In the last 10 minutes of cooking, add in ½ to 1 cup of frozen peas.
Peas might seem like a small thing, but they:
- Add a bright pop of color
- Introduce a natural sweetness
- Create texture contrast with the beef and potatoes
Not a fan of peas? No problem. Feel free to skip them. But if you’re trying to sneak in a little vegetable variety or make the dish more visually appealing (hello, Pinterest), peas do the trick.
Right before serving, sprinkle on a handful of chopped fresh parsley. It adds freshness, a burst of green, and that final chef’s kiss of presentation.
Serving Ideas: What to Serve with Beef Stew?
Beef stew is pretty much a complete meal on its own. It’s got your protein, carbs, and vegetables all in one cozy bowl.
However, if you’re looking to complement your meal or impress guests with a thoughtful spread, here are some delicious sides and accompaniments to enhance your beef stew experience.
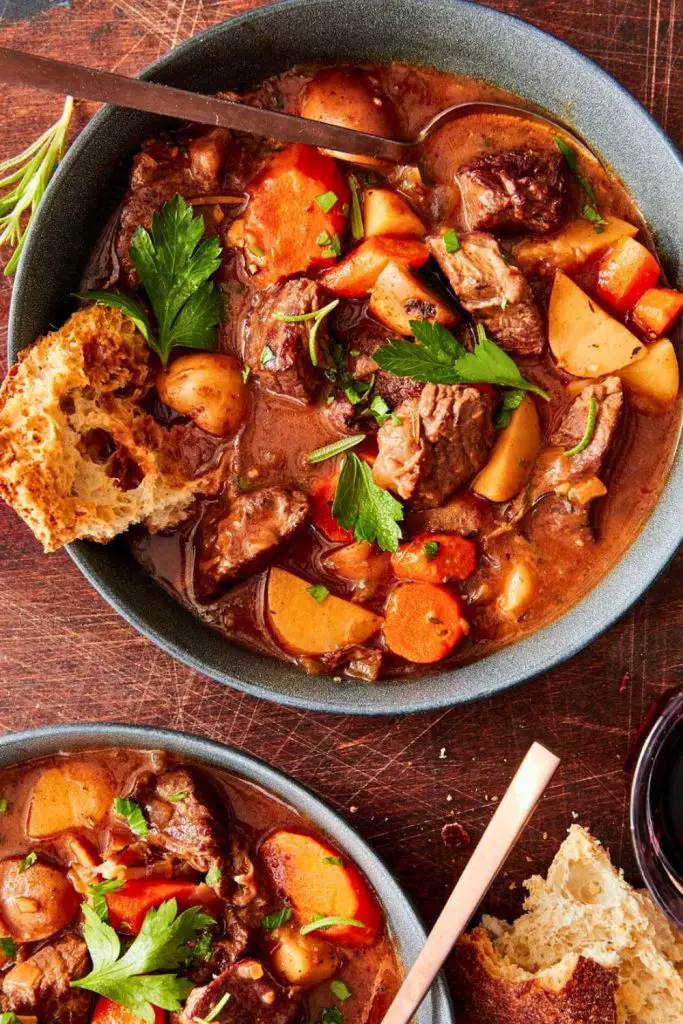
1. Crusty Bread or Garlic Toast
A warm, crusty loaf of artisan bread is the perfect accompaniment to beef stew. You’ll want something sturdy enough to soak up the rich, savory broth without falling apart. Bonus points for a garlicky, butter-slathered toast or even a slice of sourdough to add a tangy balance.
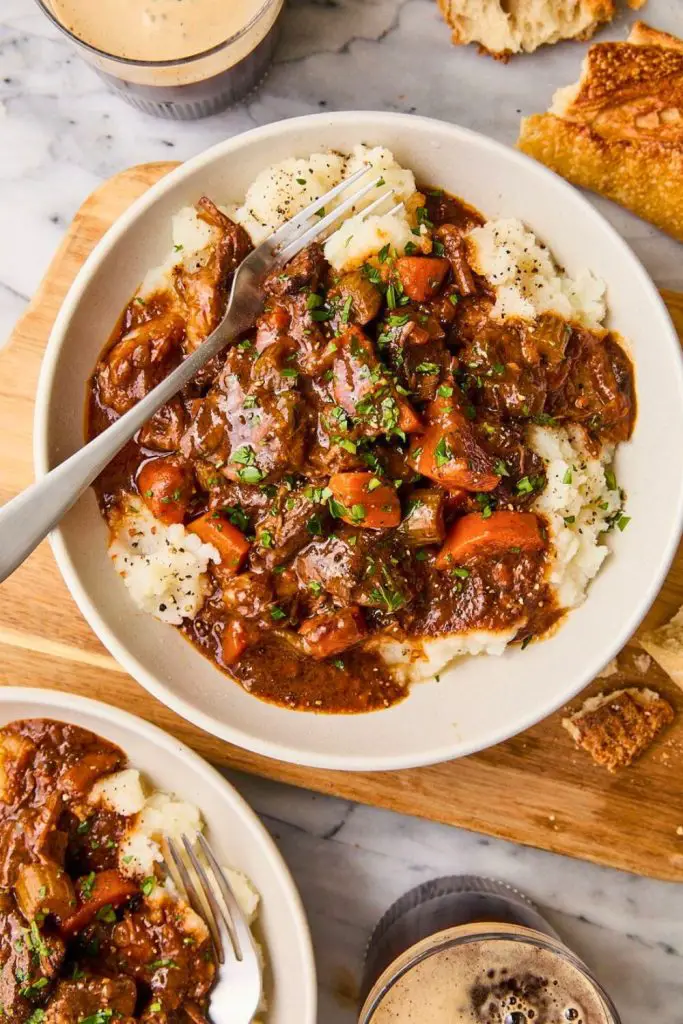
2. Mashed Potatoes (for Double Comfort)
Already have potatoes in your stew? Doesn’t matter. Serving beef stew over creamy mashed potatoes elevates the experience to a whole new level. It turns your bowl into a rich, layered dish with ultra-smooth texture on the bottom and chunky, saucy stew on top.
3. Rice or Buttered Egg Noodles
A great option if you’re skipping the potatoes in the stew or just want to bulk up the meal. Spoon the stew over fluffy white rice or wide buttered noodles for a hearty, stick-to-your-ribs kind of dinner.
4. Roasted Vegetables
Roasting some seasonal veggies like Brussels sprouts, cauliflower, or butternut squash makes a tasty, slightly sweet side that balances the savory stew beautifully. Additionally, it’s a simple way to add more variety to the meal.
5. Light Salad with Vinaigrette
If you’re craving something fresh to cut through the richness, a simple green salad with a tangy vinaigrette is the perfect solution. Consider arugula, spinach, or mixed greens paired with a lemon or balsamic dressing.
5 Tips for Beef Stew Edition
Even the most straightforward beef stew can go from good to unforgettable with a few expert tips. These tricks will help you avoid common mistakes and elevate your stew game every single time.
1. Don’t Skip the Sear
We can’t stress this enough. Searing the beef before stewing is what gives the final dish that deep, roasted flavor. It creates a beautiful crust that locks in moisture and builds the foundation for the entire dish.
➡️ Tip: Work in batches. If the beef is crowded in the pan, it will steam instead of sear.
2. Add Delicate Vegetables Later
Want perfectly cooked vegetables with a bit of bite? Add celery and peas at the end of cooking. These veggies soften quickly, and adding them too early can result in mushy, overcooked pieces that ruin the texture.
➡️ Rule of thumb: Add celery 30 minutes before the end and frozen peas 10 minutes before serving.
3. Season in Layers, But Finish at the End
Start by salting the beef. Add flavor as you sauté. However, hold off on the final seasoning until everything is thoroughly cooked. That’s when you taste and adjust to your liking. It’s the best way to ensure that nothing is too salty or bland.
➡️ Balance is key. Taste-test with a spoon before serving.
4. Make It a Day Ahead
Like chili, beef stew tastes even better the next day. The flavors meld together, the beef gets even more tender, and the broth thickens into something magical. If you’re prepping for guests, making it ahead is a stress-free win.
➡️ Reheat gently on the stove over low heat, stirring occasionally.
5. Skim the Fat for a Cleaner Finish
After simmering for over an hour, some fat will rise to the top. While it adds flavor, too much can make the stew feel greasy. Use a spoon to gently skim off the excess for a cleaner, more balanced dish.
➡️ Bonus tip: Chill overnight and remove the solidified fat layer before reheating.
Final Thoughts: A Bowl Full of Comfort
This beef stew isn’t just a meal, it’s an experience. It’s the kind of dish that brings people together, warms your belly, and makes the house smell incredible.
Whether it’s a chilly fall night or you’re just craving something nostalgic, this stew checks all the boxes.
And remember, great cooking is about tasting, adjusting, and having fun with it.
Give this recipe a try and let the flavors speak for themselves. Got a favorite variation? Share it in the comments!
More Cozy Recipes You’ll Love
If you enjoyed this beef stew, check out these reader-favorite comfort meals that are perfect for weeknights, weekends, and everything in between:
👉 5-Ingredient Mississippi Pot Roast Recipe
Tender, juicy, and made with just five simple ingredients, this slow cooker pot roast is fall-apart perfect with minimal effort.
👉 Velvety Tomato Bisque Soup Moms Love
Creamy, comforting, and rich in tomato flavor, this tomato bisque is a family favorite, especially when paired with grilled cheese.
👉 Cheesy Lasagna Soup Recipe Gen Z Loves
All the classic flavors of lasagna, no layering required. One pot, cheesy pasta goodness in under 30 minutes.


Ella Foster, co-founder of FoodBears.com, is a skilled writer whose love for cooking fuels her creative work. Her passion for experimenting in the kitchen brings authentic flavor and culinary inspiration to every piece she crafts for the platform.


