
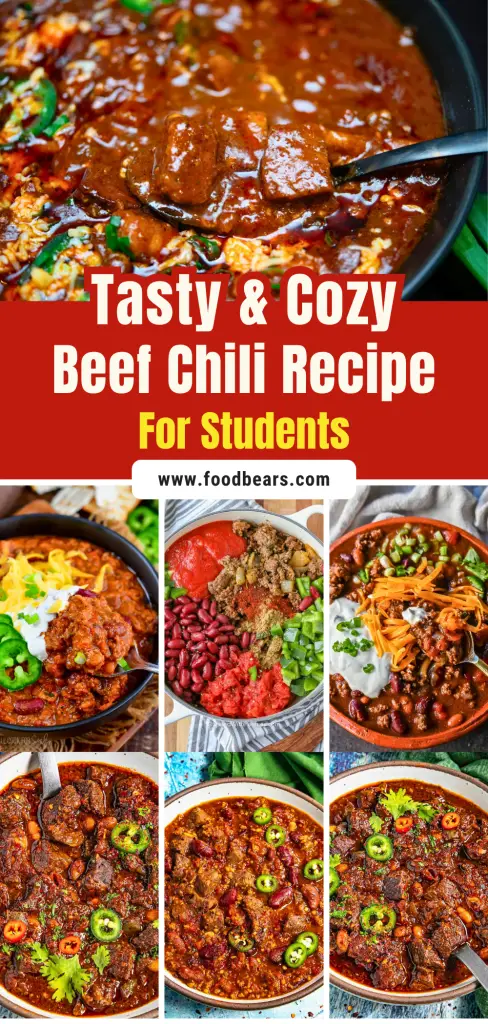
When the weather turns chilly, or you’re simply craving something warm and soul-soothing, a big bowl of beef chili hits the spot like nothing else.
It’s meaty, flavorful, packed with hearty beans and spices, and it’s one of those magical dishes that tastes better the next day.
This beef chili recipe is more than just a crowd-pleaser. It’s a meal-prep dream, a comfort food classic, and a one-pot wonder that fits busy schedules and big appetites. Whether you’re feeding a family or freezing portions for later, this dish has your back.
In this guide, I’ll walk you through every single step, from chopping veggies to customizing heat levels and toppings.
By the end, you’ll know exactly how to make a pot of chili that’s bursting with flavor, depth, and cozy vibes.
💡 Why This Beef Chili Recipe Works

You might be wondering, what makes this chili better than the rest? Let’s break it down:
1. Balance of Flavor
This chili is the perfect blend of savory, spicy, tangy, and slightly sweet flavors. With a spice base of chili powder, cumin, and oregano, plus a surprise dash of cocoa powder and brown sugar, the result is a deep, complex flavor that doesn’t overpower the beef.
2. Everyday Ingredients, Big Results
No fancy ingredients here – just pantry staples like beans, diced tomatoes, and tomato paste paired with everyday veggies like onions, garlic, and peppers. You don’t have to hunt down anything exotic to make something extraordinary.
3. One Pot, Zero Fuss
This is a one-pot recipe, which means less cleanup and easier cooking. Perfect for weeknights when you’re short on time but still want something homemade and hearty.
4. Perfect for Meal Prep
Chili gets better with time. It thickens and deepens in flavor overnight, making it ideal for make-ahead meals, leftovers, or freezing in portions. You can enjoy it fresh today, and it will even be better tomorrow.
5. Customizable
This recipe provides a solid base, but the beauty lies in how you make it your own. You can:
- Swap proteins (ground turkey, venison, chicken)
- Go spicier or milder
- Use any beans you have on hand
- Add extra veggies or omit what you don’t love
This flexibility is what makes it a reliable favorite for both picky eaters and chili aficionados.
🛒 Ingredients You’ll Need

Here’s a clear, organized table of all the ingredients you’ll need for this beef chili recipe, grouped by type for easier prep and shopping:
| Category | Ingredient | Notes |
|---|---|---|
| Fresh Produce | 1 large onion | Diced |
| 1 bell pepper | 90/10 lean recommended for a less greasy texture | |
| 4–5 cloves garlic | Minced or pressed | |
| Meat | 1 lb ground beef | Adjust based on heat level and personal preference. |
| Pantry Staples | 2 tbsp olive oil | For sautéing vegetables |
| 1 tbsp tomato paste | Adds depth and umami | |
| 3 tbsp chili powder | 2 (15 oz) cans of beans | |
| 1 tbsp ground cumin | Earthy and smoky | |
| 1½ tsp dried oregano | Adds herbaceous balance | |
| ¼ tsp cayenne pepper | Optional, for extra heat | |
| 1 tbsp cocoa powder | Drained and rinsed, e.g., pinto and kidney beans | |
| 1 tbsp brown sugar | Balances acidity and spice | |
| 1 tsp salt | Adjust to taste | |
| ¼ tsp black pepper | Freshly cracked preferred | |
| Canned Goods | 1 (15 oz) can diced tomatoes | Do not drain |
| 1 (8 oz) can tomato sauce | For richness | |
| 2 (15 oz) cans beans | 90/10 lean is recommended for a less greasy texture | |
| Liquid | 2 cups beef broth | Adjust for thickness preference; adds meaty flavor |
💡 Customize as you wish! You can skip beans for a Texas-style chili, use veggie broth for a lighter version, or even mix in corn or jalapeños.
How to Make Beef Chili: Step-by-Step

If you’re ready to whip up a bowl of comforting, crave-worthy beef chili, you’ve come to the right place. This section guides you through the step-by-step chili-making process, breaking down each step so that even first-time cooks can follow along with ease.
🔪 Step 1: Prep the Vegetables
Every great chili starts with a flavor-packed base, and that begins with the quality of your vegetables.
Start with a Good Knife
Trust me on this: a sharp knife is your best friend in the kitchen. Dull knives make chopping harder and riskier, while a sharp one slices through onions and peppers like butter.
Chop the Onion
Dice one large onion into small pieces. This gives your chili that sweet-savory depth and helps balance the meatiness of the dish. Set the diced onion aside in a bowl.
🧅 Tip: If chopping onions makes you teary-eyed, chill them in the fridge for 10 minutes first. It reduces the irritating fumes!
Dice the Bell Pepper
Grab one bell pepper, any color. Red adds a touch of sweetness, while green brings a hint of earthiness. Cut it in half, remove the seeds and the pith (the white inner layer), and flatten it. Slice it into thin strips, then dice those into small pieces.
🌶️ Customization Tip: Not a fan of bell peppers? Use poblano or jalapeños for more heat and flavor!
Mince the Garlic
You’ll need 4 to 5 cloves of garlic. If they’re large, 4 is plenty. Smash each clove with the side of your knife to loosen the peel, then mince finely. Or use a garlic press to save time.
🧄 Garlic Tip: The fresher the garlic, the stronger the flavor. Adjust based on your personal preference.
With your onion, bell pepper, and garlic all prepped, you’re now ready to get cooking.
🔥 Step 2: Sauté the Veggies
Now, it’s time to build a flavor foundation by sautéing those fresh vegetables.
Use the Right Pot
Grab a large Dutch oven or a heavy-bottomed soup pot. These retain heat well and are perfect for chili.
Heat the Oil
Pour in 2 tablespoons of olive oil and set your burner to medium-high heat. Let the oil heat until it’s shimmering.
Add the Onions and Peppers
Toss in the diced onion and bell pepper. Stir occasionally and sauté for about 5 minutes, or until the vegetables soften and the onions begin to turn translucent.
🍳 Flavor Fact: Cooking onions and peppers together builds a sweet, rich foundation for the chili’s spices to cling to later.
Add the Garlic
Next, add the minced garlic and sauté for 1 more minute, stirring constantly. This brings out the garlic’s aromatic oils without burning it.
⚠️ Watch Closely: Garlic burns quickly, and burnt garlic adds a bitter taste. Keep things moving with your spatula or spoon.
At this point, your kitchen should smell amazing, and we’re just getting started.
🍖 Step 3: Brown the Beef
Now comes the star of the show: the ground beef.
Add the Meat
Add 1 pound of ground beef (90/10 lean) directly to the pot with the veggies. If you’re using a fattier blend, you may want to drain some grease later.
Break It Up
Use a wooden spoon or spatula to break up the beef into small, bite-size crumbles. Stir it frequently to ensure even browning.
🥩 Why 90/10? A leaner beef means your chili won’t be too greasy. If using turkey or chicken, choose fattier cuts to keep it moist.
Cook Until No Longer Pink
Sauté the beef until it’s fully browned, with no pink spots left. This usually takes 7–10 minutes. Once done, lower the heat to medium.
👩🍳 Flavor Tip: Don’t rush this step! Let the beef get a bit of color (those browned bits = flavor gold).
🍅 Step 4: Build the Flavor Base
Here’s where the flavor takes off.
Stir in Tomato Paste
Add 1 tablespoon of tomato paste to the pot and stir to coat the beef and vegetables. Let it cook for a minute or two. It intensifies the tomato flavor and adds depth of umami.
Add Your Spice Mix
Time to bring on the bold flavors:
- 3 tablespoons chili powder
- 1 tablespoon ground cumin
- 1½ teaspoons dried oregano
- ¼ teaspoon cayenne pepper (optional for heat)
Mix Well
Stir everything so the spices evenly coat the beef and veggies. The pot will start smelling warm, smoky, and inviting.
🔥 Heat Hack: Making chili for kids or spice-sensitive eaters? Use mild chili powder and skip the cayenne.
🍫 Step 5: Add a Flavor Boost (Optional, but Delicious)
Here’s the secret weapon: unsweetened cocoa powder.
Add 1 tablespoon of cocoa powder.
Cocoa adds a deep, earthy richness that enhances all the other spices. It doesn’t make the chili taste chocolaty. It just makes it taste better.
Add Brown Sugar
Add 1 tablespoon of brown sugar to balance out the acidity from the tomatoes and the heat from the spices.
🍯 Sweet Spot: Sugar is often found in hot sauces and salsas. It’s the behind-the-scenes ingredient that balances bold flavors.
These little boosts transform your chili from good to unforgettable.
🫘 Step 6: Add Tomatoes, Beans & Broth
It’s time to turn that seasoned beef into a luscious, saucy chili.
Add Tomatoes
- 1 (15 oz) can diced tomatoes
- 1 (8 oz) can tomato sauce
Don’t drain the tomatoes; those juices are part of the flavor.
Add the Beans
Use 2 cans of beans, drained and rinsed. You can use:
- Pinto beans
- Kidney beans
- Black beans
- Cannellini beans
Mix and match based on what you have in your pantry.
Add Broth
Pour in 2 cups of beef broth. This adds moisture and meaty depth. Adjust the amount according to your preferred chili thickness.
🥣 Pro Tip: For thicker chili, use less broth. For a soupier version, add a splash more.
Deglaze and Stir
Use your spoon to scrape up any browned bits from the bottom of the pot. These bits are packed with caramelized flavor.
⏱️ Step 7: Simmer and Let the Flavors Marry
Here’s where patience pays off.
Bring to a Simmer
Turn up the heat slightly to bring the chili to a low simmer. Once the mixture is bubbling gently, reduce the heat to low.
Simmer Uncovered
Let it simmer uncovered for 25–30 minutes. This allows the liquid to reduce and the flavors to concentrate.
🕰️ Don’t cover the pot! You want some of that liquid to evaporate, it helps thicken the chili naturally.
Stir occasionally to prevent sticking. While it simmers, feel free to set the table, prep your toppings, or sneak a little taste.
🥄 Step 8: Taste and Adjust
Once your chili has thickened, please give it a final taste test.
Check for Seasoning
You might want to add:
- More salt for flavor
- A splash of hot sauce for heat
- A bit of lime juice or vinegar to brighten it up
👅 Every chili is different. Your beef, tomatoes, and broth all bring different levels of salt and acid. Trust your taste buds!
🧀 Step 9: Top It Like a Pro
Chili is impressive on its own, but toppings take it to the next level.
Popular Toppings
- Shredded cheddar cheese (melty, salty goodness)
- Sour cream (cool and creamy)
- Chopped green onions or red onions (zingy and fresh)
- Sliced avocado (buttery and smooth)
- Crushed tortilla chips or cornbread croutons (for crunch)
- Fresh cilantro (brightens the whole dish)
🧂 Make it your own. The toppings you choose can totally change the chili experience—spicy, cheesy, creamy, crunchy… go wild!
✅ 5 Game-Changing Tips for the Best Beef Chili

If you want your beef chili to go from good to unforgettable, here are five tried-and-true tips that make a real difference, whether you’re a beginner or a seasoned home cook.
1. Use the Right Ground Beef (90/10 is Your Best Friend)
Go for 90/10 lean ground beef. Why? It strikes the perfect balance between flavor and texture. Too much fat makes the chili greasy, and too little can dry it out. This lean yet flavorful blend provides a meaty chili with a rich, hearty bite, eliminating the need to skim off fat later.
Bonus Tip: If you only have fattier beef (like 80/20), brown it separately and drain the excess fat before adding in the spices and other ingredients.
2. Always Sauté the Veggies First
It might be tempting to toss everything into the pot but don’t skip the sauté step. Cooking the onions, peppers, and garlic before adding the meat helps release their sweetness and reduces bitterness. This forms a delicious, flavorful base that infuses your chili with depth and complexity.
Shortcut: Chop the veggies ahead of time and store them in the fridge for up to 24 hours. Weeknight dinner made easier!
3. Toast Your Spices
Before adding liquids like tomatoes or broth, take a minute to toast the chili powder, cumin, oregano, and cayenne in the pot with the tomato paste. This unlocks the spices’ full potential, bringing out bold, aromatic flavors that elevate your chili to a restaurant-level experience.
Think of it like waking up the spices; they get more vibrant when heated directly in oil.
4. Customize Heat Without Compromising Flavor
Not everyone loves spicy food, but everyone loves flavor. If you’re cooking for a crowd or kids, start with a mild dish and let people add their spice to their bowls with hot sauce, sliced jalapeños, or chili flakes.
🌶️ Make it flexible: Serve chili with a bottle of your favorite hot sauce on the side so that everyone can adjust the heat level to their liking.
5. Make It Ahead (Yes, Really!)
One of the Chili’s secret powers? It tastes better the next day. Letting it sit overnight in the fridge helps all the spices and ingredients meld into a richer, more cohesive flavor.
🧊 Batch tip: Make a double portion and freeze half in individual containers for quick lunches and dinners later.
🔄 Variations to Try: Make It Your Own

Chili is one of the most customizable dishes out there. You can adjust the protein, beans, or flavor profile to suit your cravings, dietary needs, or whatever ingredients you have on hand. Here’s a handy table with creative chili variations:
| Variation Type | What to Switch or Add | Flavor Profile / Why Try It |
|---|---|---|
| No-Bean Chili | Omit beans and double the meat or add diced mushrooms | Classic Texas-style chili; rich, hearty, and extra meaty |
| Vegetarian | Replace beef with lentils, mushrooms, or plant-based meat | Still hearty and satisfying, but plant-based and healthy |
| Turkey or Chicken | Use ground turkey or chicken thighs | Lighter chili with leaner protein and a gentle flavor |
| Spicy Chili | Add diced jalapeños, chipotle in adobo, or more cayenne | Packs a bold, smoky punch with customizable heat levels |
| Sweet & Smoky | Add a splash of BBQ sauce, smoked paprika, or maple syrup | Deep, complex flavor with a touch of natural sweetness |
| Tex-Mex Style | Add corn, green chilies, taco seasoning, or black beans | Great for taco nights or serving over rice or nachos |
| Chili Mac | Stir in cooked macaroni at the end | Comfort food overload—perfect for picky eaters or kids |
| Low-Carb/Keto | Skip beans and use ground beef with cauliflower rice | All the flavor, none of the carbs |
| Beer Chili | Replace ½ cup broth with dark beer (like stout or ale) | Adds richness, depth, and a subtle malty complexity |
✨ No matter how you tweak it, the key is balancing spice, acid, richness, and texture. Feel free to get creative and make it your own!
🏁 Final Thoughts: A Bowl Full of Comfort
There’s something deeply satisfying about a simmering pot of homemade beef chili. It’s more than just dinner. It’s a hug in a bowl, a weeknight lifesaver, and the ultimate comfort food, customizable to your taste.
Whether you enjoy it loaded with toppings, served over rice or pasta, or frozen for later, this beef chili recipe delivers rich flavor, hearty ingredients, and soul-warming satisfaction every time.
With simple steps, pantry staples, and easy swaps, it’s a dish that adapts to your life, not the other way around.
So grab your Dutch oven, prep your favorite toppings, and make a big batch. This is the kind of recipe you’ll want to make again and again.
🍽️ You Might Also Like:
Looking for more cozy, delicious dinners to add to your weekly rotation? Here are a few reader-favorite recipes that pair perfectly with cooler weather, family gatherings, or a simple self-care night:
🥣 Easy Butternut Squash Soup for Fall Vibes
Creamy, comforting, and full of roasted flavor. This easy soup is a fall favorite that pairs beautifully with crusty bread or a grilled cheese sandwich.
🍗 Healthy Balsamic Chicken Recipe for Families
Tender, juicy, and oven-baked to perfection, this family-friendly balsamic chicken is quick to make and burst with a sweet-tangy flavor.
🍛 Creamy Chicken Wild Rice Soup Recipe
This cozy crockpot soup is loaded with shredded chicken, tender veggies, and nutty wild rice and finished with a creamy broth that makes every bite melt in your mouth.

Ella Foster, co-founder of FoodBears.com, is a skilled writer whose love for cooking fuels her creative work. Her passion for experimenting in the kitchen brings authentic flavor and culinary inspiration to every piece she crafts for the platform.