
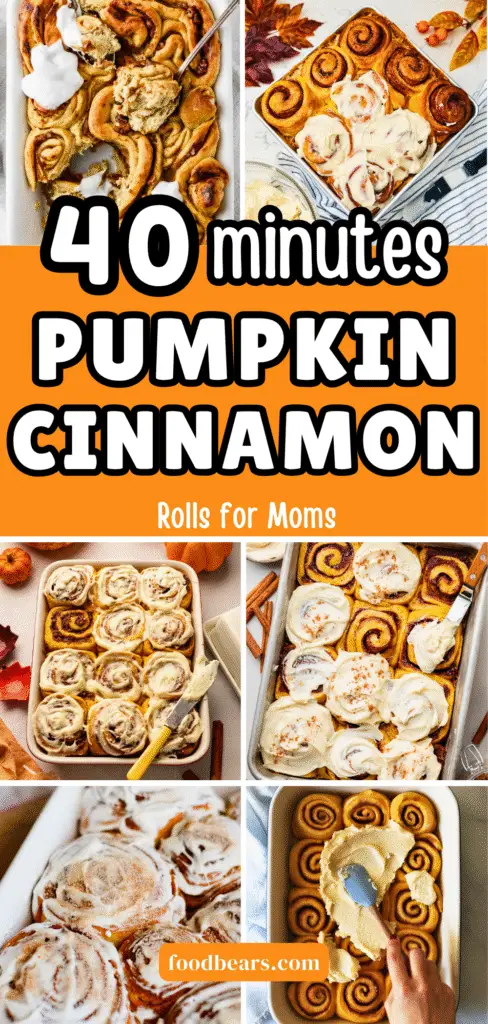
Is there anything cozier than the smell of freshly baked cinnamon rolls on a crisp fall morning? Now imagine that, but with a sweet twist of pumpkin and warm spices.
Yes—we’re talking about pumpkin cinnamon rolls! These soft, gooey, golden treats combine the comforting flavors of cinnamon with the seasonal magic of pumpkin.
Whether you’re baking for a weekend brunch, a holiday gathering, or simply enjoying a quiet cup of coffee on the couch, this easy recipe is the perfect fall treat for your kitchen.
In this blog post, we’ll guide you through the step-by-step process of making these rolls using simple ingredients and easy-to-follow instructions. Let’s turn your kitchen into a cozy fall bakery.
Why You’ll Love These Pumpkin Cinnamon Rolls
If you’re someone who waits all year for fall flavors to hit the shelves, these Pumpkin Cinnamon Rolls will steal your heart.
They combine everything you love about a classic cinnamon roll, fluffy dough, gooey filling, and sweet glaze, with the rich, earthy warmth of pumpkin and spices. It’s comfort food at its finest.
But what sets this recipe apart?
- Soft, Cloud-Like Texture: The dough is enriched with butter, eggs, and warm milk, giving it a pillowy softness that melts in your mouth.
- Absolute Pumpkin Goodness: Pumpkin puree isn’t just for flavor. It adds moisture and depth to every bite. You’ll notice it the second you sink your teeth in.
- Warm Cinnamon Spice: With cinnamon in both the dough and the filling, every bite bursts with cozy fall flavors.
- Simple Ingredients, Homemade Magic: You don’t need fancy equipment or a long list of ingredients. Everything here is pantry-friendly and beginner-approved.
- Perfect for Any Time of Day: Enjoy these rolls warm for breakfast with a cup of coffee, as an afternoon snack, or even for dessert with a scoop of vanilla ice cream.
Whether you’re baking for a fall brunch, Thanksgiving breakfast, or just because the leaves are turning, these rolls will fill your kitchen with sweet aromas and your heart with happiness.
Ingredients You’ll Need
Before you start baking, take a moment to gather all the necessary ingredients. Most of them are simple and may already be in your kitchen!
🥣 Dough Ingredients:
| Ingredient | Amount | Purpose |
|---|---|---|
| Warm Milk | 187 ml (¾ cup + 1 tbsp) | Activates the yeast and creates tender dough |
| Sugar | 3–4 tablespoons | Adds sweetness and feeds the yeast |
| Eggs | 2 large | Enrich the dough and help bind ingredients |
| Melted Butter | 78 grams (about ⅓ cup) | Adds fat for softness and flavor |
| Salt | ½ teaspoon | Balances the sweetness and enhances flavor |
| Ground Cinnamon | 1 teaspoon | Adds warm spice to the dough itself |
| Pumpkin Puree | 173 grams (¾ cup) | Provides moisture and pumpkin flavor |
| Instant Yeast | 1 packet (2¼ teaspoons) | Helps the dough rise quickly and efficiently |
| All-Purpose Flour | 4 cups | The base of the dough |
🍂 Filling Ingredients:
| Ingredient | Amount | Purpose |
|---|---|---|
| Softened Butter | 6 tablespoons | Creates a rich, spreadable base for the filling |
| Brown Sugar | 7 tablespoons | Sweetens and caramelizes during baking |
| Ground Cinnamon | 3 tablespoons | Infuses the rolls with that classic spicy flavor |
🍰 Icing Ingredients:
| Ingredient | Amount | Purpose |
|---|---|---|
| Icing Sugar (Powdered Sugar) | 4–5 tablespoons | For a smooth, sweet topping |
| Milk | 2 tablespoons | Thins the sugar for a drizzle-worthy consistency |
Step-by-Step: How to Make Pumpkin Cinnamon Rolls from Scratch
Making pumpkin cinnamon rolls from scratch may sound like a daunting task, but this recipe breaks it down into easy, manageable steps.
If you can mix, roll, and wait for the dough to rise, you can master this. Let’s walk through it, step by step.
Step 1: Preheat and Prep
Before diving in, ensure your workspace is clean and that your ingredients are measured and ready.
You don’t need to preheat the oven yet unless your kitchen is cold and you’re creating a warm environment for your dough to rise (more on that soon!).
Also, melt your butter ahead of time so it has time to cool slightly. The goal is for it to be warm, not hot.
Step 2: Warm the Milk and Combine Wet Ingredients
Start by pouring 187 ml of warm milk into a large mixing bowl. The milk should be between 100°F and 110°F (38 °C and 43°C), just warm to the touch.
If it’s hotter, it can kill the yeast. Use a thermometer if you have one; otherwise, think “just above body temperature.”
Whisk the milk with:
- 3 to 4 tablespoons of sugar. This helps sweeten the dough and provides the yeast with food to feed on.
- 2 large eggs
- 78 grams (about ⅓ cup) of melted butter ensures it’s cooled slightly so it doesn’t cook the eggs.
- ½ teaspoon salt
- 1 teaspoon ground cinnamon for a cozy hint of spice baked right into the dough.
Whisk everything together until smooth and thoroughly combined.
Step 3: Add Pumpkin Puree
Time for the star ingredient—pumpkin puree.
Add 173 grams (¾ cup) of pumpkin puree into your bowl and mix well. It should blend effortlessly into the mixture, resulting in a slightly orange and deliciously aromatic mixture.
This not only adds a subtle earthy sweetness but also makes your dough extra moist and tender.
Step 4: Add Yeast and Flour
Sprinkle one packet of instant yeast (2¼ tsp) right over the wet ingredients. There’s no need to bloom it separately when using instant yeast; it’s designed to mix right in.
Add 4 cups of all-purpose flour a little at a time, stirring as you go. You can use a wooden spoon or your hands for this part.
Mix until a soft, slightly sticky dough forms. It should pull away from the sides of the bowl and not stick to your fingertips too much. If it’s too sticky, add a little more flour, just a tablespoon at a time.
This dough is rich and soft, thanks to the pumpkin and eggs. Expect it to be a bit smoother than traditional bread dough.
Step 5: Let the Dough Rise (First Rise)
Cover the bowl tightly with plastic wrap or a clean kitchen towel and let the dough rise for 1 hour in a warm spot.
Pro Tip: If your kitchen is chilly, preheat your oven to 150°F (65°C), then turn it off. Place the bowl inside with the door cracked open for 30 minutes. Then close the door to trap in warm air. This creates a cozy environment to help the dough rise evenly.
The dough should nearly double in size after an hour. If not, give it an extra 15 minutes.
Step 6: Roll Out the Dough
Once your dough has risen, lightly flour your countertop or a large clean surface. Turn the dough out of the bowl and dust the top with a bit more flour.
Knead it very gently, just once or twice, to bring it together. Then, grab your rolling pin, flour it lightly, and roll the dough into a large rectangle, roughly 18 inches by 12 inches.
Try to keep the thickness even, about ¼ inch thick. A rectangular shape will help you get evenly sized cinnamon rolls later.
Step 7: Add the Filling
This part is where all the magic happens. You’ll build that irresistible cinnamon-sugar swirl.
Start by spreading 6 tablespoons of softened butter over the rolled dough. Use a spatula or your fingers to smooth it evenly across the surface, reaching the edges.
Next, sprinkle:
- 7 tablespoons of brown sugar for that caramelized depth, and
- 3 tablespoons of ground cinnamon for bold, spicy sweetness.
Use your hand to press the mixture into the butter so it sticks gently. Don’t rush this part. The more evenly you distribute the filling, the better the swirl in every bite.
Step 8: Roll It Up and Slice
Starting from the long edge of the rectangle, roll the dough up tightly but gently into a log.
Once you’ve reached the end, press the seam closed slightly to seal it.
Now, here’s the best trick for cutting: dental floss.
Slide a piece of unflavored floss underneath the log, then cross the ends over the top and pull tight. It cuts cleanly without squishing the rolls like a knife would. Use this method to slice the log into 12 even rolls.
Tip: If you want taller, bakery-style rolls, slice into 9 pieces instead of 12.
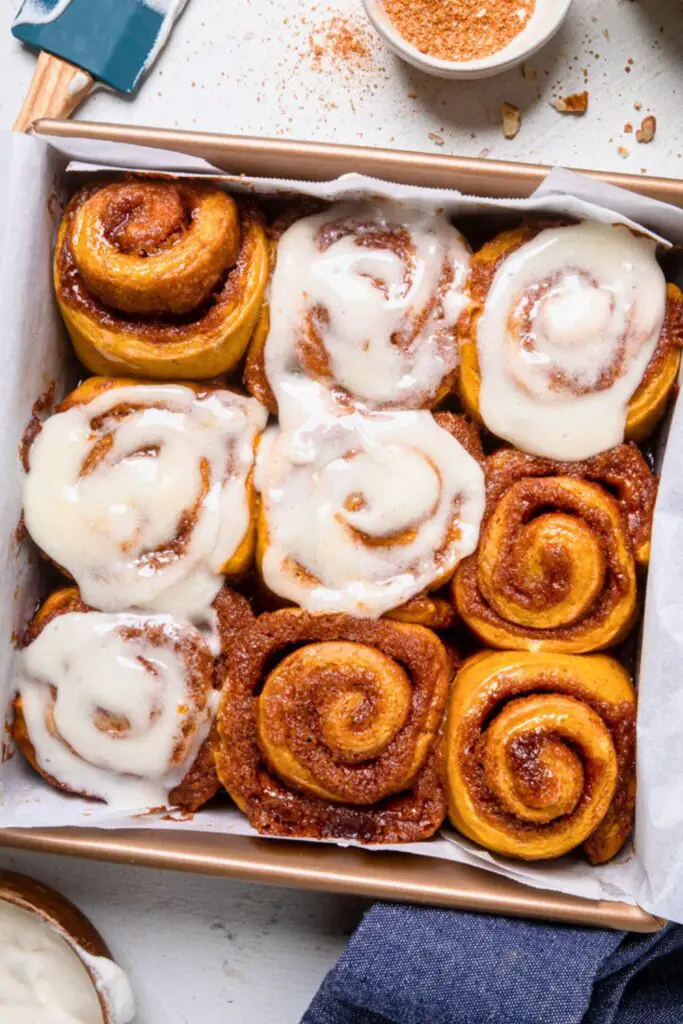
Step 9: Arrange and Rise Again (Second Rise)
Place your cut rolls into a greased or parchment-lined cake or baking pan. You can use a rectangular dish or two round pans. It’s up to you. Leave a little space between each roll to allow for proper rising.
Cover the rolls loosely with plastic wrap and let them rise for an additional 30 minutes. They’ll puff up beautifully, filling in the gaps in the pan.
This second rise gives the rolls their signature airy texture.
Step 10: Bake to Golden Perfection
Once the rolls have risen and are touching, it’s time to bake.
Preheat your oven to 350°F (175°C) and bake for 20 minutes, or until the tops are lightly golden brown.
Your kitchen will smell like a cinnamon-scented dream.
Check them around the 18-minute mark. You want the tops golden, not too dark. The centers should be soft but fully baked.
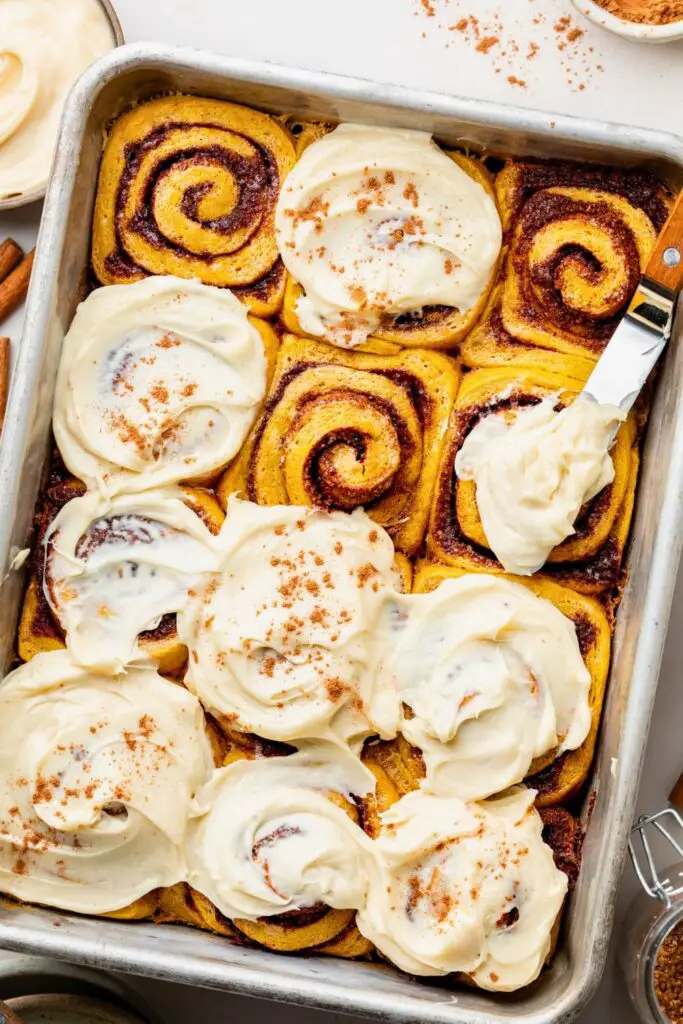
Step 11: Make the Icing
While your pumpkin cinnamon rolls bake (or cool), whisk together a quick icing:
- 4–5 tablespoons of powdered sugar
- 2 tablespoons of milk
Mix until smooth and slightly pourable. You can add more milk for a thinner glaze or more sugar for a thicker one.
This simple icing melts right into the warm rolls, providing a classic sweet finish. If you like, you can even flavor it with a drop of vanilla extract or a sprinkle of pumpkin spice.
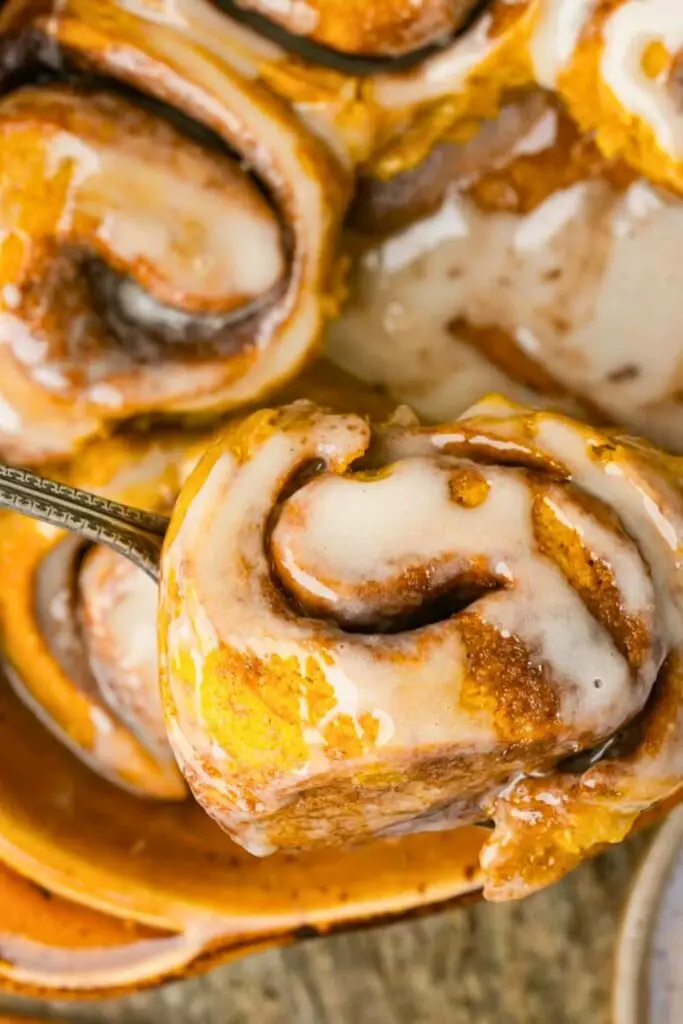
Step 12: Glaze and Serve Warm
When the rolls come out of the oven, let them sit for about 5 minutes to cool slightly. Then, drizzle the icing all over the top using a spoon or small whisk.
The glaze will melt into the warm layers and pool slightly between the rolls—pure bliss.
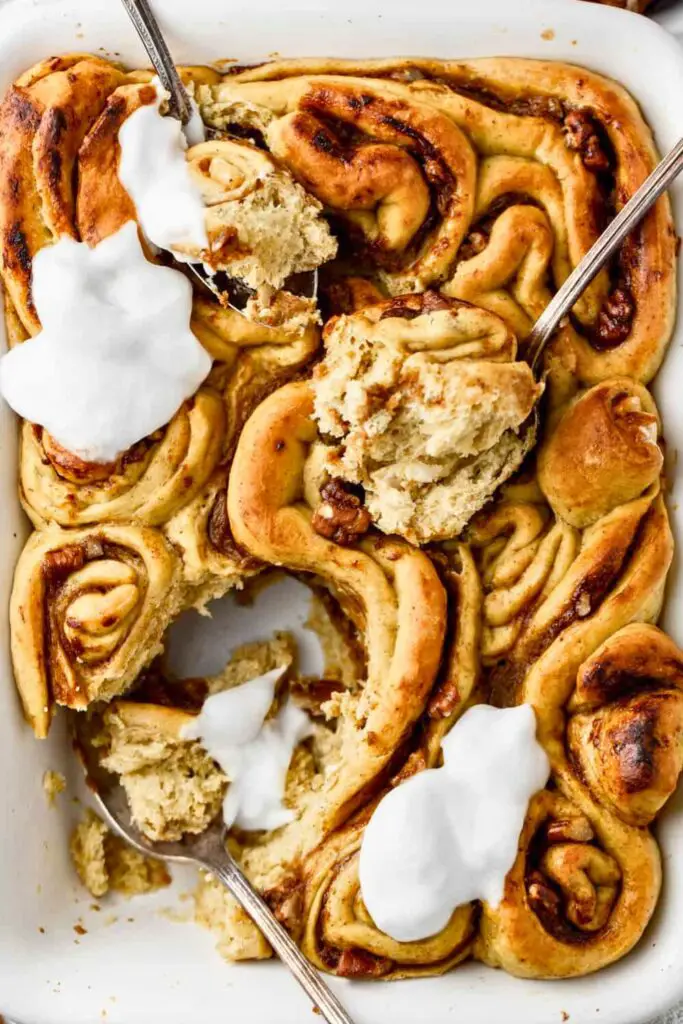
Grab a fork (or use your fingers) and enjoy while they’re still warm. Serve them with:
- A hot mug of coffee
- A glass of cold milk
- A cozy cup of tea
- Or… just as they are!
Tips for the Best Pumpkin Cinnamon Rolls
Want to make sure your pumpkin cinnamon rolls turn out perfectly soft, golden, and flavorful every time? Here are some practical tips and tricks straight from the kitchen that will help you bake with confidence and avoid common pitfalls.
1. Use Warm (Not Hot) Milk
Always ensure your milk is warm to the touch, between 100°F and 110°F (38 °C and 43°C). If the milk is too hot, it will kill your yeast, and the dough won’t rise. If it’s too cool, the yeast will work very slowly.
Pro Tip: If you’re unsure, dip your finger in. It should feel comfortably warm, not hot.
2. Don’t Overdo the Flour
It’s tempting to keep adding flour when your dough is a bit sticky, but resist the urge. The dough should be soft, slightly tacky, and elastic, not dry. Too much flour = dry, dense rolls.
If your dough is sticking too much to your fingers, dust it lightly with flour, just a tablespoon at a time.
3. Let the Dough Rise in a Warm, Draft-Free Place
Yeast loves warmth, so find a cozy corner in your kitchen. On colder days, use your oven as a proofing box:
- Preheat to 150°F, then turn it off and place your dough inside with the door slightly ajar for 30 minutes.
- Then close the door to trap in the heat for the final rise time.
4. Use Dental Floss to Slice
Unflavored dental floss is the best-kept secret in cinnamon roll baking. Unlike knives, floss doesn’t press down or flatten your dough when slicing.
To use:
- Slide the floss under the dough log.
- Cross the ends over the top.
- Pull in opposite directions for a clean, perfect slice.
5. Don’t Skip the Second Rise
That 30-minute second rise after you’ve shaped the rolls is essential. It helps the dough become even fluffier and ensures a soft texture after baking.
Skipping this step leads to denser, less satisfying rolls.
Serving Suggestions: How to Enjoy Pumpkin Cinnamon Rolls
Pumpkin cinnamon rolls are incredibly versatile. Here are some of the best ways to enjoy them, whether you’re savoring one on a quiet morning or making a batch for friends and family.
🍽️ 1. Serve Warm, Fresh Out of the Oven
This is, hands down, the best way to enjoy them. When they’re still warm, the rolls are fluffy, and the cinnamon-sugar filling is gooey. And the icing melts into every layer.
Pair with:
- A steaming mug of coffee
- Hot chai latte or pumpkin spice tea
- A glass of cold milk (classic comfort combo)
🍳 2. Make It Part of a Fall Breakfast Spread
Hosting brunch or just feeling festive? Serve your pumpkin cinnamon rolls with:
- Scrambled eggs or an egg casserole
- Crispy bacon or sausage links
- A fresh fruit salad
- Maple-glazed sweet potatoes
It turns your casual breakfast into a cozy, full-on fall celebration.
🎃 3. Dress It Up for Dessert
Yes, these rolls can double as dessert! Just add:
- A drizzle of warm caramel sauce
- A scoop of vanilla ice cream
- A sprinkle of toasted pecans or walnuts
Boom—an easy, crowd-pleasing dessert that feels gourmet.
👶 4. Perfect for Kids and Family Gatherings
These rolls are soft, sweet, and kid-approved. They’re easy to make in batches for holidays like Thanksgiving or Halloween morning.
Want to make it more fun for kids?
- Let them help with spreading the filling or mixing the icing
- Add a tiny bit of orange food coloring to the icing for a festive fall look
🧊 5. Store and Reheat Like a Pro
If you’ve leftovers, don’t worry – these rolls reheat beautifully.
- Storage: Keep in an airtight container at room temperature for up to 4 days.
- To reheat, microwave for 15–20 seconds to warm and soften them again. Add a fresh drizzle of icing if desired.
You can also freeze unbaked or baked rolls. Just wrap tightly and store in a freezer-safe container for up to 2 months. Thaw overnight and reheat before serving.
Final Thoughts: Fall Baking Never Tasted This Good
These pumpkin cinnamon rolls are soft, sticky, sweet, and bursting with the warmth of the season. Whether you’re a baking novice or a seasoned kitchen pro, this recipe is easy to follow and consistently delivers mouthwatering results.
So grab your apron, stock up on pumpkin, and treat yourself (and your loved ones) to the best homemade fall breakfast around.
Don’t forget to save this recipe, share it with a friend, or tag your rolls on Instagram because warm pumpkin rolls deserve to be seen and devoured!
More Fall Recipes You’ll Love
If you enjoyed these pumpkin cinnamon rolls, here are a few more fall favorites to add to your baking list:
- 🍞 Best Pumpkin Bread Recipe for Busy Moms
Moist, sweet, and easy to make, perfect for breakfast or snacks. - 🍫 Easy & Yummy Pumpkin Brownies in 30 Mins
Fudgy, flourless, and packed with pumpkin flavor. The ultimate fall treat! - 🍁 Stunning Pumpkin Scones Recipe for Fall
Flaky, buttery scones that pair perfectly with your morning coffee.

Ella Foster, co-founder of FoodBears.com, is a skilled writer whose love for cooking fuels her creative work. Her passion for experimenting in the kitchen brings authentic flavor and culinary inspiration to every piece she crafts for the platform.