
Few dishes stir up as much excitement at the dinner table as Teriyaki Chicken. With its irresistible sweet-and-savory glaze, juicy chicken, and fluffy rice, it’s no wonder this Japanese-American favorite has become a weeknight staple around the world.
But here’s the truth: you don’t need takeout or bottled sauce to enjoy restaurant-quality chicken teriyaki at home. You need a simple recipe, a few pantry ingredients, and a hot skillet.
In this guide, we’re going all in on how to make chicken teriyaki from scratch—from the glossy homemade sauce to perfectly seared chicken and fluffy buttered rice. This is a 100% foolproof, flavor-packed, no-shortcuts recipe that’ll become your new obsession.
What Is Teriyaki Chicken?
Chicken Teriyaki is one of the most beloved dishes in Japanese cuisine and for good reason. It’s simple, savory, and incredibly satisfying. But what does “teriyaki” actually mean?
The word teriyaki is a combination of two Japanese words:
- “Teri” means shine or glaze
- “Yaki” means grilled, roasted, or broiled
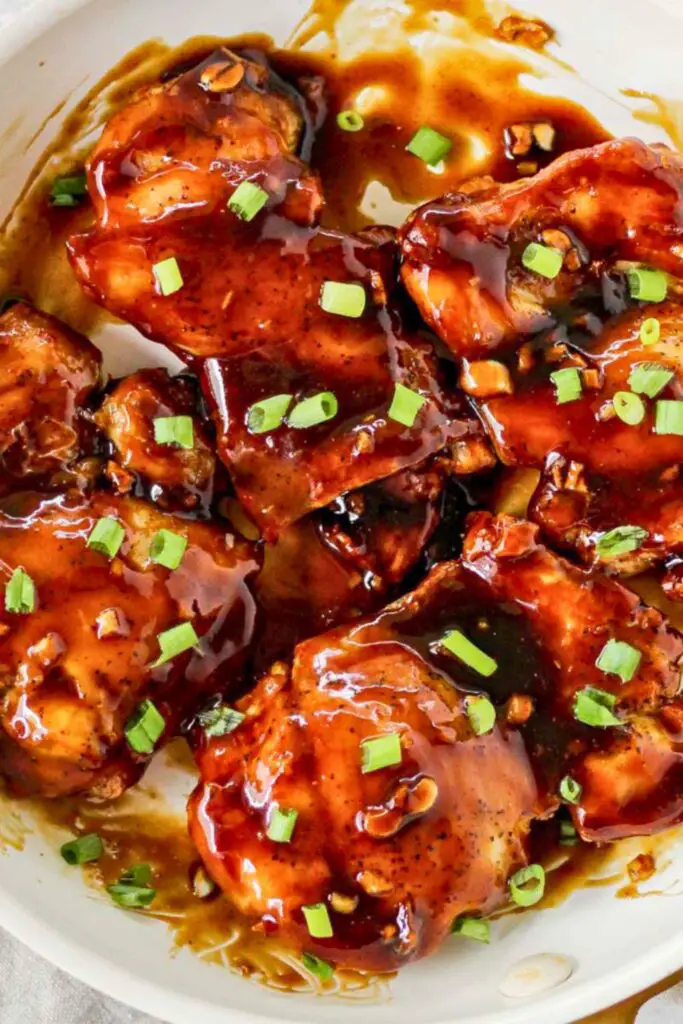
So when we say “chicken teriyaki,” we’re really talking about glazed grilled chicken. In this dish, juicy, tender chicken is coated in a shiny, sweet-savory sauce made primarily from soy sauce, sugar, and mirin or sake.
While Western versions often rely on bottled sauces, the true beauty of chicken teriyaki lies in its simplicity. With just a few ingredients, you can whip up a sauce that’s miles better than anything you’ll find on a grocery store shelf.
Whether stir-fried, pan-seared, or grilled, the key to excellent chicken teriyaki is that sticky, caramelized glaze that clings to every bite of chicken.
It’s the kind of recipe you’ll crave weekly, and luckily, it’s incredibly easy to make at home.
Why You’ll Love This Teriyaki Chicken Recipe
Still wondering if you should try this at home instead of ordering takeout? Here’s why this recipe is a must-make:
✅ Simple Ingredients, Huge Flavor
You don’t need fancy ingredients or hard-to-find condiments. Just soy sauce, sake, rice vinegar, and brown sugar—and boom, you’ve got teriyaki sauce better than anything store-bought.
✅ Homemade Sauce That’s Shelf-Worthy
This teriyaki sauce lasts in your fridge for 3–4 months and works well on everything from chicken to salmon, shrimp, or even vegetables. Once you try it, you’ll find endless uses.
✅ Perfect for Meal Prep
Make a big batch of chicken, rice, and veggies, portion it out, and you’ve got lunch or dinner ready to go all week. It reheats beautifully and retains its fresh taste.
✅ Healthier Than Takeout
Skip the preservatives and mystery ingredients in bottled sauce. This recipe is cleaner, lighter, and lets you control your sodium and sugar levels.
✅ Customizable Heat and Sweetness
Want it spicier? Add a pinch of crushed red pepper. Prefer it less sweet? Cut back on the brown sugar. This recipe is flexible and adapts to your taste.
Ingredients You’ll Need for Teriyaki Chicken
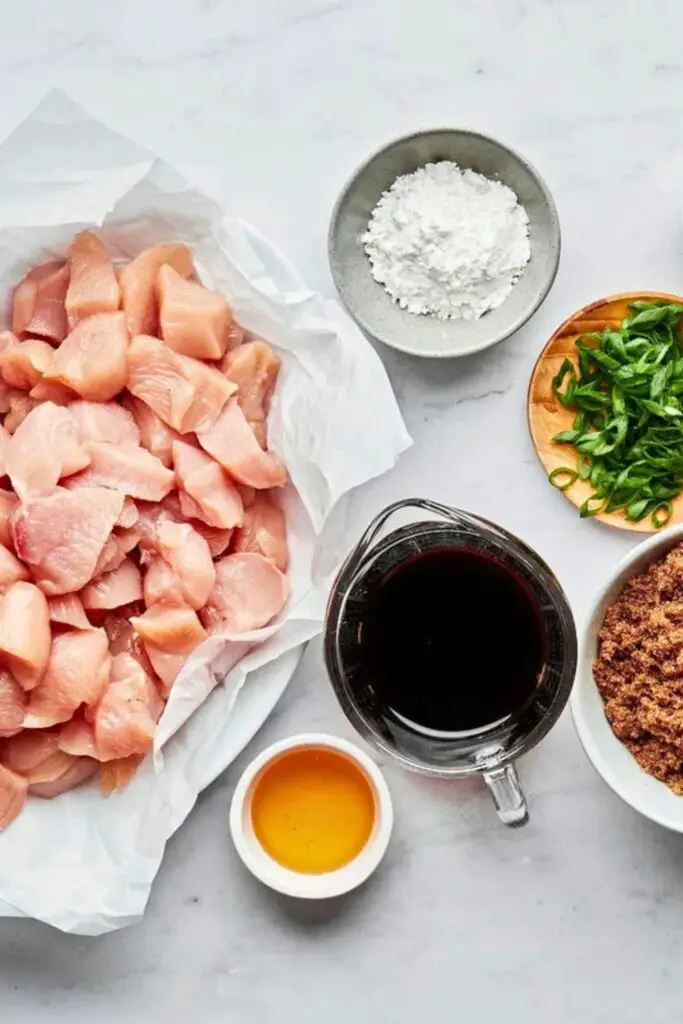
Here’s a complete breakdown of everything you need to make both the chicken teriyaki and its classic sides (rice and optional broccoli):
| Category | Ingredient | Notes |
|---|---|---|
| For the Teriyaki Sauce | Low-Sodium Soy Sauce (1 cup) | Juicy and forgiving, chicken breast is also acceptable |
| Sake (1/4 cup) | Adds depth and authentic Japanese flavor; use small bottles for cooking | |
| Rice Vinegar (2–3 tbsp) | Provides acidity to balance the sweetness | |
| Brown Sugar (1/3 cup) | Caramelizes to create that signature shiny glaze | |
| Sesame Seeds (optional) | Adds nuttiness and a pretty garnish | |
| Crushed Red Pepper (optional) | For a slight spicy kick | |
| For the Chicken | Boneless Skinless Chicken Thighs (1.5 lbs) | Juicy and forgiving; chicken breast is also acceptable |
| Salt & Pepper | For seasoning the chicken | |
| Fresh Ginger (1 small knob) | Grated or finely minced | |
| Garlic (2 cloves) | Grated or minced | |
| Green Onions (2–3 stalks) | Use both white and green parts; reserve some green for garnish | |
| Neutral Oil (1 tbsp) | Canola, vegetable, or avocado oil | |
| Sesame Oil (1 tsp) | Deepens the teriyaki flavor | |
| For the Rice | Basmati or Long-Grain White Rice (1 cup) | Fluffy and perfect for soaking up sauce |
| Water or Chicken Stock (2 cups) | Use stock for more flavor | |
| Butter (1 tbsp) | Helps toast the rice and prevent sticking | |
| Salt (pinch) | To season the rice | |
| Optional Side | Broccoli Florets (2 cups) | Sautéed or roasted great at soaking up extra sauce |
| Olive Oil, Garlic Powder, Salt, Pepper | To season the broccoli |
📝 Pro tip: The sauce also makes a great marinade for grilled chicken or wings just reduce it slightly and brush it on.
How to Make Teriyaki Chicken at Home (Step-by-Step)
Craving better-than-takeout chicken teriyaki? You’re in luck. This method is foolproof, beginner-friendly, and packed with flavor.
Let’s break it down step by step so that you can master this delicious Japanese classic right in your kitchen.
Step 1: Make the Homemade Teriyaki Sauce
Let’s kick things off with the heart and soul of this dish: the sauce.
Instead of buying a pre-made bottle loaded with preservatives, this simple recipe uses just a few fresh ingredients. Here’s how you do it:
🔥 What You’ll Need:
- 1 cup low-sodium soy sauce
- 1/4 cup sake
- 2–3 tablespoons rice vinegar
- 1/3 cup brown sugar
- Optional: sesame seeds & crushed red pepper
👩🍳 How to Make It:
In a small saucepan, combine soy sauce, sake, rice vinegar, and brown sugar. Place over medium heat and stir until the sugar fully dissolves. That’s it, you’ve got teriyaki sauce!
Want to take it up a notch? Add sesame seeds for a nutty flavor and a pinch of crushed red pepper for subtle heat.
💡 Pro Tip: Store extra sauce in a mason jar, it keeps in the fridge for up to 3–4 months.
You can use this sauce for way more than chicken. Toss it with shrimp, glaze salmon, drizzle it over grilled veggies, or stir it into noodles.
Step 2: Prep the Chicken and Aromatics
Next up—your chicken and flavor base.
🐔 Choose Your Chicken:
We’re using boneless, skinless chicken thighs because they stay juicy and are super forgiving. If you prefer leaner meat, go with chicken breast. Just trim it well and cut into chunks or strips.
🧄 Aromatics You’ll Need:
- 1 small knob of fresh ginger
- 2 cloves of garlic
- 2–3 green onions (white and green parts)
Prep It Like a Pro:
- Peel and grate the ginger. Use a spoon to scrape off the peel—it’s faster and safer than a knife.
- Grate or finely mince the garlic.
- Slice the green onions, separating the white and green parts. Reserve some green tops for garnish.
These fresh aromatics infuse the sauce with bold, authentic flavor. Don’t skip them—they’re what makes this dish shine.
Step 3: Cook the Rice (The Foolproof Way)
Say goodbye to mushy or gummy rice. This toasting method ensures perfect, fluffy grains every time.
🥄 Ingredients:
- 1 cup basmati or long-grain white rice
- 2 cups water or chicken stock
- 1 tablespoon butter
- Pinch of salt
👩🍳 Method:
- In a saucepan, melt the butter over medium heat.
- Add the dry rice and stir. Coat each grain until they look slightly glossy.
- Let the rice toast for 30 seconds to 1 minute; it’ll start to smell slightly nutty.
- Add a pinch of salt, then pour in your water or stock.
- Stir once, then leave it alone!
- Bring to a boil, stir once more, reduce heat, cover, and let simmer until all liquid is absorbed (about 15 minutes).
- Please turn off the heat and let it rest (covered) for five more minutes.
🍚 Why This Works: Toasting the grains in butter keeps them separate, so your rice won’t clump or stick.
Step 4: Sear the Chicken
Now it’s time to build flavor and texture with a proper sear.
🔥 Heat It Right:
Get your skillet hot. This isn’t a low-and-slow situation—we want a quick, golden crust.
Add:
- 1 tablespoon neutral oil (canola or avocado)
- 1 teaspoon sesame oil for flavor depth
🐓 Cook the Chicken:
- Season your chicken chunks with salt and pepper.
- Place them in the hot pan in a single layer. No stirring yet!
- Let them sear for a few minutes to build a crust.
- Once browned, flip the burger and cook the other side for an additional minute.
- Remove the chicken from the pan—it won’t be fully cooked yet. That’s okay.
🔥 Crust = Flavor: The golden brown sear helps the sauce cling better and adds richness.
Step 5: Build Flavor in the Pan
Don’t clean the skillet—those little brown bits left behind are liquid gold.
🧄 Time for Aromatics:
Toss in your grated ginger, garlic, and the white part of the green onions. Stir quickly for 30 seconds until fragrant.
Now, pour in about 3/4 cup of the teriyaki sauce you made earlier.
Let the sauce come to a boil, then reduce the heat and let it simmer for a few minutes. It will naturally start to reduce and thicken.
Want a quicker result? Mix 1 teaspoon of cornstarch with 1 tablespoon of water and stir it in. This will thicken the sauce into a shiny glaze almost instantly.
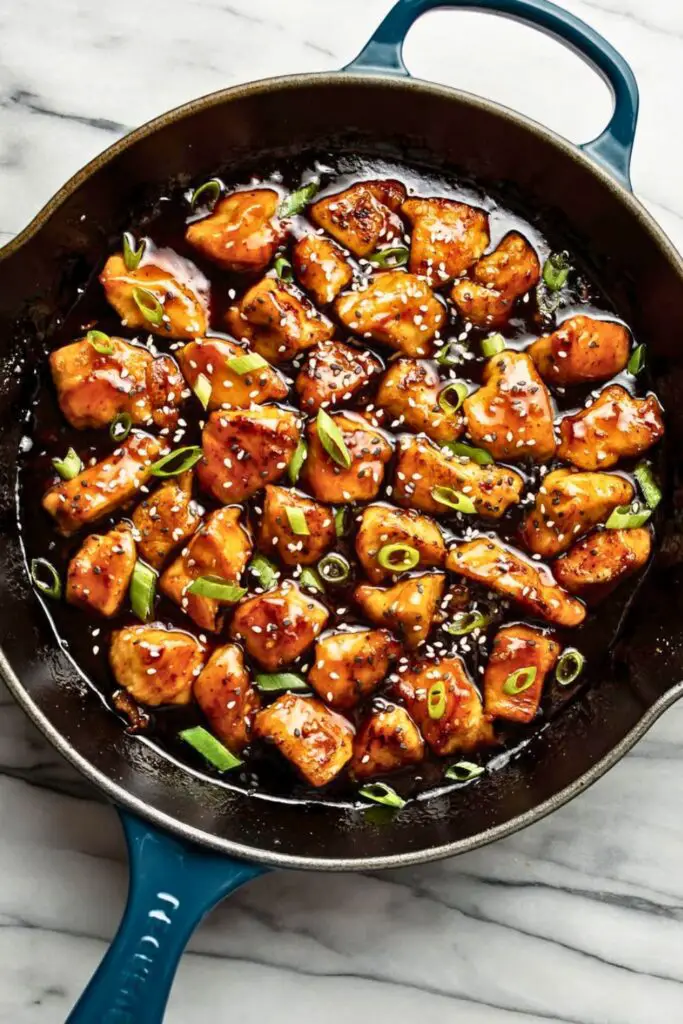
Step 6: Combine and Finish Cooking
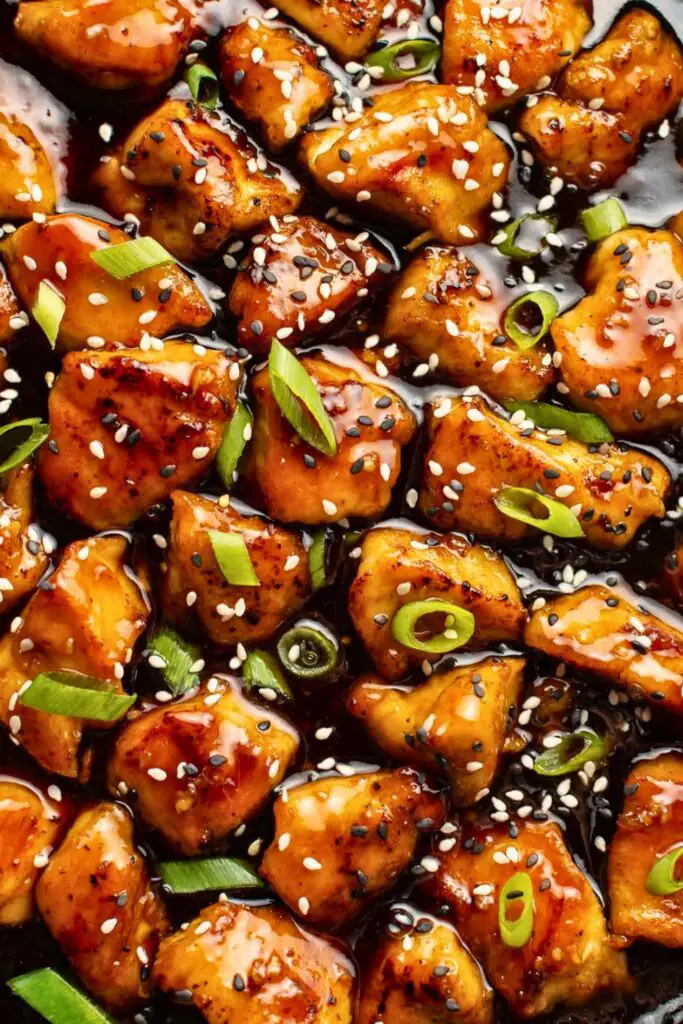
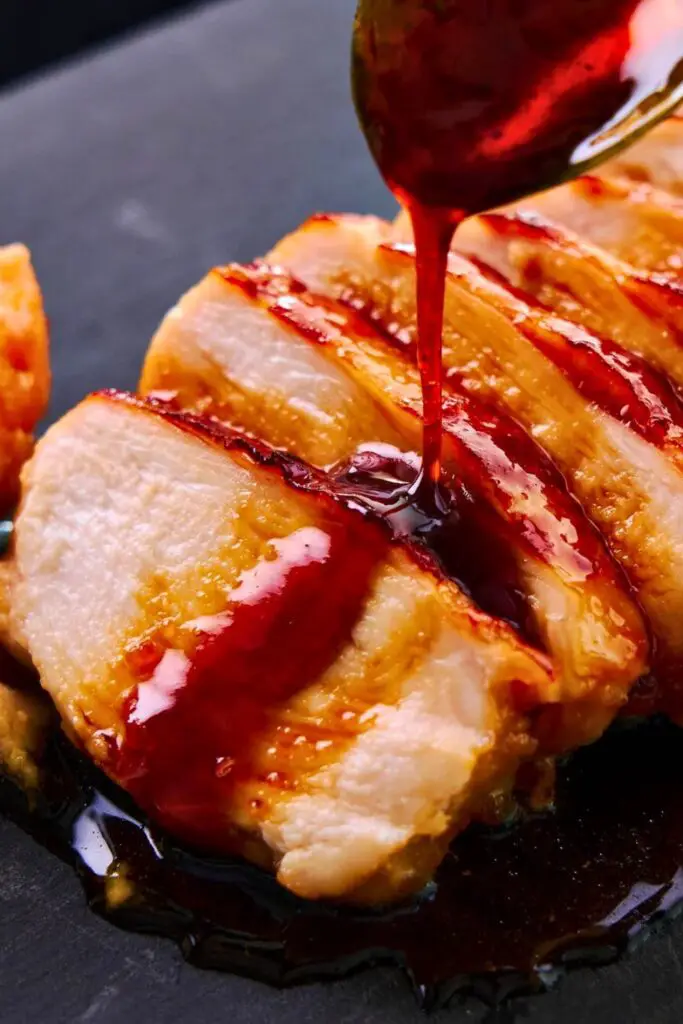
When the sauce is reduced by about half and looks glossy, it’s time to reunite it with the chicken.
Add the seared chicken back to the skillet and toss to coat every piece in the glaze. Let it simmer gently for 3–5 minutes until the chicken is fully cooked and coated in that irresistible teriyaki shine.
You’ll notice the sauce thickens even more as it cools slightly, and that’s when the magic happens.
👀 Look for the shine. If your chicken looks like it belongs on the cover of a menu, you’re doing it right.
Step 7: Roast the Broccoli (Optional But Amazing)
Want to add a healthy, flavor-packed side that pairs perfectly with teriyaki sauce? Say hello to roasted broccoli.
🥦 Quick Pan Method:
- Heat another skillet over medium-high.
- Toss broccoli florets with olive oil, garlic powder, salt, and pepper.
- Place flat sides down in the hot pan and let sear until golden, about 3–5 minutes.
- Stir occasionally until tender but still crisp.
🔥 Oven Method:
Preheat oven to 425°F (220°C). Roast the seasoned broccoli on a baking sheet for 15–20 minutes.
🥢 Broccoli soaks up the teriyaki sauce like a sponge. It’s not just a veggie—it’s a flavor carrier.
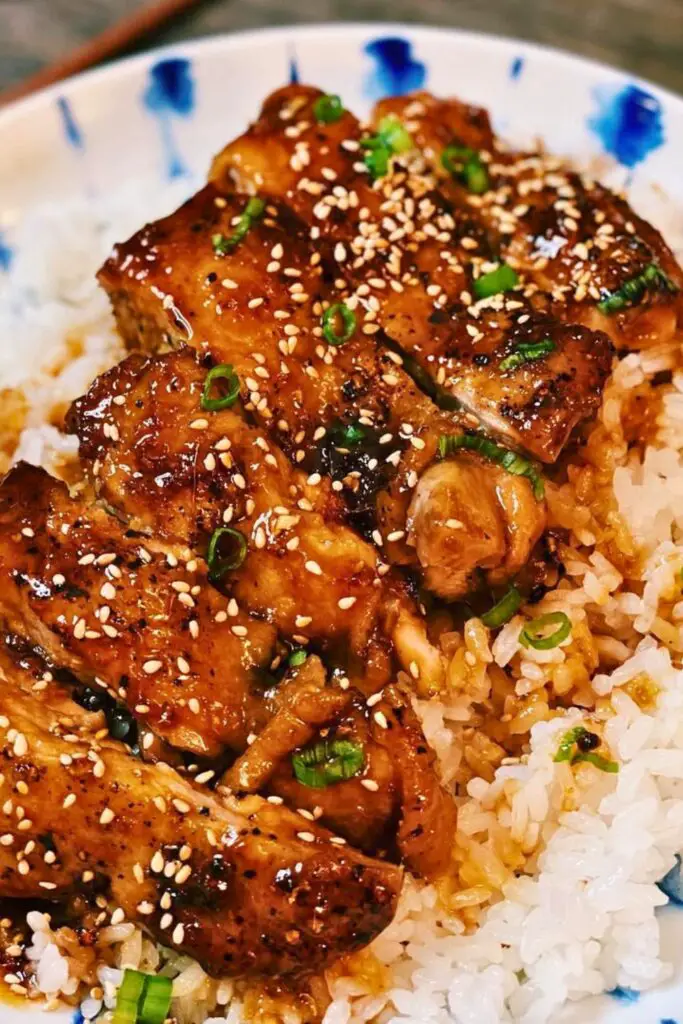
Step 8: Plate and Garnish
You’ve made it. Now it’s time to plate this beauty.
🥣 Here’s the Flow:
- Spoon your buttery, fluffy rice into a bowl or plate.
- Add a generous helping of glazed chicken teriyaki on top.
- Nestle some crispy roasted broccoli on the side.
- Spoon a bit of extra sauce over everything.
🌿 Garnish with:
- Chopped green onion tops
- Extra sesame seeds
- Red pepper flakes (if you love heat)
Snap a photo of something you’ve just made that’s worthy of your favorite Japanese bistro.
🍱 Better than takeout? You bet. And you made it all in your own kitchen.
Pro Tips for Teriyaki Chicken Success
If you want restaurant-style chicken teriyaki at home, these tips will elevate your cooking from good to unbelievably great. These are the small details that make a big difference in both flavor and presentation.
🔥 1. Get That Pan Screaming Hot
When you’re stir-frying or searing meat like we do in this recipe, high heat is your friend. Let your skillet heat up thoroughly before adding oil. This is key to developing that deep brown crust on your chicken—no soggy or steamed meat here.
💡 Why it matters: A hot pan locks in juices and gives you the irresistible sear that helps the sauce cling better.
🧂 2. Season Before You Sear
Before your chicken hits the skillet, season it with salt and pepper. This base layer of seasoning builds flavor from the inside out. Even with a flavorful sauce, you still want the chicken itself to taste good.
✨ Bonus Tip: Keep it simple. Too many spices will clash with the teriyaki glaze.
🧄 3. Fresh Garlic and Ginger = Game Changers
Using freshly grated ginger and garlic (instead of jarred or powdered) brings brightness and depth to your sauce. It enhances the natural umami of the soy sauce while cutting through the sweetness of the sugar.
🥄 Don’t skip this step—it’s what makes your dish taste fresh, not flat.
🥄 4. Let the Sauce Reduce Naturally (If You Have Time)
While you can use a cornstarch slurry to thicken the sauce quickly, letting it reduce slowly creates better flavor and a more traditional texture. It thickens on its own as the sugar caramelizes and the liquid evaporates.
🔥 Keep an eye on the bubbles—once they start getting glossy and syrupy, you’re close.
🍚 5. Toast Your Rice First
Most people boil their rice and wonder why it turns out sticky. The secret? Sauté the dry rice in butter first. This coats the grains and keeps them fluffy. Stir it once after adding water, and then leave it alone.
🧈 Buttered rice adds richness that pairs perfectly with the teriyaki glaze.
Teriyaki Chicken Variations to Try
Want to shake things up or use what you have on hand? The beauty of this recipe lies in its flexibility. Here are some delicious ways to make it your own:
🐟 1. Salmon Teriyaki
Salmon is rich, tender, and perfect for soaking up teriyaki glaze.
- Sear or broil salmon fillets until just cooked
- Brush or spoon teriyaki sauce over the top in the last 2–3 minutes
- Finish with sesame seeds and serve over rice
🍋 Bonus: Add a squeeze of lemon for brightness.
🍤 2. Shrimp Teriyaki
This version is quick and perfect for busy weeknights.
- Use peeled, deveined shrimp
- Sauté quickly over high heat until just pink
- Toss in reduced teriyaki sauce and cook for 1–2 minutes more
🧄 Add garlic and chili flakes for a spicy-sweet finish.
🧆 3. Tofu Teriyaki (Vegetarian-Friendly)
Tofu is a blank canvas that loves bold flavors.
- Press and cube firm tofu
- Sear until golden and crisp
- Add to the skillet with teriyaki sauce and toss until coated
🥢 Serve with steamed rice and roasted bok choy for a meatless meal.
🐮 4. Beef Teriyaki
Thin slices of steak or flank steak work beautifully with teriyaki.
- Sear beef strips in a hot pan with oil
- Add garlic and ginger
- Stir in the sauce and simmer until glossy
🧄 Try it with sautéed bell peppers and onions for a beef teriyaki stir-fry twist.
🥬 5. Veggie Teriyaki Stir-Fry
Go fully plant-based with this veggie-packed option:
- Stir-fry broccoli, carrots, bell peppers, and mushrooms
- Add teriyaki sauce and toss until coated
- Top with crispy tofu or serve as-is
🥦 An excellent option for using up fridge leftovers and making a meatless Monday dinner that still satisfies.
Final Thoughts
If you’ve made it this far, congratulations, you now know how to make authentic, homemade chicken teriyaki that’s glossy, flavorful, and infinitely better than takeout.
From the homemade sauce that you’ll want to put on everything, to the buttery rice and roasted broccoli that tie it all together, this is one of those meals that checks every box: fast, satisfying, and customizable.
Here’s your reminder:
- You don’t need store-bought sauce.
- You don’t need a fancy kitchen.
- You don’t need to be a professional chef.
All you need is good ingredients, a hot skillet, and this guide to show you how.
So next time the craving hits? Skip the delivery app and head to your kitchen—you’ve got this.
You Might Also Love:
These comfort-packed recipes pair perfectly with your new kitchen confidence:
- 🥣 Cozy & Creamy White Chicken Chili Recipe
A warm, hearty dinner perfect for cool nights or cozy Sundays. - 🥧 The Best Homemade Chicken Pot Pie Recipe
Our flaky crust, creamy filling, and all the classic flavors are made from scratch. - 🌶️ The Easiest Chicken Fajita Recipe Ever
Sizzling skillet chicken with peppers and onions is great for wraps, bowls, or salads.

Ella Foster, co-founder of FoodBears.com, is a skilled writer whose love for cooking fuels her creative work. Her passion for experimenting in the kitchen brings authentic flavor and culinary inspiration to every piece she crafts for the platform.