
Peach season is more than a time of year; it’s a celebration of flavor, warmth, and nostalgia only fresh fruit and homemade cake can deliver.
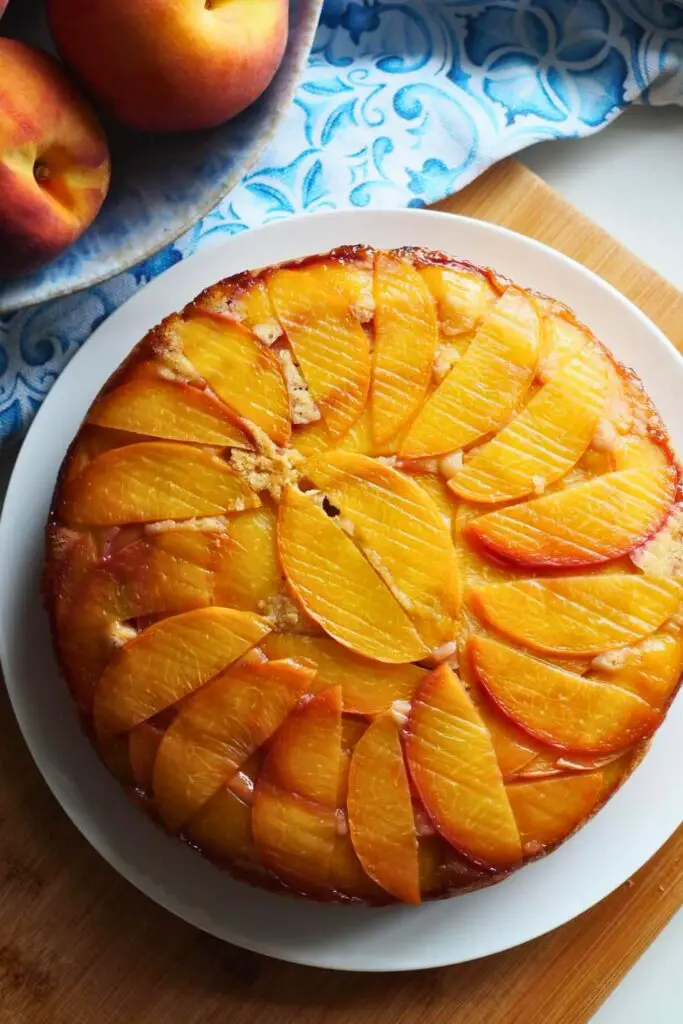
This peach upside-down cake recipe is the ultimate showstopper when showcasing peaches at their best.
This recipe combines juicy, ripe peaches, a rich layer of golden caramel, and a soft, tender cake in one bowl. It is easy, beautiful, and unforgettable in flavor.
Whether you want to impress guests or enjoy a slice of sunshine at home, this cake delivers every time.
🍑 Why You’ll Love This Peach Upside Down Cake
This isn’t just any peach cake. It’s a celebration of summer’s best fruit in its most comforting form.
Whether you’re baking for a family get-together, a picnic, or just a treat-yourself day, this upside-down cake recipe delivers big flavor with minimal effort.
Here’s why you’ll fall in love with it:
1. It’s All About the Peaches
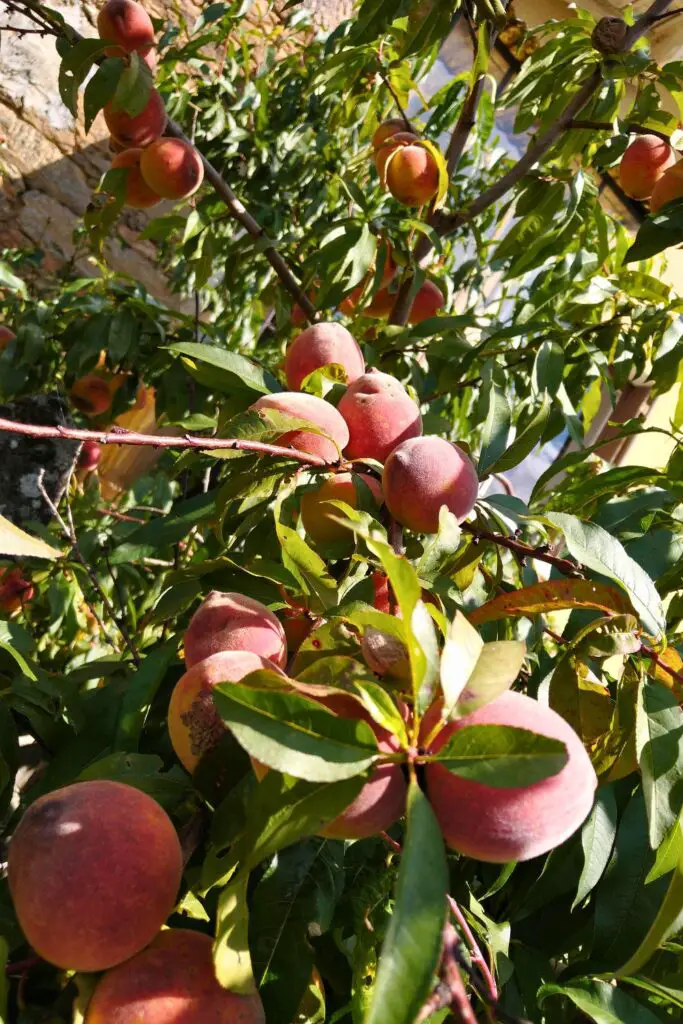
This cake highlights fresh, ripe peaches, those slightly wrinkled ones you’ve left on the counter for a few days? Perfect. They peel easily and are bursting with sweetness. The fruit takes center stage, and the flavor is incredible.
2. Easy One-Bowl Cake Batter
No stand mixer? No problem. The cake batter is made by hand in one bowl, making cleanup a breeze. It’s ideal for busy days when you want something special without the mess.
3. Homemade Caramel Magic
A dry caramel (just sugar, no cream or butter) is poured over the sliced peaches. As it bakes, the caramel melts into the fruit and soaks into the cake, creating that glossy, golden top when flipped. It’s slightly bitter, sweet, and ridiculously addictive.
4. Stunning Presentation Without the Fuss
Once baked and flipped, this cake looks like you spent hours on it—perfectly arranged fruit slices glistening with caramel, sitting on top of a golden, fluffy cake. It’s rustic, impressive, and 100% made from scratch.
5. Served Warm = Pure Bliss
While it’s delicious at room temperature, it’s truly magical when served warm. That soft, sweet fruit and the just-melted caramel? Paired with ice cream or whipped cream? Absolute heaven.
🧾 Ingredients You’ll Need
Here’s everything you need for the caramel layer and the cake base. Most of these are pantry staples, with peaches being the seasonal star.
🔸 For the Caramel + Peach Layer
| Ingredient | Amount |
|---|---|
| Granulated sugar | ¾ to 1 cup |
| Fresh ripe peaches | 3 to 4, sliced |
| Butter (for greasing) | 1 piece for lining the pan |
| Parchment paper | 1 piece for lining pan |
✅ Use ripe, slightly wrinkled, and super fragrant peaches for the best flavor and easy peeling.
🔸 For the Cake Batter
| Ingredient | Amount |
|---|---|
| Unsalted butter | ½ cup (softened) |
| Granulated sugar | ¾ cup |
| Eggs | 2 large |
| Vanilla extract | 1½ teaspoons (or to taste) |
| All-purpose flour | 1 cup |
| Fine cornmeal (optional) | 1 tablespoon |
| Kosher salt | ¼ teaspoon |
| Baking powder | 1½ teaspoons |
| Buttermilk | ½ cup |
🥄 Measuring tip for flour: Spoon into the measuring cup and level it off with a knife. Don’t scoop directly from the bag, you’ll pack in too much!
👩🍳 How to Make Peach Upside Down Cake
This is it if you’ve ever wanted to create a dessert that feels like sunshine on a plate. Every layer of this sweet peach, rich caramel, and buttery cake is designed to highlight summer’s favorite fruit.
The best part? It’s homemade, beginner-friendly, and made in one bowl.
Let’s break down each step of this stunning (and surprisingly simple) upside down cake.
🍯 Step 1: Make the Caramel First
Before discussing cake batter, we need to start with the caramel base. This isn’t your usual creamy caramel sauce.
It’s a dry caramel, meaning it’s just sugar, no butter or cream. Sounds fancy, right? But it’s super doable and perfect for this cake.
Here’s how you do it:
- Grab a small shallow skillet, a 4-quart saucepan, or a small non-stick skillet; they work great.
- Pour in ¾ to 1 cup of granulated sugar, depending on your desired caramel.
- Place the skillet over medium to medium-low heat.
Now comes the fun part: wait and watch. Don’t stir!
You’ll start to see the sugar around the edges turn translucent and begin to melt. This is your sign, it’s working.
As more sugar melts, gently swirl the pan to encourage even cooking. Avoid stirring with a spoon—this can cause crystallization, and nobody wants grainy caramel.
Remove it from the heat once all the sugar melts and the color turns a beautiful deep amber.
Pro Tip: Don’t walk away! Caramel goes from perfect to burnt in seconds. Watch closely and act fast.
🍑 Step 2: Prep the Peaches & Pan
While your caramel is cooling slightly, prep your cake pan and peaches.
Prepare the Pan:
- Use a 9-inch round or square cake pan.
- Generously grease the pan with butter or nonstick spray.
- Cut a circle (or square) of parchment paper to fit the bottom of the pan.
- Place the parchment in it, and grease it, too.
This step might feel extra, but trust me, it guarantees a clean, gorgeous release when you flip the cake later.
Slice the Peaches:
Use 3 to 4 ripe peaches if they’ve been sitting on your counter for a few days and look a little wrinkly, even better! That means they’re super ripe, and the skins will peel off easily.
Here’s how to prep them:
- Peel the peaches (you can also leave the skin if you prefer a more rustic look).
- Slice into even wedges—think medium thickness, not too thin.
- Arrange the slices at the bottom of the pan in concentric circles or a fan-like pattern.
This is your cake’s future top, so take a little time to make it look nice!
Now, pour that warm caramel slowly over the peach slices.
Don’t worry if it hardens a bit when it hits the peaches; it’ll melt beautifully back down in the oven.
🥣 Step 3: Make the One-Bowl Cake Batter
Here comes the coziest part: mixing the cake batter. No stand mixer is needed—just a bowl, a whisk, and a bit of elbow grease.
Start by Creaming:
- Add ½ cup of softened unsalted butter to your mixing bowl.
- Pour in ¾ cup of granulated sugar.
Use a rubber spatula or wooden spoon to mix the butter and sugar. Then switch to a whisk and start mixing vigorously until the mixture becomes light, fluffy, and creamy. This is called creaming, and it adds air to your batter.
Add the Eggs and Vanilla:
- Crack 2 large eggs, one at a time, into a separate bowl to check for shells.
- Mix the eggs into the butter-sugar mixture one at a time.
- Add 1½ teaspoons of vanilla extract with the second egg.
Homemade vanilla extract? Even better. Use your heart to measure it because vanilla makes everything smell like dessert heaven.
At this stage, your batter might look slightly curdled; that’s okay! It’ll smooth out when you add the dry ingredients.
Sift in Dry Ingredients:
- Sift in 1 cup of all-purpose flour, 1 tablespoon of cornmeal (optional but recommended for flavor), 1½ teaspoons of baking powder, and ¼ teaspoon of kosher salt.
Don’t just scoop your flour; gently spoon it into the measuring cup and level it off. This ensures you don’t pack in too much flour, which would make the cake dry.
Add the Buttermilk:
- Pour in ½ cup of buttermilk while gently stirring the batter.
Use a whisk or spatula to mix just until everything is combined. Don’t overmix; it’ll make the cake tough.
Once it’s mostly combined, switch to a rubber spatula and fold the batter to finish mixing. A few streaks of flour are incredible.
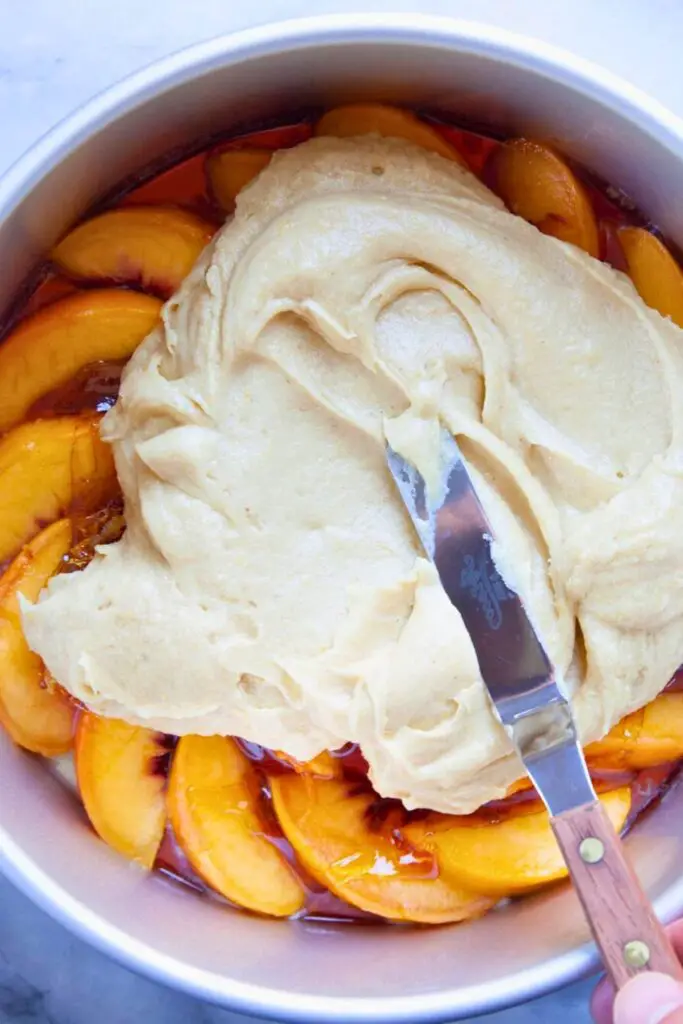
🎂 Step 4: Pour & Smooth the Batter
Your batter is now ready to meet those caramel-glazed peaches!
- Pour the batter directly over the peaches and caramel in your prepared cake pan.
- To smooth it out, use an offset spatula, the back of a spoon, or a regular spatula.
- Be sure the batter reaches into all corners and covers the fruit completely.
This step helps create an even rise during baking and locks in all the fruity goodness below.
Shortcut Tip: No offset spatula? A butter knife works in a pinch!
🔥 Step 5: Bake the Cake
Preheat your oven to 350°F (175°C).
Place the cake on the center rack and bake for 35 to 40 minutes, or until:
- The top is golden brown.
- The center is set.
- A toothpick inserted into the center comes out clean.
You’ll also notice the edges pulling away slightly from the pan, which is another good sign that it’s done.
Once baked, remove the cake from the oven and set it on a cooling rack. Let it cool for 15 to 20 minutes, long enough for the caramel to settle without hardening.
🔄 Step 6: Flip the Cake (The Moment of Truth!)
This part is dramatic (and fun!). Ready to reveal the beauty?
Here’s How to Flip It:
- Run a knife gently around the edges to loosen the cake.
- Place a serving plate or cake stand over the top of the pan.
- Holding the pan and plate together, flip the whole thing upside down confidently.
- Lift the pan off slowly.
- Peel off the parchment paper (if it has stuck to the peaches).
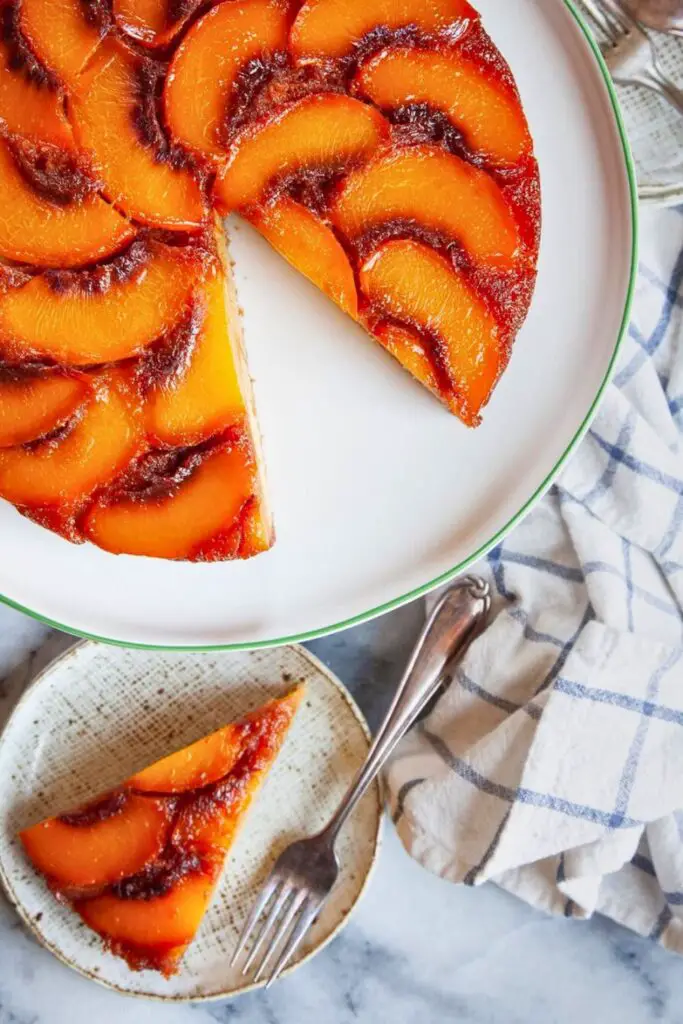
And there it is: golden peach slices glistening in a layer of caramel, perfectly sitting atop a moist, buttery cake.
It’s beautiful. It’s rustic. And it smells like a dream.
🎉 Bonus: Serve It Warm
This cake is at its absolute best when it’s still warm. The caramel is soft and sticky, the peaches are tender, and the cake is rich and delicate.
Want to take it over the top? Serve it with:
- A scoop of vanilla bean ice cream
- A dollop of fresh whipped cream
- A drizzle of honey or extra caramel
Or enjoy it as-is, it’s that good.
💡 Tips for the Best Peach Upside Down Cake
Making a stunning peach upside-down cake is easier than you think, but a few thoughtful tips can take it from good to unforgettable.
Whether you’re a beginner baker or a seasoned pro, these tips will help you achieve a perfect flip, flavorful caramel, and a tender cake crumb every time.
✅ Grease Everything Generously
Don’t underestimate this step. Greasing your pan well, including the parchment paper, is one of the most important things you can do.
- Use softened butter or non-stick spray to coat the entire pan.
- Add a layer of parchment paper to the bottom of the pan for extra insurance.
- Then grease the parchment again.
This helps ensure the caramel and peaches release cleanly after baking, without tearing your beautiful topping.
🍑 Use Ripe but Firm Peaches
The best peaches for upside-down cake are:
- Slightly wrinkly on the outside
- Fragrant and juicy
- Firm enough to slice without falling apart
Let your peaches sit on the counter for a few days until they soften naturally. They’ll be easier to peel, slice neatly, and hold their shape during baking.
🍽️ Avoid overly ripe or mushy peaches they may break down too much and make the cake soggy.
🍬 Go Deep with Your Caramel
Don’t be afraid to let your sugar darken into a deep amber. The bitterness of slightly burnt sugar balances the sweetness of the fruit and the cake.
- Use the dry caramel method: no butter or cream, just sugar.
- Watch it closely as it melts, don’t walk away!
- Swirl the pan, don’t stir, to prevent crystallization.
Even if the caramel hardens after you pour it over the peaches, don’t panic—it will melt again in the oven and form a glossy topping.
🥄 Measure Flour the Right Way
Using too much flour is one of the most common cake mistakes. For the best texture:
- Spoon flour lightly into your measuring cup.
- Don’t scoop directly from the bag.
- Level it off with a knife.
This keeps your cake soft, moist, and never dense or dry.
🥛 Don’t Skip the Buttermilk
Buttermilk adds a slight tang and acidity, which reacts with the baking powder to give the cake a better rise and super tender crumb. If you don’t have buttermilk on hand, mix ½ cup milk + 1½ teaspoons lemon juice or vinegar and let it sit for 5 minutes.
🎂 What Kind of Pan Is Best for Upside Down Cake
Choosing the right pan can make all the difference.
Best Option:
- A 9-inch round cake pan or a 9×9 square pan
- Heavy-duty, light-colored metal works best
- At least 2 inches deep to prevent bubbling over
Avoid These:
- Springform pans. The caramel will leak through the bottom.
- Dark metal pans. They may cause over-browning.
- Glass baking dishes. Retain heat differently, and it may result in uneven baking.
💡 Pro tip: Use a cake pan with straight sides, so your caramel and peach topping sit evenly without sloping.
🍑 Can You Substitute Fresh Peaches for Canned Peaches

Absolutely! You can make this cake with fresh, canned, or even frozen peaches—but there are a few things to keep in mind:
Fresh Peaches (Best Option)
- Use ripe but firm peaches for the best texture and flavor.
- Peel and slice before placing in the pan.
- Taste the natural sweetness—fresh peaches give you the most vibrant, natural flavor.
Canned Peaches
- Use canned peaches in juice, not syrup (to reduce added sugar).
- Drain them thoroughly and pat dry with paper towels before using.
- You may want to reduce the sugar in the caramel slightly since canned fruit is often sweeter.
Frozen Peaches
- Thaw completely before using.
- Drain excess liquid and pat dry.
- Great when fresh peaches are out of season!
🍑 Final Thoughts: A Slice of Summer, Straight from the Oven
There’s something genuinely magical about baking with peaches. Their sweet aroma, soft texture, and golden color turn a simple cake into a stunning dessert that feels nostalgic and luxurious. And this Peach Upside Down Cake captures all that and more, with minimal effort.
Every bite screams summer comfort from the deep amber caramel to the juicy peach slices and fluffy buttery cake.
Whether serving it at a backyard barbecue, a family dinner, or just sneaking a slice in your kitchen with coffee, this cake brings people together.
So, take those ripe peaches, whisk, and create something beautiful. This recipe isn’t just about baking, it’s about savoring the season and sharing joy, one slice at a time.
🥄 You Might Also Love:
Looking for more quick and delicious peach treats? Try these Pinterest favorites next:
- 👉 Best 10-Min Homemade Peach Salsa for BBQs
Perfectly sweet, spicy, and summer-ready, ideal for tacos, grilled salmon, or tortilla chips! - 👉 5-Star Best Peach Muffins Recipe For Moms
Soft, fluffy, and loaded with peaches and cream cheese, ready in under 30 minutes! - 👉 10-Minute Prep Peach Jam Recipe for Busy Moms
No pectin needed! A quick, freezer-friendly jam bursting with fresh fruit flavor.

Ella Foster, co-founder of FoodBears.com, is a skilled writer whose love for cooking fuels her creative work. Her passion for experimenting in the kitchen brings authentic flavor and culinary inspiration to every piece she crafts for the platform.