
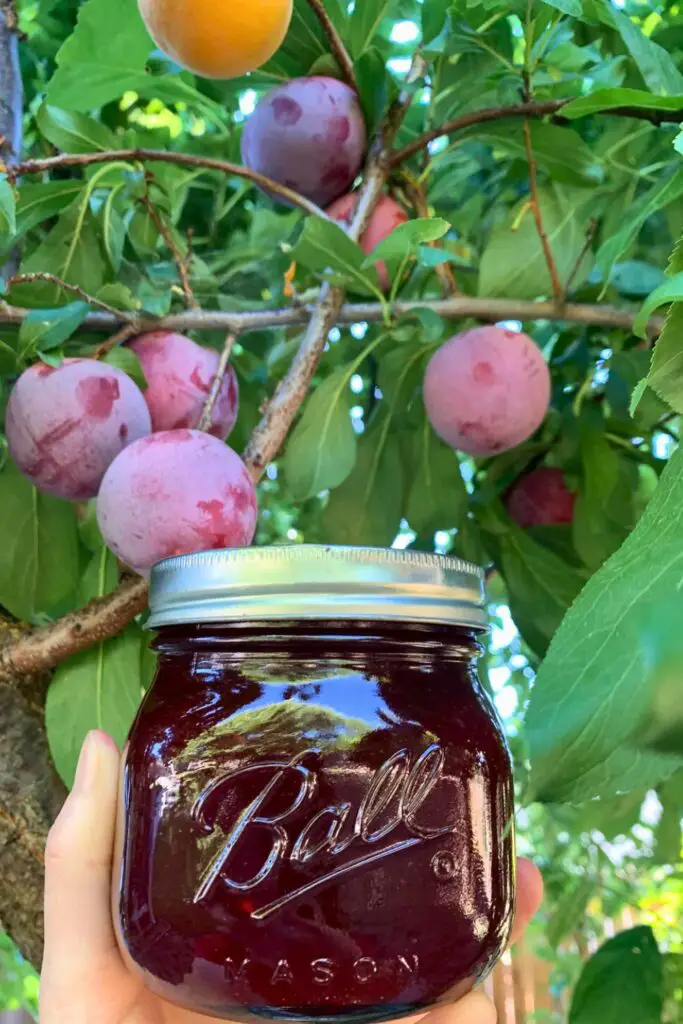
Making your peach jam from scratch might sound like a long, intimidating process, but guess what? It doesn’t have to be.
In fact, with this method, you’ll get the perfect spreadable peach jam in under 10 minutes of boiling time, and you won’t need any store-bought pectin. Just juicy peaches, fresh lemon, and sugar. That’s it.
Let’s walk you through the process in a fun, friendly, and foolproof way from peeling peaches to canning your jars like a pro.
Why You’ll Love This Peach Jam

Homemade peach jam isn’t just a treat, it’s a nutrient-packed, flavor-filled jar of sunshine. Let’s explain exactly why this no-pectin peach jam is something to smile about, whether you’re health-conscious, flavor-obsessed, or just looking for a fun kitchen project.
🍑 Natural Health Benefits
Peaches contain antioxidants, fiber, and vitamins, especially C, A, and potassium. You retain many of these nutrients when you make peach jam at home using fresh, ripe fruit and lemon.
Here’s what you’re getting with every spoonful:
- Vitamin C: Boosts your immune system and skin health.
- Fiber: Supports digestion and helps keep you full.
- Potassium: Helps regulate blood pressure and balance fluids.
- No preservatives or additives: Unlike store-bought jams, you know exactly what’s going in—pure fruit and sugar, nothing fake.
Plus, this recipe skips commercial pectin, which often contains additives. Instead, we rely on lemon’s natural pectin, keeping your jam as close to nature as possible.
😋 Incredible Taste
Let’s talk flavor. This peach jam delivers:
- Pure peach essence with fresh, ripe fruit as the star
- A bright citrus punch thanks to real lemon (peel and all!)
- A balanced sweetness with raw cane sugar or white sugar, it’s not too sweet or too tart
- A juicy texture because we don’t puree it, you’ll get real chunks of peach in every bite
This jam tastes like summer, whether spreading it on toast, pairing it with cheese, or swirling it into Greek yogurt.
💪 Nutrition in Every Jar
Here’s a rough nutritional profile (per tablespoon of jam):
| Nutrient | Estimated Amount |
|---|---|
| Calories | ~50–60 kcal |
| Sugars | ~12–14g |
| Vitamin C | ~2–3 mg |
| Fiber | ~0.5g |
Note: Actual values may vary based on your ingredients and serving size.
💡 How This Jam Helps You
- A healthier snack option is to skip the overly processed supermarket jams. This homemade version has fewer ingredients and no mystery chemicals.
- Money-saving – Got an excess of ripe peaches? Turn them into jars of jam instead of letting them spoil.
- Gift-worthy – Everyone loves a thoughtful, homemade gift. Tie a ribbon on a jar, and you’ve got something special.
- Family activity – It’s a great recipe to make with kids. Peeling, stirring, and canning together is a fun memory-maker.
Ingredients You’ll Need
Here’s a handy table to keep your ingredient list organized and your prep smooth:
| Ingredient | Quantity | Notes |
|---|---|---|
| Fresh peaches | 12 medium-to-large | Ripe peaches work best; aim for 5 cups crushed |
| Lemon | 1 medium-to-large | Use juice and peel for natural pectin |
| Sugar (raw or white) | 5 cups | Adjust to taste; raw cane adds richness |
| Mason jars (8 oz) | 8–10 jars | Also called jelly jars |
| Canning lids | 8–10 | Standard-sized for the mason jars |
| Metal rings | 8–10 | To hold the lids in place |
| Large pot (6 qt) | 1 | For boiling the jam |
| Canning funnel | 1 | Helps with clean pouring |
| Ladle + stirring spoon | 1 each | For mixing and filling jars |
These basic ingredients and tools are all you need to make a batch of peach jam that’s healthier, tastier, and far more satisfying than anything on a grocery shelf.
Step-by-Step Guide: How to Make Peach Jam
Making peach jam at home is satisfying and straightforward when you follow these clear, beginner-friendly steps.
This guide walks you through each phase with practical tips, friendly warnings, and handy techniques so you can get perfect results, even on your first try.
🥄 Step 1: Prep Your Peaches
Start with 12 medium- to large-ripe peaches. These should be fragrant, slightly soft to the touch, and not too firm or mushy.
How to Peel and Cut the Peaches:
- Rinse your peaches under cold water.
- Use a small, sharp knife to peel the skin off. If the fruit is very ripe, the skin should come off easily.
- Cut the peaches in half, carefully working your knife around the pit.
- Slice away from the seed, avoiding the tough center. This area can have an unpleasant texture in jam.
- Roughly chop the peeled fruit into small chunks and collect them in a large bowl or pot.
Once all 12 peaches are chopped, crush them. Don’t use a blender or food processor; you want texture. Use a potato masher or a fork to mash the peaches until they’re pulpy but still have small fruit pieces.
✅ Goal: You want 5 cups of crushed peaches, with some juice released. That’s the perfect amount for this recipe.
🔥 Step 2: Preheat the Jars
To safely can your jam, your jars must be hot and sterilized. Here’s how to do it:
- Preheat your oven to 250°F (121°C).
- Arrange 8 to 10 mason jars (8-ounce size) upright on a baking sheet.
- Place them in the oven for at least 15 minutes while you prepare your jam. This step keeps the jars sterile and prevents cracking when the hot jam is added.
Also:
- Place your canning lids in a small pot of water.
- Keep the heat low; you want them warm, not boiling.
🎯 Why this matters: Hot jars prevent bacterial growth and help the sealing process later on.
🍋 Step 3: Add Lemon and Start Cooking
Now it’s time to add brightness and natural pectin to your peach mixture. This is where the lemon comes in.
Here’s what to do:
- Take one medium-to-large lemon and cut it into quarters.
- Squeeze each lemon wedge into your pot of mashed peaches.
- Don’t throw the lemon away; drop the wedges (peel and all) directly into the pot.
- Remove any visible lemon seeds with a spoon or fork.
Set your stovetop to medium-high heat and slowly bring the mixture to a boil. Stir occasionally to avoid sticking or burning.
🍋 Why add the whole lemon? The peel contains natural pectin, which helps the jam set without using store-bought pectin. Cooking the peel releases those compounds into the jam.
🍲 Step 4: Boil the Peaches
Once your mixture is warming up, it’s time to bring it to a full rolling boil.
What is a full rolling boil?
It’s a vigorous boil that continues even while you stir. You’re not quite there if you stir and the bubbles disappear.
Once the rolling boil starts:
- Start your timer and boil the peach-lemon mixture for 5 minutes.
- Stir constantly to keep the bottom from scorching and to prevent overflow.
- Watch the heat—adjust between medium and medium-high to keep it consistent.
⚠️ Warning: Jam can splatter during this stage. Use a long spoon and wear an apron or old shirt.
During this time, your kitchen will smell amazing, with sweet peaches, zesty lemon, and a hint of sunshine.
🥄 Step 5: Remove Lemon, Add Sugar
After the 5-minute boil, it’s time to add the sweet stuff.
Here’s what to do:
- Use a spoon to remove the four lemon wedges from the pot carefully.
- Discard them (they’ve done their job!).
- Pour in 5 cups of sugar (raw cane or regular white sugar).
- Stir slowly but thoroughly until the sugar completely dissolves.
You may see a few lemon seeds floating up as you stir. Just scoop them out and toss them. No big deal.
💡 Pro Tip: Sugar helps preserve the jam and gives it that classic glossy finish. Don’t skimp if you want a proper set.
💥 Step 6: Final Boil
Now that the sugar is in, bring your peach mixture back to a rolling boil, just as you did before.
This time:
- Let it boil for 2 minutes only.
- Stir constantly to avoid burning or clumping.
- Watch for bubbles, foam, or splatters—things can get lively!
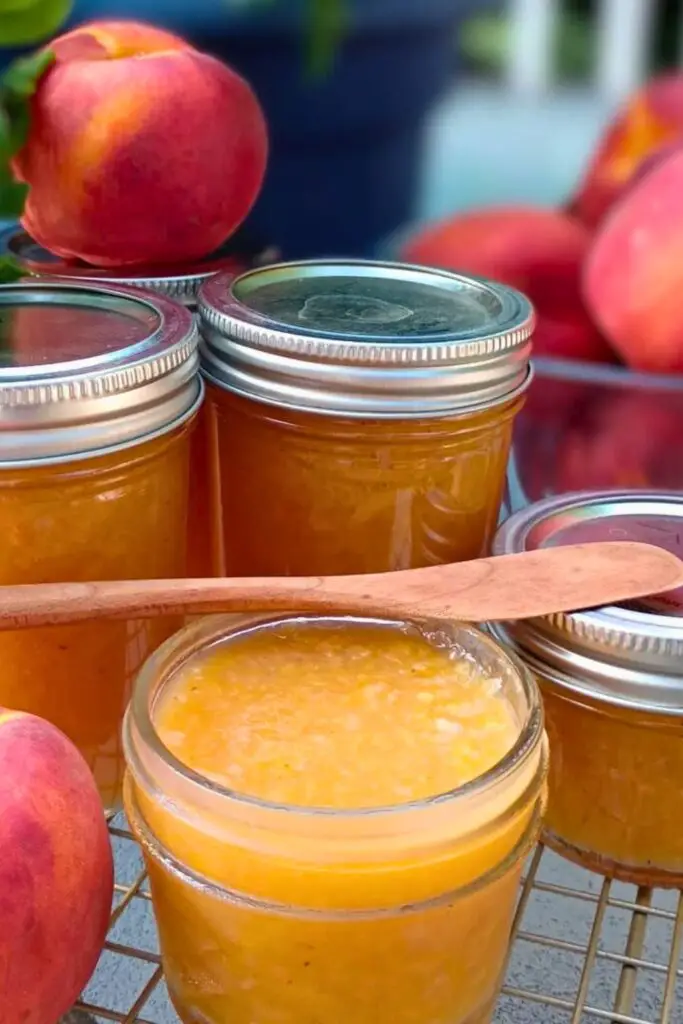
After exactly two minutes, turn off the heat. The jam is now cooked and ready for canning.
🎉 You’re almost there! At this point, your jam should be thick, glossy, and smell like the best peach pie you’ve ever imagined.
How to Can Your Peach Jam
So, your peach jam is hot, sweet, and ready. Now comes the fun part: canning it so you can enjoy it all year (or gift it to your favorite people!).
This recipe uses the open kettle method, an old-fashioned but still effective technique for canning acidic foods like jams and jellies. Let’s walk you through it step by step.
Step 1: Remove Any Foam
After turning off the heat, you might notice a thin foam layer (skim) on your jam. This is normal and harmless, but removing it gives your jam a cleaner look and texture.
- Use a spoon to scoop off the foam and discard it gently.
- Give your jam one last stir to keep the fruit chunks evenly distributed.
Step 2: Fill Your Jars
You’ll want to work quickly while the jam is still hot.
- Place a canning funnel over your first jar to keep things clean.
- Use a ladle to pour the jam into the jar, leaving about ¼ inch of space from the top (called headspace).
- Stir or gently shake the jar to settle the contents and remove air bubbles.
- Move on to the next jar and repeat.
📦 This batch should yield 7 full jars of jam (8 oz size). Have an extra jar or two ready—just in case.
Step 3: Clean the Rims
Take a damp paper towel and wipe the rims of all your jars. This is an important step that ensures a proper seal. Even a tiny bit of jam on the rim can prevent the lid from sealing properly.
Step 4: Add Lids and Rings
- Dry your warm canning lids with a clean towel.
- Place a lid on each jar.
- Screw on the metal rings until they’re fingertip-tight don’t crank them down hard!
Step 5: Flip and Seal
Here comes the signature move of the open kettle method:
- Turn the jars upside down carefully.
- Let them sit like this for 5 minutes.
- Then flip them back upright and place them on a towel or cooling rack.
As the jam cools, the vacuum inside the jar will create a tight seal.
🫙 You’ll start hearing soft pings or pops as the lids seal—a sound jam makers love!
What to Expect After Cooling
After your jars are right-side-up again, let them cool undisturbed for several hours (or overnight). Now let’s talk about what to check.
1. The Seal
The lid’s center should be slightly indented and not pop up and down when pressed. That’s your sign; the seal is good.
If a lid does flex when pressed, the seal didn’t take. No worries, store that jar in the fridge and eat it first.
2. The Set
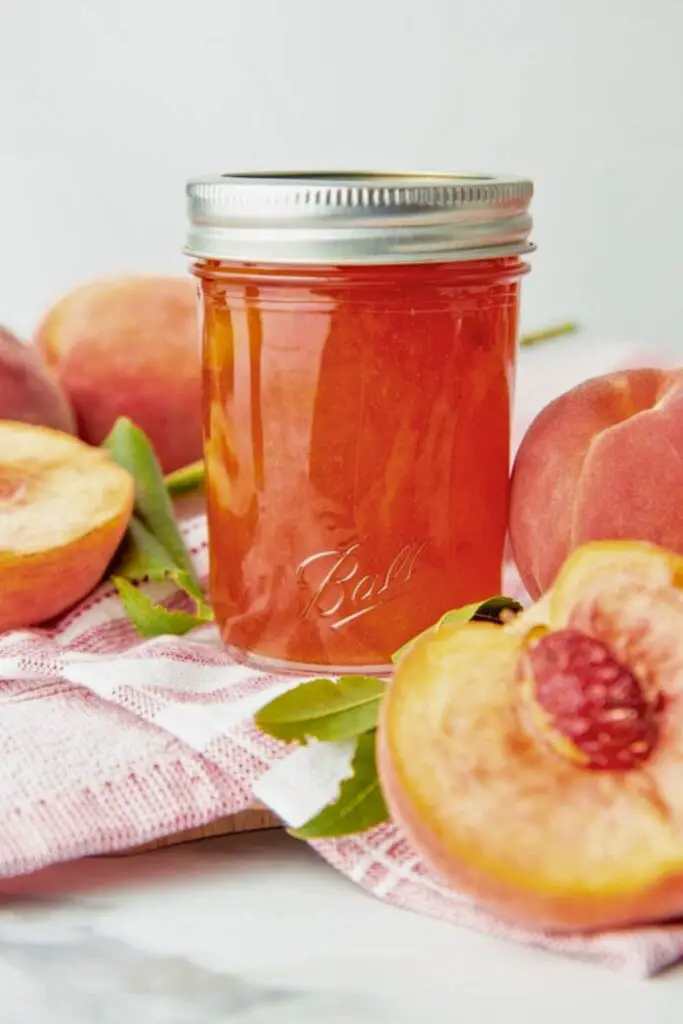
This jam should have the perfect spreadable consistency. Here’s what a good set looks like:
- The fruit is evenly distributed from top to bottom in the jar.
- It’s not runny—it holds its shape on a spoon but spreads easily on toast.
- Shining a light through the jar should look golden, glossy, and slightly thickened.
If your jam is too thin, it could be from undercooking. It may have been cooked too long if it’s too thick or stiff.
🍑 This recipe has a forgiving sweet spot. Follow the time guidelines closely; you’ll consistently achieve the perfect jam texture.
Tips for Perfect Peach Jam

Want flawless results every time you make jam? These tips will keep your jars popping, both in flavor and presentation.
🍑 1. Use Ripe but Not Overripe Peaches
Ripe peaches provide the best natural sugars and texture. Avoid underripe fruit (too firm and tart) or overripe (mushy and hard to peel). You want that juicy sweet spot in the middle.
🍋 2. Don’t Skip the Lemon
Lemon isn’t just for flavor. It naturally contains pectin, which helps the jam thicken. Cooking with the peel also draws out fragrant oils that deepen the flavor.
And yes, you can safely cook the lemon peel in the jam, it gets removed before adding sugar!
🫙 3. Always Warm Your Jars and Lids
Cold jars + hot jam = cracked glass. Always preheat your mason jars and keep the lids warm. This is also important for sanitization and food safety.
🕒 4. Stick to the Boiling Time
- Boil the fruit + lemon for 5 minutes.
- Add sugar, then boil again for 2 minutes.
- Overboiling can make jam hard or sticky. Underboiling may leave it runny.
Set a timer if necessary; timing is crucial for a perfect set!
🍽 5. Don’t Overfill the Jars
Leave a ¼-inch headspace at the top of each jar. This helps create the vacuum seal and prevents overflow when you flip the jars during the open kettle method.
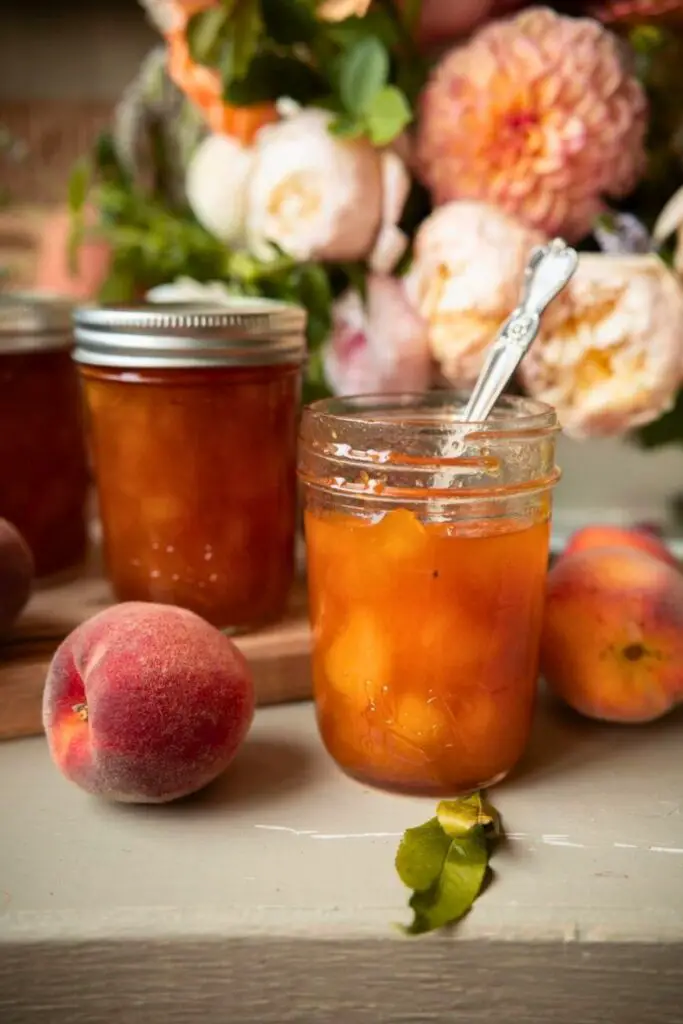
Creative Peach Jam Variations
Besides the irresistible smell filling your kitchen, one of the best things about making your jam is how easy it is to customize. Once you’ve nailed the classic peach jam recipe (like the one we’ve just walked through), you can experiment with flavors that suit your taste or complement specific dishes.
Here are some mouthwatering ways to take your homemade peach jam to the next level:
🍦 Vanilla Peach Jam
Add: 1 teaspoon of pure vanilla extract.
When: After you remove the pot from the heat, just before filling the jars.
Vanilla brings out the sweetness of the peaches and gives your jam a creamy, mellow undertone. It pairs beautifully with scones, waffles, or as a filling for vanilla cupcakes.
🍂 Spiced Peach Jam
Add: ½ teaspoon cinnamon + ¼ teaspoon nutmeg or ground cloves
When: Add the peaches before the first boil with the lemon.
This version feels like a warm hug. The spices give the jam an autumn twist, making it perfect for fall breakfast spreads or paired with brie on a cracker board.
🌶 Ginger Peach Jam
Add: 1 tablespoon finely grated fresh ginger
When: Add it right before the first boil with the lemon.
Ginger adds a bright zing and spicy warmth that cuts the sweetness and makes this jam taste gourmet. Perfect with tea, toast, or even grilled shrimp!
Final Thoughts
Making peach jam at home is easier than you think and a lot more rewarding. It’s fast, fun, and packed with flavor. Whether you’re giving it as a gift or keeping it all for yourself (no shame!), It’s the taste of summer in a jar.
This recipe is a keeper. Sweet, spreadable, and made with love.
Try it once, and you’ll never look at store-bought jam the same again. 🍑
More Peach Recipes to Try Next
If you’re loving this peach jam, here are a few more easy, delicious, and summer-perfect peach recipes to check out:
🥄 20-Min Summer Peach Crumble Recipe
A warm, comforting dessert with juicy peaches and a buttery crumble topping ready in just 20 minutes!
🌶 Best 10-Min Homemade Peach Salsa for BBQs
A sweet and spicy salsa that’s perfect with chips, tacos, grilled meats, or even on top of burgers.
🧁 5-Star Best Peach Muffins Recipe For Moms
Fluffy, tender, and bursting with peach flavor, these muffins are perfect for busy mornings or brunch with friends.

Ella Foster, co-founder of FoodBears.com, is a skilled writer whose love for cooking fuels her creative work. Her passion for experimenting in the kitchen brings authentic flavor and culinary inspiration to every piece she crafts for the platform.