
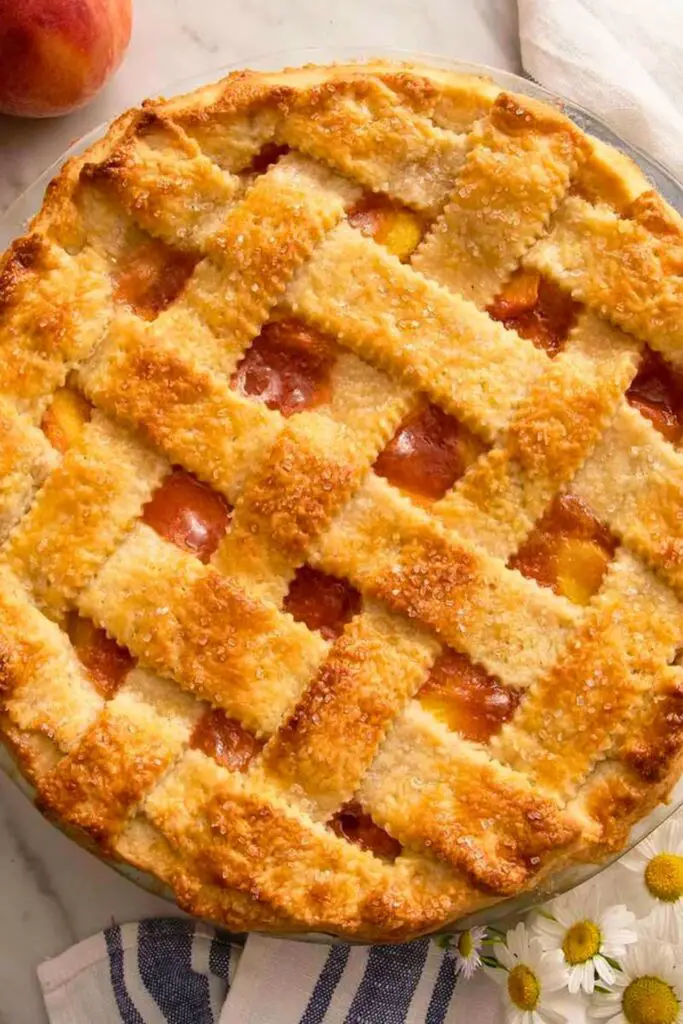
There’s just something magical about peach pie. It’s the smell of summer wrapped in flaky crust and buttery goodness.
Whether you’re channeling Southern charm or want to treat your loved ones to a golden, bubbling dessert, this Perfect Peach Pie Recipe is for you.
We’re taking you through every step, from peeling those juicy peaches to crimping your beautiful lattice crust.
🍑 Why You’ll Fall in Love with This Peach Pie
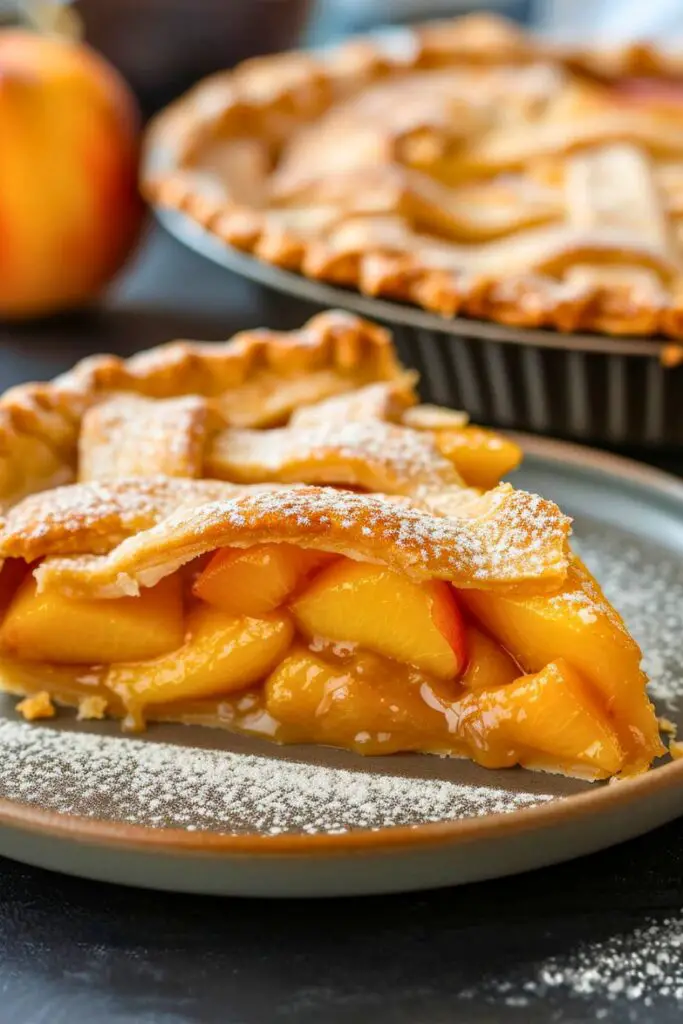
There’s a reason peach pie has earned its place as a timeless classic. This recipe, in particular, captures everything we adore about summer desserts—fresh, juicy peaches nestled in a flaky, golden crust with hints of warm cinnamon, sweet vanilla, and a touch of citrus to balance it all out.
But what truly makes this peach pie unforgettable?
- It’s simple but sophisticated. You don’t need fancy ingredients or techniques—just ripe peaches and a bit of love.
- It’s flavor-packed. To enhance the peach flavor, the filling is sweet, lightly spiced, and brightened with lemon juice. Every bite is like sunshine on a spoon.
- It’s texturally perfect. From the buttery crunch of the golden crust to the soft, luscious fruit inside, it offers contrast in every bite.
- It’s crowd-pleasing. Whether you’re baking it for family, friends, or just yourself (yes, you deserve that!), this pie feels like a warm hug.
- It celebrates the season. Peaches are only around for a short time each year, so when they’re in season, this pie makes the most of their sweet, fragrant magic.
And let’s not forget the aroma. When that pie is bubbling in the oven, the scent of peaches, vanilla, and cinnamon wafts through the air. You’ll understand why people say baking is therapy.
🥗 Are Peach Pies Good for Your Health?
While peach pie is certainly a dessert, it can offer some surprising benefits, especially when made with fresh, seasonal fruit and quality ingredients.
Health Highlights:
- Peaches are rich in nutrients. They contain vitamin C, A, fiber, and antioxidants, which support skin health, immunity, and digestion.
- Homemade is better. When you make a pie at home, you control what goes in, with less processed sugar, no preservatives, and options to use whole grain or gluten-free crusts if needed.
- Cinnamon and lemon have benefits, too. Cinnamon may help regulate blood sugar, and lemon juice offers a refreshing dose of vitamin C.
That said, peach pie is still a treat. It contains sugar, butter, and refined flour—so it’s best enjoyed in moderation as part of a balanced lifestyle.
✅ Tip: Serve your slice with Greek yogurt instead of ice cream for a lighter, protein-packed twist!
So, is peach pie “healthy”? Not exactly. But is it a wholesome, fruit-forward dessert with real ingredients you can enjoy occasionally? Absolutely.
📋 Ingredients for the Perfect Peach Pie
Below is a simple, clear table to help you gather everything you’ll need before you bake:
| Ingredient | Amount | Purpose |
|---|---|---|
| Fresh peaches | 3 lbs | Main fruit filling (juicy and sweet) |
| Granulated sugar | ⅔ cup (133g) | Sweetens the filling |
| Cornstarch | 6 teaspoons (42g) | Thickens the peach juices to prevent sogginess |
| Lemon juice | 1 tablespoon | Adds brightness and balances the sweetness |
| Vanilla extract | 2 teaspoons | Enhances flavor and aroma |
| Ground cinnamon | 1 teaspoon | Adds warm, spiced depth |
| Pie dough | 2 rounds | One for the base crust, one for the lattice top |
| All-purpose flour | As needed | Prevents sticking while rolling out dough |
| Unsalted butter | 2 tablespoons (cubed) | Dotted over filling for richness |
| Egg | 1 | For egg wash (helps crust turn golden) |
| Water | 1 teaspoon | Mixed with egg for egg wash |
| Sanding or coarse sugar | To sprinkle on top | Adds sparkle and crunch to the crust |
| Ice water | For blanching peaches | Stops cooking and helps peel the skin easily |
| Aluminum foil | For tenting pie crust edge | Prevents over-browning during baking |
🛒 Pro Tip: If you’re short on time, you can use high-quality frozen peaches just thaw and pat them dry to avoid excess moisture in your pie.
🥧 How to Make Peach Pie: Step-by-Step Guide
If you’ve ever dreamed of making a homemade peach pie that looks straight out of a Southern bakery, with a golden crust and bubbling filling, this is your guide.
Whether you’re a first-time baker or a pie enthusiast looking to refine your skills, these steps will walk you through everything you need to know to create the perfect peach pie from scratch.
🍑 Step 1: Prep the Peaches Like a Pro
Let’s face it, peeling peaches can be tricky. Sometimes the skins slip right off and cling like cling wrap. That’s where blanching comes in.
Here’s how to peel peaches easily:
- Score the peaches: Use a paring knife to cut a shallow “X” at the bottom of each peach. This helps the skin loosen during blanching.
- Boil water: Bring a large pot of water to a rapid boil.
- Blanch the peaches: Carefully drop the peaches into the boiling water and let them sit for 30 to 60 seconds—no longer.
- Ice bath: Transfer the peaches to an ice bath using a slotted spoon. This stops the cooking and makes peeling effortless.
- Peel easily: Gently peel the skin back from the “X” mark once cooled. It should slide off like magic.
🔄 Optional Tip: You don’t have to peel your peaches. The skin softens during baking, adding a slight pink hue and extra texture.
🔪 Step 2: Slice and Pit the Peaches
Once peeled, it’s time to get slicing.
- Halve the peaches along the natural line and twist to separate.
- If the peaches cling to the pit (even when ripe), cut around the pit carefully, much like how you’d cut a mango.
- Slice each half into ½ to ¾-inch thick wedges.
Add the slices to a large bowl as you go. Don’t stress if some pieces aren’t perfect; this pie is rustic and forgiving.
🍑 Quick Note: If you’re using frozen peaches, make sure they are completely thawed and patted dry with paper towels. Excess moisture can make your pie runny.
🥄 Step 3: Mix the Filling
Now comes the flavor magic.
To your bowl of peach slices, add:
- ⅔ cup granulated sugar
- 6 teaspoons cornstarch
- 1 tablespoon lemon juice
- 2 teaspoons vanilla extract
- 1 teaspoon cinnamon
Gently toss the ingredients together to coat all the peaches evenly. Don’t stir aggressively—these peaches are ripe and soft, and you want them to hold their shape.
The cornstarch will help thicken the juices as the pie bakes, the lemon juice adds brightness, and the cinnamon + vanilla combo delivers that warm, comforting flavor everyone loves in a summer pie.
💡 Pro Tip: Let the filling rest while you roll out your dough. This gives the sugar time to draw out some juice from the peaches.
📏 Step 4: Roll Out the Pie Dough
Your pie dough should be just right, not too cold or warm.
The sweet spot? Let it sit out of the fridge for about 20 minutes before rolling.
Rolling the bottom crust:
- Lightly flour your surface and rolling pin.
- Roll the dough into a 13-inch circle large enough to cover the base and sides of a 9-inch pie pan.
- Keep rotating the dough as you roll to prevent sticking.
- Carefully roll the dough around your pin and unroll it into your pie pan.
- Press the dough into the pan gently, without stretching. Leave about 1 inch of overhang around the edge.
Set aside while you prepare the lattice top.
Rolling the top crust:
- Roll your second round of dough into an 11-inch circle.
- Use a pastry cutter or knife to slice it into 1-inch-wide strips for the lattice.
🧁 Optional Shortcut: Don’t want a lattice? You can use the full dough circle as a top crust remember to cut slits for steam.
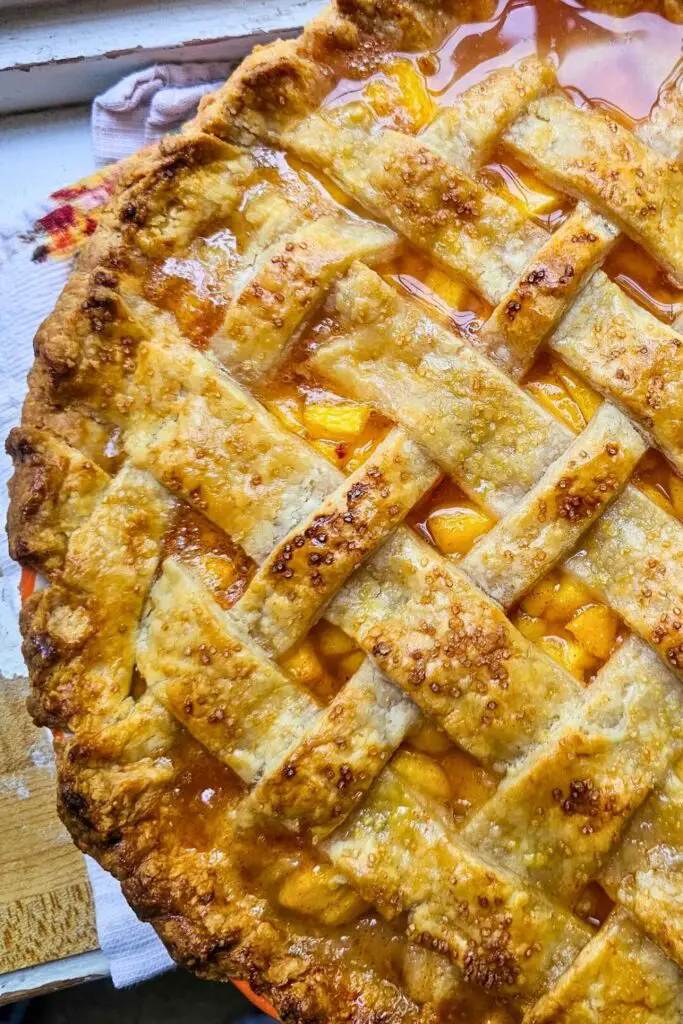
🥧 Step 5: Assemble the Pie
This is where everything starts to come together beautifully.
- Spoon the peach filling into the prepared pie crust. Spread it evenly without creating large mounds or dips.
- Use the back of a spoon to level out the surface.
- Dot with butter: Cut 2 tablespoons of butter into small pieces and scatter them over the top of the peach filling. This adds richness and smoothness to the baked pie.
Now comes the fun part: creating the lattice.
- Lay half of your dough strips vertically across the pie with even spacing.
- Fold back alternating strips and place a horizontal strip across.
- Continue weaving until you have a beautiful crisscross pattern.
💡 Don’t stress about perfection. Lattice looks gorgeous even with a little rustic charm!
✂️ Step 6: Trim, Fold & Crimp
With the filling in and the lattice laid, it’s time to finish the edges.
- Trim excess dough around the edges, leaving about 1 inch of overhang.
- Fold the overhang underneath itself to create a thick, sealed edge.
- Crimp the edge using your thumb and two fingers, or press with a fork for a classic look.
🔁 If your dough tears or cracks, patch it gently and keep going. Pie crusts are very forgiving with a little love.
🥚 Step 7: Egg Wash + Sparkle
Want that golden bakery crust? This step makes all the difference.
- Whisk together:
- 1 egg
- 1 tsp water
- Brush the egg wash over the lattice and outer edge. This gives the crust a shiny, golden finish.
- Sprinkle sanding sugar or coarse sugar over the top. It adds sparkle and a delicate crunch.
Don’t skip this—it takes your pie from homemade to showstopper.
🔥 Step 8: Tent and Bake
Peach pies need time to bake; without protection, the crust edges can burn before the center is cooked.
Here’s how to tent your pie:
- Place the pie on a baking sheet to catch drips.
- Tear a strip of aluminum foil and loosely cover the edges of the crust to shield them from burning.
- Optionally, create a foil “dome” to cover the top lightly.
Bake in two stages:
- 425°F (220°C) for 20 minutes.
- Reduce heat to 375°F (190°C) and bake for 40–50 minutes more.
The pie is ready when the filling is bubbling and the crust is deeply golden. If it browns too quickly, cover the whole pie loosely with foil.
⏲️ Total time: About 1 hour 10 minutes.
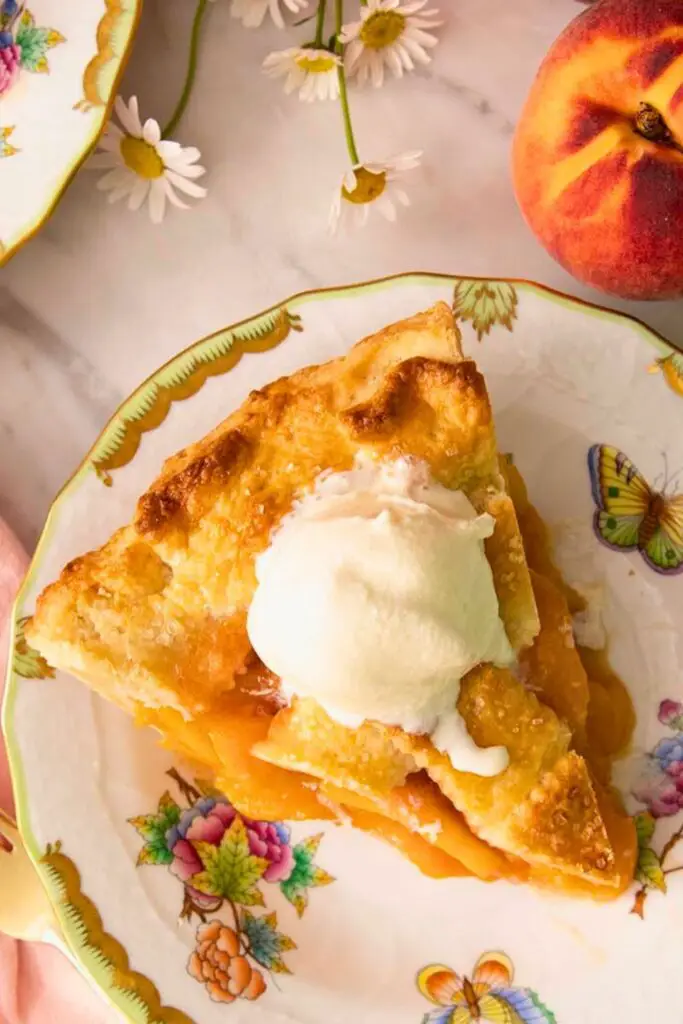
❄️ Cooling & Serving
Once your peach pie is out of the oven, diving right in is tempting, but patience is key.
- Let the pie cool completely at room temperature. This can take 2 to 4 hours.
- Cooling helps the filling set properly, making for neat, juicy slices instead of a runny mess.
When serving, go all out with a scoop of vanilla ice cream, whipped cream, or even a drizzle of caramel.
🍨 Pro Tip: Warm up slices before serving for that melt-in-your-mouth experience.
📦 Storing the Pie
Leftovers? Lucky you!
- Fridge: Wrap the pie in plastic wrap and store in the refrigerator for up to 4 days.
- Reheating: Warm slices in a 300°F oven for 10–15 minutes or use an air fryer for a quick crisp.
- Freezer-friendly: You can also bake and freeze the pie. Let it cool completely, wrap it tightly in foil and plastic wrap, and freeze for up to 3 months.
To serve from frozen, thaw in the fridge overnight and reheat in the oven until warmed through.
🍴 Pro Tips for Peach Pie Success
Want your peach pie to come out bakery-worthy every time? These tried-and-true tips will help you avoid common pitfalls and elevate your baking game, whether it’s your first peach pie or your fiftieth.
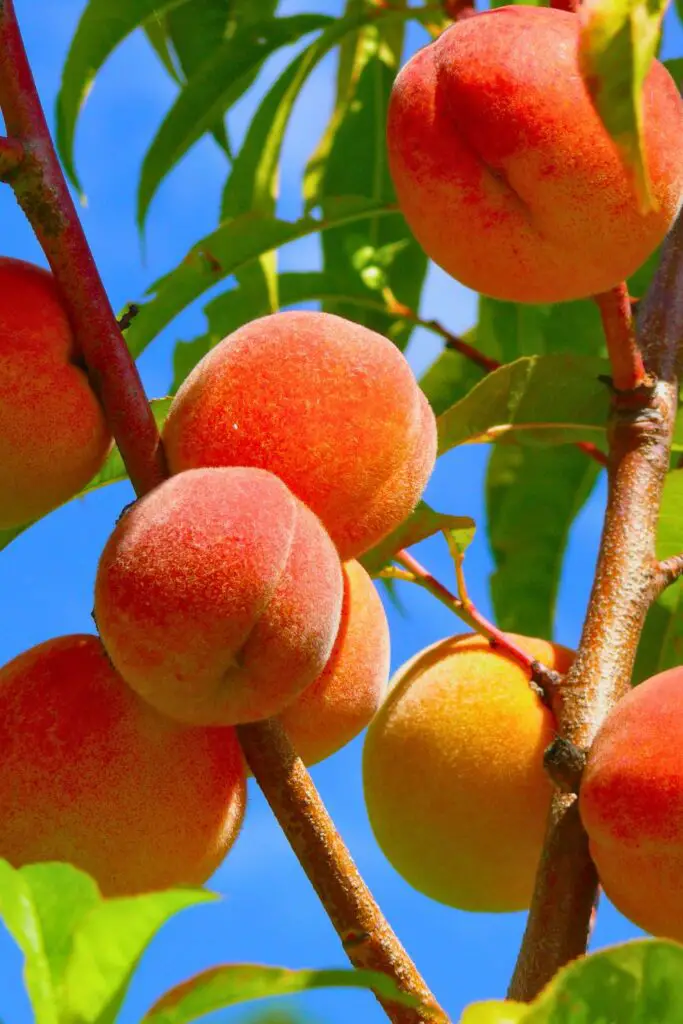
✅ 1. Use Ripe but Firm Peaches
- Underripe? They’ll lack sweetness and flavor.
- Overripe? They’ll fall apart and make your filling mushy.
- Aim for peaches that give slightly to pressure and smell fragrant.
✅ 2. Score and Blanch for Easy Peeling
Peeling peaches with a knife is tedious and inconsistent. Instead:
- Score the bottom, blanch for 30–60 seconds, and shock in ice water.
- The skins will slip off effortlessly, saving you time and frustration.
⚠️ Don’t skip scoring! If you don’t, the skin might cling tightly even after blanching.
✅ 3. Always Pat Peaches Dry (Especially Frozen Ones)
Extra moisture is the enemy of a crisp-bottomed pie. If using thawed frozen peaches:
- Drain them well.
- Lay them out on paper towels.
- Pat dry thoroughly before mixing into the filling.
✅ 4. Don’t Overdo the Lemon Juice
Lemon juice brightens the flavor, but too much will:
- Thin your filling, weakening the cornstarch’s thickening power.
- Make your pie overly tart.
Stick to 1 tablespoon max, it’s the perfect balance.
✅ 5. Chill the Dough—but Not Too Much
If your dough is:
- Too cold? It cracks when rolled.
- Too warm? It becomes sticky and hard to manage.
Leave refrigerated dough at room temperature for 15–20 minutes before rolling.
🥧 What Is the Difference Between a Peach Pie and a Peach Cobbler?
While both are delicious ways to celebrate fresh peaches, pie and cobbler are quite different in structure, texture, and preparation.
| Feature | Peach Pie | Peach Cobbler |
|---|---|---|
| Crust | Has a traditional pastry crust (bottom + top or lattice) | Topped with biscuit dough, cake batter, or dumplings |
| Bottom Layer | Always has a bottom crust | Soft, cake-like, or crumbly, depending on topping |
| Texture | Crisp, flaky, buttery | Soft, cake-like, or crumbly, depending on the topping |
| Presentation | Structured, sliceable | Free-form, rustic, scooped like a casserole |
| Effort Level | Requires rolling dough and lattice work | Simpler and quicker to prepare |
| Serving Style | Sliced like a cake | Scooped with a spoon |
🍑 Frozen vs Fresh Peaches: Which Is Better for Pie?
This is one of the most common questions when making peach pie, and the answer depends on the season and what you have on hand.
Fresh Peaches:
- Best for: Peak summer pies, special occasions, presentation
- Pros:
- Unmatched flavor and fragrance when in season
- Great texture when baked
- Easier to control juiciness
- Cons:
- Require peeling and slicing
- Can be unpredictable (some cling to the pit)
- Limited availability
🧡 Pro Tip: Always use fresh peaches when they’re in season (typically June to August in the US).
Frozen Peaches:
- Best for: Off-season baking, convenience
- Pros:
- Pre-peeled and sliced = less prep work
- Available year-round
- Still very flavorful, especially if flash-frozen when ripe
- Cons:
- High moisture content → can lead to soggy crusts
- Require full thawing and thorough drying
- Slightly softer texture when baked
❄️ How to use frozen peaches: Thaw completely, then place on paper towels and pat them dry to reduce excess liquid. Consider adding an extra ½ to 1 teaspoon of cornstarch to compensate for the moisture.
So, which is better?
- If peaches are in season, always go with fresh.
- Frozen is a perfect substitute if baking in fall or winter, just prep them properly.
🍰 Final Thoughts: A Slice of Sunshine in Every Bite
Peach pie isn’t just a dessert, a warm, golden memory wrapped in flaky pastry and dripping with summer flavor.
Whether you’re making this for a backyard gathering, a family dinner, or simply because peaches are finally in season, this recipe promises a pie that’s as satisfying to bake as it is to eat.
Each bite celebrates homemade goodness, from the buttery crust to the juicy, cinnamon-kissed filling. With the right peaches and patience, anyone can turn simple ingredients into a show-stopping treat.
And remember, don’t stress over perfection, a slightly messy pie made with love always tastes better than a flawless one made with fear.
So roll up your sleeves, preheat that oven, and make the most of peach season. Your kitchen is about to smell amazing.
🍑 More Summer Desserts You’ll Love
Craving more fruity, Southern-inspired treats? Check out these popular recipes from our summer kitchen:
- 👉 Summer’s Best Peach Crisp in Just 20 Minutes
Quick, easy, and bursting with flavor, this crisp is perfect for weeknights. - 👉 Best Southern Peach Cake Recipe You’ll Love
A soft, buttery cake layered with juicy peaches and brown sugar magic. - 👉 Southern Moms’ Best Peach Cobbler Recipe
A beloved classic with a golden biscuit topping and warm spiced filling.

Ella Foster, co-founder of FoodBears.com, is a skilled writer whose love for cooking fuels her creative work. Her passion for experimenting in the kitchen brings authentic flavor and culinary inspiration to every piece she crafts for the platform.