
If there’s one dessert that captures the essence of sunshine, it’s Peach Cheesecake. It’s cool. It’s creamy. It’s packed with juicy peaches and a buttery crust that melts in your mouth.
Whether planning a picnic, a summer birthday, or needing a pick-me-up treat, this dessert always hits the spot.
In this post, I’ll walk you through everything—from why this dessert is so beloved to how you can whip it up at home without breaking a sweat.
Whether you’re a baking newbie or a cheesecake pro, you’ll find something helpful here.
Why Everyone Loves Peach Cheesecake
Cheesecake is already a crowd favorite. It’s rich, creamy, and a celebration in every bite. Now—add peaches to the mix? That’s next-level delicious.
Peaches bring a natural sweetness, a soft bite, and that sunny golden color that screams “summer on a plate.” They balance out the dense texture of cheesecake with their juicy, fruity freshness.
The combo creates a beautiful contrast, creamy vs. juicy, rich vs. light, tangy vs. sweet. It’s like a dance of flavors that just works.
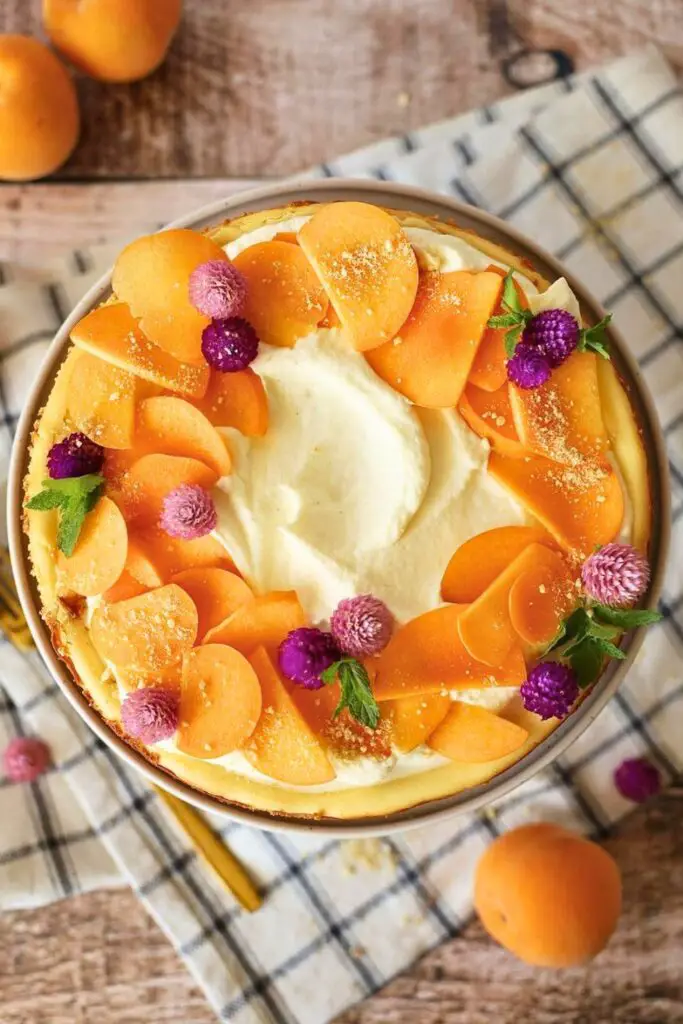
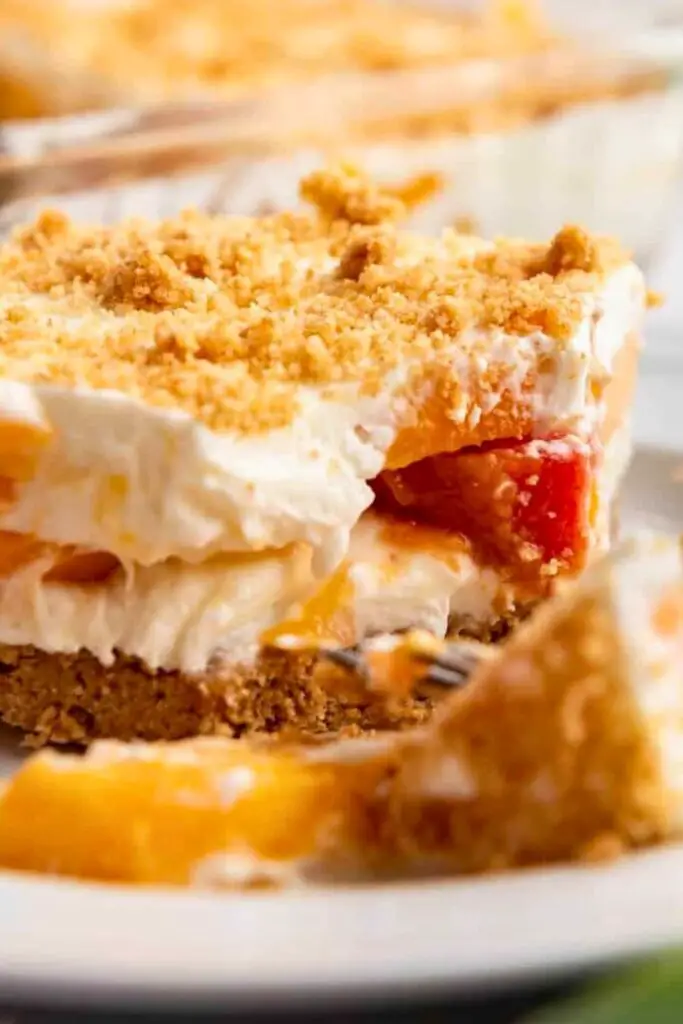
Plus, let’s not forget the visual appeal. A peach-topped cheesecake is flat-out gorgeous. The soft ivory base topped with peachy-orange slices or glaze is something you’d proudly serve at brunch, birthdays, or even weddings.
Why do people keep coming back for it?
- It’s a comfort dessert with a fruity twist
- It tastes indulgent without being too heavy
- It makes you feel like you’re eating sunshine
And that buttery graham cracker crust underneath? It ties everything together like a warm hug.
The Perfect Cheesecake for Peach Season
Peach season is short, but magical. That sweet spot between late June and early September is when fresh peaches are at their prime—juicy, soft, fragrant, and oh-so-sweet.
That’s when markets are filled with ripe peaches, and your kitchen can smell like an orchard if you leave a few on the counter. And what better way to use them than in a chilled, creamy cheesecake?
But here’s the best part: this dessert isn’t limited to summer. You can easily make peach cheesecake all year long by swapping in:
- Canned peaches (packed in juice, not syrup, are best)
- Frozen peaches (thaw and pat them dry)
- Jared peach preserves (perfect for a quick topping)
So, whether it’s July or January, there’s always a way to bring this fruity cheesecake to your table.
Bonus Tip: When peaches are in season, slice and freeze a batch yourself. That way, you always have summer in your freezer waiting to be baked into something beautiful.
Ingredients You’ll Need
You don’t need fancy or hard-to-find ingredients to make this peach cheesecake. Just a few basics that work like magic when combined.
Here’s a breakdown by section, so you can easily shop or prep ahead.
1. For the Crust
You need just 3 main things here:
- 1 ½ cups graham cracker crumbs – use a food processor or rolling pin to crush
- ¼ cup sugar – to sweeten the crust just enough
- 6 tablespoons melted unsalted butter – binds the crust and adds that toasty flavor
Optional: Add ½ tsp cinnamon for a warm touch that pairs well with peaches.
2. For the Cheesecake Filling
This is where the magic happens:
- 3 (8 oz) blocks of cream cheese – softened to room temp for smooth blending
- 1 cup sugar – just enough to sweeten the tangy cream cheese
- 3 large eggs – these bind the filling
- 1 tsp vanilla extract – adds that classic flavor
- ½ cup sour cream OR heavy cream – makes the filling richer and silkier
Make sure your cream cheese is really soft—cold cream cheese = lumpy batter.
3. For the Peach Topping
You’ve got options based on what you have in the kitchen:
Option 1: Fresh Peach Glaze (cooked)
- 2 cups fresh peaches, sliced
- 2 tbsp sugar (adjust based on how sweet your peaches are)
- 1 tbsp lemon juice – brightens up the flavor
- 1 tbsp cornstarch – thickens the glaze (optional)
- Pinch of cinnamon – adds warmth
Option 2: Simple Topping (no-cook)
- Canned or fresh sliced peaches – arranged beautifully on top
- Optional whipped cream or mint leaves – for presentation
How to Make Peach Cheesecake: Step-by-Step
Making peach cheesecake might sound fancy, but it’s pretty easy to break it down into simple steps. You’re all set if you can mix, pour, and chill.
Let’s walk through it together.
🔸 Step 1: Make the Buttery Graham Cracker Crust
This is your cheesecake’s foundation. It should be firm, golden, and slightly sweet.
🧂 Ingredients:
- 1 ½ cups graham cracker crumbs
- ¼ cup sugar
- 6 tbsp unsalted butter (melted)
- ½ tsp cinnamon (optional)
👩🍳 Instructions:
- Preheat your oven to 325°F (165°C).
- Mix the graham cracker crumbs, sugar, and cinnamon (if using) in a bowl.
- Pour in melted butter and stir until the crumbs are evenly moistened.
- Press the mixture into the bottom of a 9-inch springform pan. Use the bottom of a glass or measuring cup to flatten it firmly and evenly.
- Bake the crust for 10 minutes. Then take it out and let it cool while you prepare the filling.
Pro Tip: Lining the bottom of the springform pan with parchment paper makes it easier to transfer the cheesecake later.
🔸 Step 2: Whip Up the Creamy Cheesecake Filling
This part gives your dessert that creamy, dreamy texture that cheesecake lovers crave.
🧂 Ingredients:
- 3 (8 oz) blocks cream cheese, softened
- 1 cup sugar
- 3 large eggs
- 1 tsp vanilla extract
- ½ cup sour cream or heavy cream
👩🍳 Instructions:
- In a large mixing bowl, beat the softened cream cheese with an electric mixer until it’s smooth and lump-free.
- Add sugar gradually and mix until fully combined and fluffy.
- Beat the eggs one at a time, mixing well after each addition.
- Add vanilla and sour cream (or heavy cream), and mix on low speed until smooth.
Important: Don’t overmix at this stage. Overbeating can cause cracks later.
🔸 Step 3: Pour and Prepare for Baking
- Pour the cheesecake filling into the pre-baked crust and smooth the top with a spatula.
- Tap the pan gently on the counter to release any trapped air bubbles.
🔸 Step 4: Use a Water Bath (Trust Me, It’s Worth It)
This might sound extra, but it’s the secret to no cracks and perfect texture.
How to set it up:
- Wrap the outside of your springform pan with 2–3 layers of aluminum foil to keep water from seeping in.
- Place your wrapped pan inside a large roasting pan or baking dish.
- Pour hot water into the outer dish until it reaches halfway up the sides of your springform pan.
🔸 Step 5: Bake and Chill
- Bake at 325°F for 50–60 minutes until the edges are set and the center slightly jiggles.
- Turn off the oven, crack the door, and let the cheesecake sit inside for 1 hour.
- Remove the cheesecake from the water bath and let it cool completely on a wire rack.
- Chill in the fridge for at least 4 hours, or overnight for best results.
Cheesecake Rule #1: Always chill before slicing. Warm cheesecake = messy cuts.
🔸 Step 6: Make the Peach Topping
You have two main options: cooked glaze or fresh slice topping.
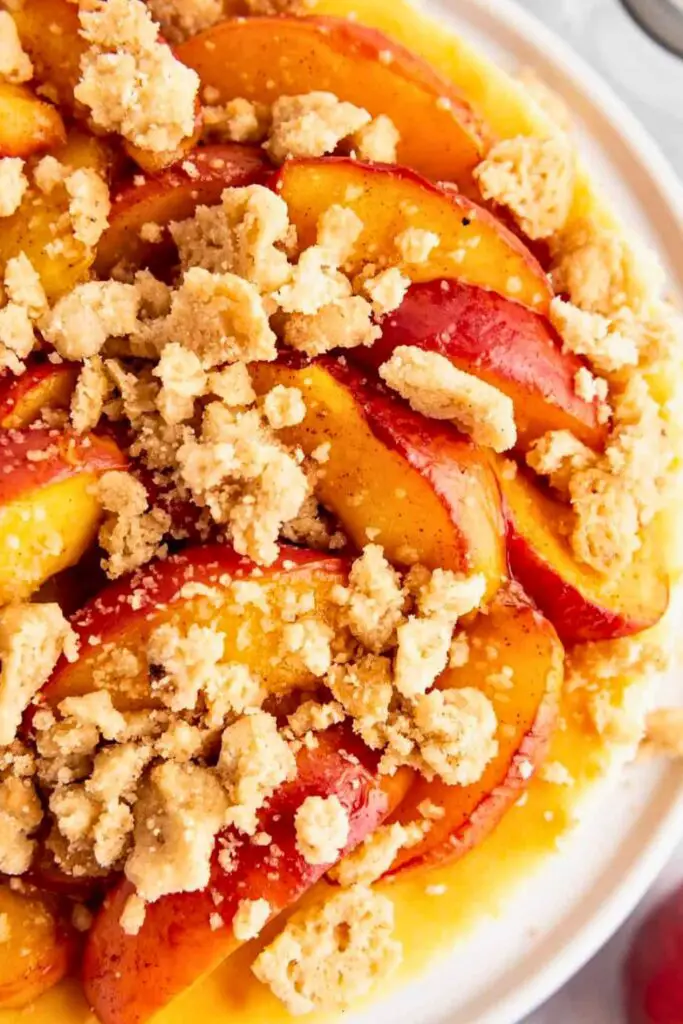
🍑 Cooked Peach Glaze (Sweet and Saucy)
- In a small saucepan, combine:
- 2 cups sliced peaches
- 2 tbsp sugar
- 1 tbsp lemon juice
- 1 tbsp cornstarch (optional)
- Simmer on medium heat for 5–7 minutes until peaches are soft and the mixture thickens slightly.
- Let it cool to room temperature before adding to your cheesecake.
You can also add a pinch of cinnamon or a drop of vanilla to enhance flavor.
🍑 No-Cook Fresh Peach Topping (Quick and Pretty)
- Slice fresh or drained canned peaches into thin slices.
- Lay them neatly in circles or a spiral pattern over the chilled cheesecake.
- Add a dollop of whipped cream or mint sprigs if you want to fancy it up.
🔸 Step 7: Slice and Serve
- Use a sharp knife dipped in warm water for clean cuts.
- Wipe the knife clean between slices.
- Serve chilled with a fork and a big smile.
Want to get extra fancy? Drizzle some caramel or white chocolate over the top.
Why This Cheesecake Is So Worth It

You know those desserts that get people talking? The kind that makes guests go, “Who made this?” Yep, this peach cheesecake is one of those. It’s not just a dessert—it’s an experience.
Here’s why it’s totally worth your time:
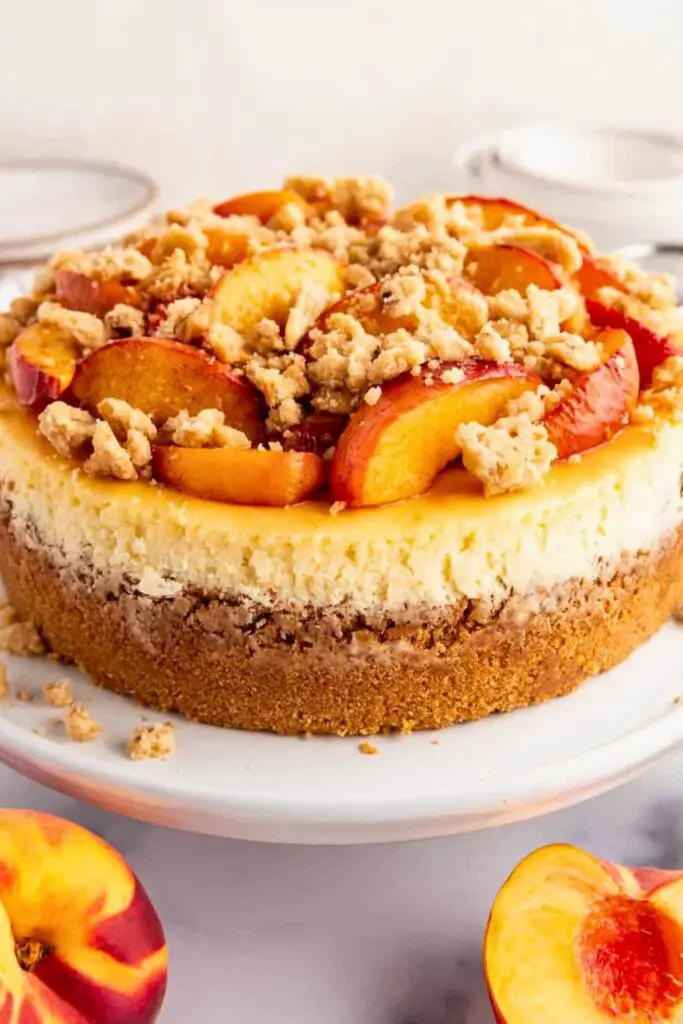
✅ It Looks Fancy (But It’s Super Easy)
From the smooth creamy filling to the golden peach topping, this cheesecake has that Pinterest-perfect look without needing bakery-level skills. You don’t have to do anything complicated. After a few simple steps, it looks like something out of a high-end patisserie.
✅ It Feels Like a Celebration
The creamy base gives you that classic cheesecake comfort, while the peaches add freshness and fruity flair. Together? It feels indulgent, refreshing, and satisfying all at once. Whether you’re celebrating a birthday, a summer BBQ, or just a random Tuesday feels special.
✅ It’s Make-Ahead Friendly
This cheesecake loves being made ahead. In fact, it tastes better the next day after chilling overnight. That means less stress when entertaining. Just slice, serve, and soak up the compliments.
✅ It’s a Guaranteed Crowd-Pleaser
You don’t have to guess whether people will like it—everyone loves it. It’s not too sweet. Not too heavy. And that fresh peach topping wins over even non-dessert people.
Bottom Line? This cheesecake is one of those recipes you’ll come back to again and again. It’s reliable, impressive, and ridiculously delicious.
What to Serve With Peach Cheesecake
Peach cheesecake is amazing, but if you’re putting together a summer table or hosting a little gathering, the right sides and drinks can elevate the whole experience.
Here are some pairings that bring out the best in your dessert:
🧋 Drinks That Compliment
- Iced Peach Tea – light, fruity, and perfectly on theme
- Sparkling Lemon Water – cuts through the richness of the cheesecake
- Vanilla Cold Brew – adds a cozy coffeehouse vibe
- Champagne or Prosecco – if you’re feeling fancy
🍓 Light Sides and Garnishes
- Fresh Berry Mix – strawberries, blueberries, or raspberries add color and tartness
- Mint Leaves – add a refreshing green pop on top
- Whipped Cream – for extra indulgence
- Toasted Nuts – almonds or pecans give a crunchy contrast
🧁 Bonus Serving Ideas
- Serve it chilled in small slices after a heavy meal
- Add a scoop of vanilla ice cream on the side for kids
- Dust the top with powdered sugar for an elegant touch
My Favorite Tip for Extra Peach Flavor
Want to take this cheesecake from great to unforgettable? Add peaches inside the cheesecake filling, not just on top.
Here’s how:
🍑 Peach Purée Swirl
- Peel and slice 1 to 2 ripe peaches
- Blend them into a smooth purée
- Stir in 1 teaspoon lemon juice and a pinch of sugar
- Once you pour your cheesecake batter into the crust, dollop the purée over the top
- Use a knife or skewer to swirl it in gently
It creates gorgeous golden ripples throughout the creamy base, and each bite gives you a little peach surprise.
🍑 Diced Peaches in the Filling
For a chunky bite:
- Fold ½ cup of finely diced, peeled peaches into the batter before baking
- This works especially well with firm, fresh peaches
Tip: Don’t add too many or they’ll release too much juice. Just enough to accent the cheesecake is perfect.
Final Thoughts: Let Your Summer Shine With Peach Cheesecake
If you’re looking for a dessert that’s equal parts comforting, refreshing, and beautiful, peach cheesecake is your answer. It’s the treat that makes everyday moments feel like a celebration and summer days taste a little sweeter.
Whether you top it with fresh slices, swirl in some purée, or serve it in cute little jars, one thing’s certain: every bite brings a taste of sunshine.
So next time you’re staring at ripe peaches on the counter or dreaming of a dessert that’ll wow your friends, you know what to bake. 🍑✨
Craving More Easy, Fruity Cakes? Try These Next!
Here are some of our most loved, no-fuss recipes that are quick, pretty, and packed with summer flavor:
- 👉 25-Min Quick Strawberry Icebox Cake for Busy Moms
Perfect for hot days when you don’t want to turn on the oven. - 👉 Strawberry Shortcake Recipe: A Sweet Slice of Summer
Should we say more about soft biscuits, whipped cream, and juicy strawberries? - 👉 Easy 30-Min Strawberry Upside Down Cake Recipe
Flip it, slice it, love it. A fun twist on a fruity classic! - 👉 Delicious Lemon Raspberry Cake Recipe: Quick & Easy!
Zingy, fresh, and bursting with color, your summer dessert table will thank you.

Ella Foster, co-founder of FoodBears.com, is a skilled writer whose love for cooking fuels her creative work. Her passion for experimenting in the kitchen brings authentic flavor and culinary inspiration to every piece she crafts for the platform.